How to Change Motorcycle Brake Fluid: DIY Flush and Bleeding
To change motorcycle brake fluid, use the fluid specified in the owner’s manual, protect painted surfaces, and flush the old fluid through the brake caliper’s bleed valve while continually replenishing the master-cylinder reservoir. On a conventional hydraulic system, the basic method is to squeeze and hold the brake lever, briefly open the bleed valve, close it before releasing the lever, and repeat until fresh fluid flows without air. Never let the reservoir run dry.
That sounds simple, but brakes are a critical safety system. Incorrect fluid, a loose bleed screw, or trapped air can reduce or eliminate braking. Motorcycles with ABS, combined brakes, or electronically controlled systems may require a special procedure and diagnostic equipment. Without the correct service instructions and experience, professional servicing is the safer choice.
Most motorcycles with hydraulic disc brakes have front and rear systems that require separate attention. Brake fluid can also damage painted and plastic surfaces, so careful preparation matters.
In this guide, I cover the tools, fluid types, front and rear bleeding procedures, ABS exceptions, and final safety checks. You’ll also learn when to replace the fluid and what to do if the brake lever remains spongy.
How to Change Motorcycle Brake Fluid: Step-by-Step Guide
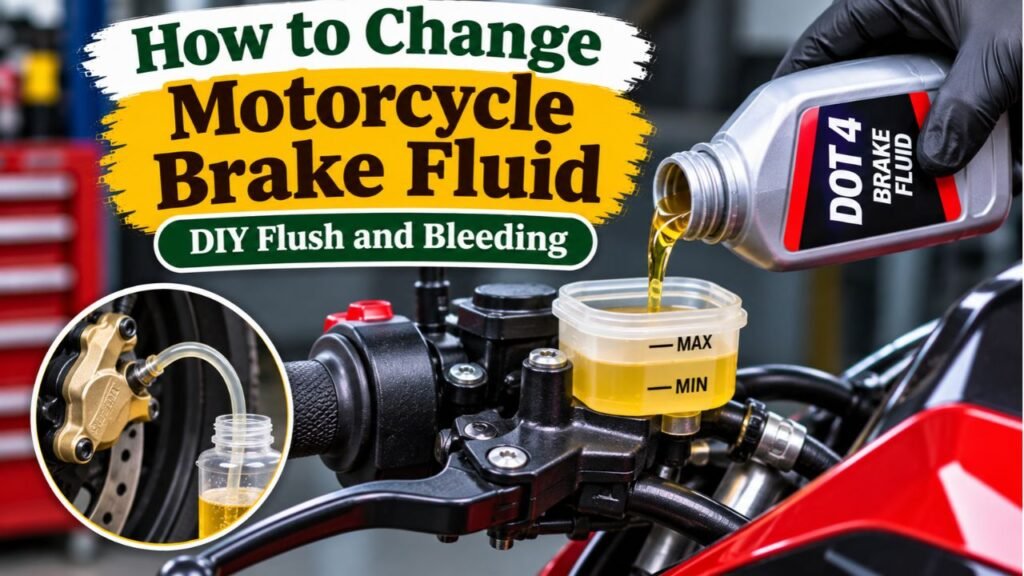
Changing motorcycle brake fluid involves replacing the old fluid throughout the appropriate hydraulic circuit.
The process is commonly called a brake fluid flush.
It also involves bleeding the hydraulic system to prevent trapped air from affecting braking performance.
The following procedure describes a conventional motorcycle hydraulic disc brake system. It is not a universal service procedure for ABS, linked-brake, or electronically controlled systems.
Before beginning, obtain the exact factory service procedure for your motorcycle. If you cannot confirm the correct bleeding sequence, fluid specification, and final inspection requirements, use a qualified motorcycle technician.
Motorcycle Brake Fluid Change: Quick Overview
| Step | What to do | Important precaution |
| 1 | Confirm brake fluid specification | Never use an unapproved fluid |
| 2 | Stabilize the motorcycle | Keep the reservoir level |
| 3 | Protect painted surfaces | Brake fluid can damage finishes |
| 4 | Clean and open reservoir | Prevent dirt from entering |
| 5 | Add fresh fluid | Never let reservoir run dry |
| 6 | Connect hose to bleed valve | Use a secure, suitable hose |
| 7 | Pump and hold brake lever | Follow the correct sequence |
| 8 | Open bleed valve briefly | Release old fluid |
| 9 | Close valve before releasing lever | Prevent air entering |
| 10 | Repeat while replenishing reservoir | Continue until fresh fluid emerges |
| 11 | Service other required bleed points | Follow model-specific order |
| 12 | Check level, lever feel, and leaks | Do not ride if any check fails |
A mistake during bleeding can introduce air into the hydraulic system.
If this occurs, the brakes may not function normally.
Step 1: Check Your Motorcycle’s Brake Fluid Type
Before purchasing brake fluid, determine the exact type required by the manufacturer.
Common motorcycle brake fluid specifications include:
- DOT 3.
- DOT 4.
- DOT 5.
- DOT 5.1.
Many modern motorcycles use DOT 4, but this is not universal.
The specification may appear on the reservoir cap or in the owner’s manual.
Never assume that a higher DOT number automatically means a better or compatible replacement.
DOT 5 is silicone-based and must not be confused with glycol-based DOT 5.1.
Using incompatible fluid can damage braking components.
Step 2: Gather the Required Tools and Materials
Prepare the necessary tools before opening the hydraulic system.
Motorcycle Brake Fluid Change Tools
| Tool or material | Purpose |
| Manufacturer-approved brake fluid | Replaces old hydraulic fluid |
| Correct-size wrench | Opens the caliper bleed valve |
| Clear flexible tubing | Directs old fluid into a container |
| Collection bottle | Holds used brake fluid |
| Screwdriver or correct reservoir tool | Removes reservoir cover |
| Clean lint-free cloths | Protects and cleans work area |
| Protective gloves | Reduces fluid contact |
| Safety glasses | Protects eyes from splashes |
| Motorcycle stand or suitable support | Keeps motorcycle stable |
| Approved brake bleeding equipment, if required | Supports manufacturer-specified service |
| Service manual | Provides bleeding order, torque values, and safety requirements |
A clear hose is useful because it allows you to observe fluid movement and air bubbles.
The hose must fit the bleed nipple securely.
Avoid using tools that damage the bleed valve.
Step 3: Position the Motorcycle Safely
Park the motorcycle on a firm, level surface.
Turn off the engine.
Allow hot components to cool.
Make sure the motorcycle is stable.
Use an appropriate stand if necessary.
For the front brake reservoir, turn the handlebar until the reservoir is level.
For the rear brake reservoir, position the motorcycle according to the manufacturer’s inspection procedure.
Do not attempt the service while the motorcycle is unstable or likely to fall.
Step 4: Protect the Motorcycle From Brake Fluid
Most common glycol-based brake fluids can damage painted surfaces and some plastics.
Before opening the reservoir, protect nearby components.
Cover:
- Fuel tank.
- Painted fairings.
- Handlebar controls.
- Instrument areas.
- Other nearby finished surfaces.
Use appropriate protective material.
Keep clean water and suitable cleaning supplies available for accidental spills, following the fluid manufacturer’s handling instructions.
Wear gloves and eye protection.
Do not allow brake fluid onto tires, brake pads, or brake discs.
Step 5: Locate the Brake Fluid Reservoir
Most hydraulic-disc motorcycles have a master cylinder and brake fluid reservoir.
The front brake reservoir is commonly near the right handlebar.
The rear brake reservoir may be near the rear brake pedal, frame, or under a body panel.
However, locations vary.
Some motorcycles also have linked or combined hydraulic braking arrangements.
Do not assume every motorcycle has two completely independent brake circuits.
Step 6: Clean the Reservoir Exterior
Clean the area around the reservoir cap before opening it.
Remove visible dirt and debris.
This helps prevent contamination from entering the hydraulic system.
Brake hydraulic components contain small passages and seals.
Dirt can interfere with their operation.
Never use an unapproved solvent inside the reservoir.
Step 7: Open the Reservoir Carefully
Remove the reservoir cover using the appropriate tool.
Some reservoirs have a metal cap secured with screws.
Others have threaded plastic caps.
Certain designs also contain a rubber diaphragm beneath the cover.
Follow the manufacturer’s instructions for handling the diaphragm.
Keep the removed parts clean.
Avoid dropping dirt or other material into the fluid.
Step 8: Inspect the Existing Fluid
Look at the fluid condition.
Brake fluid may appear clear, pale amber, or darker depending on its formulation and age.
Very dark or cloudy fluid may warrant additional inspection.
However, color alone cannot determine whether the fluid is safe or how much moisture it contains.
Look for signs of contamination, but do not rely on appearance as a substitute for the specified maintenance schedule.
Step 9: Prepare the Bleed Valve
Locate the brake caliper’s bleed valve.
It is commonly a small metal fitting with a hexagonal base.
Many valves have a rubber protective cap.
Remove the cap.
Fit the correct-size wrench to the valve.
Attach the clear tubing securely.
Place the other end into a suitable collection container.
Do not loosen the valve yet.
Step 10: Replenish the Reservoir With Fresh Fluid
Use fresh brake fluid from a properly sealed container.
For a conventional fluid exchange, the old fluid is progressively replaced while fresh fluid enters through the reservoir.
Some procedures permit removing part of the old fluid from the reservoir first.
However, you must not uncover the master cylinder’s supply ports or allow the reservoir to empty.
If you cannot reliably control the fluid level, do not attempt this method.
Fill according to the service procedure.
Avoid overfilling.
Step 11: Pump and Hold the Front Brake Lever
For a conventional manual bleeding procedure:
- Slowly squeeze the front brake lever several times.
- Hold the lever firmly in the applied position.
- Maintain lever pressure while the bleed valve is opened.
Do not release the lever while the valve remains open.
The exact pumping method and sequence must match the motorcycle’s service instructions.
Step 12: Open the Bleed Valve Briefly
While maintaining pressure on the brake lever, carefully open the bleed valve by the amount specified in the service procedure.
Old brake fluid should move through the clear tubing into the collection container.
The brake lever may travel farther as pressure is released.
Avoid excessive force.
Do not unscrew or remove the bleed valve.
Step 13: Close the Bleed Valve Before Releasing the Lever
Close the bleed valve while the brake lever is still held.
Only after the valve is closed should the lever return to its normal position.
The sequence is:
Squeeze → Hold → Open → Close → Release
This order helps prevent air from being drawn into the system during conventional manual bleeding.
An incorrect sequence may introduce air and leave the brake lever soft.
The detailed RevZilla motorcycle brake bleeding guide and video explains this process and emphasizes the importance of keeping the master-cylinder reservoir supplied with fluid.
Step 14: Check and Refill the Reservoir Frequently
This is one of the most important steps.
Each bleeding cycle removes fluid from the hydraulic circuit.
The reservoir level will fall.
Never let the master-cylinder reservoir run dry.
If the fluid level becomes too low, air may enter the hydraulic system.
Removing that air can require additional bleeding.
Some motorcycle braking systems may also need specialized service procedures if air enters the ABS unit.
Keep the fluid above the required minimum throughout the procedure.
Step 15: Repeat Until Fresh Fluid Flows
Continue the manufacturer-approved bleeding sequence.
Observe the fluid leaving through the tubing.
During a conventional fluid replacement, fresh fluid gradually displaces the older fluid.
Continue until the required fluid exchange is complete.
Do not rely solely on color changes to decide whether the entire system has been serviced.
Some fresh and old fluids have similar appearances.
Follow the specified procedure and fluid quantity or exchange method.
If bubbles continue appearing, determine whether air is trapped or entering through a connection.
Do not assume endless pumping will correct every problem.
Step 16: Service the Remaining Bleed Points
Some motorcycles have a single front brake disc.
Others have two front calipers.
Certain calipers may contain more than one bleed valve.
The number of required bleeding points depends on the brake system.
For motorcycles with dual front discs, follow the manufacturer’s bleeding order.
Some conventional procedures begin with the caliper farthest from the master cylinder, but this is not a universal rule.
Linked braking systems and ABS configurations may require different sequences.
Step 17: Fill the Reservoir to the Correct Level
After the required bleeding steps are complete, check the fluid level.
Follow the manufacturer’s specified level markings and inspection position.
Do not automatically fill to MAX without considering brake pad condition and service instructions.
As brake pads wear, caliper pistons extend and the reservoir fluid level may gradually decrease.
Overfilling can create problems when pistons are retracted during future brake-pad service.
Step 18: Reinstall the Reservoir Cover
Inspect the diaphragm and cover seal.
Make sure they are clean and correctly positioned.
Reinstall the components according to the manufacturer’s instructions.
Use the specified fastening torque when applicable.
Avoid overtightening small screws.
Clean any spilled brake fluid immediately according to the fluid manufacturer’s instructions.
Step 19: Tighten and Inspect the Bleed Valve
The bleed valve must be properly closed.
Use the manufacturer’s specified tightening torque.
Do not guess or apply excessive force.
A damaged or leaking bleed valve can compromise braking.
Reinstall its protective cap.
Inspect the area for leakage.
Step 20: Check Brake Operation Before Riding
With the motorcycle stationary, check:
- Front brake lever feel.
- Rear brake pedal feel.
- Reservoir fluid levels.
- Bleed valve sealing.
- Hydraulic connections.
- Visible leaks.
- Brake warning indicators.
The lever and pedal should behave according to the manufacturer’s specifications.
If the lever is unusually soft, travels excessively, or approaches the handlebar, the system may contain air or have another fault.
Do not ride the motorcycle if the brakes are not operating correctly.
A qualified technician must verify the system before it is returned to service.
How to Change Front Motorcycle Brake Fluid
The front brake commonly operates through a hand lever mounted on the right handlebar.
Many motorcycles use a separate front hydraulic circuit.
Front Brake Fluid Change Overview
For a conventional front-disc system:
- Stabilize the motorcycle.
- Level the front master-cylinder reservoir.
- Identify the approved fluid.
- Protect nearby painted surfaces.
- Open the reservoir carefully.
- Connect the bleeding equipment to the specified caliper valve.
- Follow the correct fluid-exchange sequence.
- Keep the reservoir supplied with fresh fluid.
- Service all specified front bleed points.
- Restore the correct level and inspect the system.
Single-Disc Front Brakes
A motorcycle with one front disc typically has one main front caliper.
However, the caliper may have one or more bleeding points.
Use the exact service procedure.
Dual-Disc Front Brakes
Dual front discs usually have two calipers.
Both must be serviced as required.
Do not assume that replacing fluid through one caliper exchanges all the fluid in the other.
Why Is the Front Brake Important?
The front brake supplies a substantial portion of the stopping force on many motorcycles, particularly during deceleration.
Improper bleeding can reduce front brake performance.
For this reason, a soft front lever after service is a serious warning sign.
How to Change Rear Motorcycle Brake Fluid
The rear brake commonly operates through a foot pedal near the right footpeg.
Many motorcycles have a separate rear master cylinder and reservoir.
Rear Brake Fluid Change Overview
For a conventional rear-disc system:
- Stabilize the motorcycle.
- Locate and level the rear reservoir as specified.
- Clean the reservoir cap.
- Identify the rear caliper bleed valve.
- Connect the appropriate bleeding equipment.
- Apply the rear brake pedal according to the service procedure.
- Release old fluid through the specified bleed point.
- Replenish the reservoir throughout the exchange.
- Restore the correct fluid level.
- Inspect the pedal feel and hydraulic connections.
Is Rear Brake Bleeding Different From Front Bleeding?
The hydraulic principles are similar.
However, the control is usually a foot pedal rather than a hand lever.
Reservoir location and bleeding order may also differ.
Do You Need to Change Front and Rear Fluid Together?
If both systems are due for scheduled replacement, servicing them during the same maintenance visit is often practical.
However, not every motorcycle has completely separate front and rear brake circuits.
Combined braking systems may require a special procedure.
How to Change Motorcycle Brake Fluid With ABS
Motorcycles equipped with ABS require particular caution.
Do not assume that a standard manual bleeding procedure fully services an ABS braking system.
The ABS hydraulic unit may contain valves, a pump, and internal passages.
Some systems require diagnostic equipment to operate these components during maintenance.
Can You Change ABS Motorcycle Brake Fluid Yourself?
The answer depends on the motorcycle model and its approved service procedure.
Some manufacturers allow certain routine fluid replacement procedures without special electronic operations.
Others require diagnostic equipment or a specific bleeding sequence.
A conventional caliper bleed may not fully exchange fluid trapped inside the ABS hydraulic unit.
What Happens if Air Enters the ABS Unit?
Air trapped within the hydraulic control system can be difficult to remove.
Some motorcycles require a diagnostic tool to cycle valves and pumps.
The correct procedure varies.
Do not attempt to activate ABS manually through unsafe riding maneuvers to compensate for an incomplete bleed.
What About Linked or Combined Brakes?
Certain motorcycles use linked braking systems.
These may connect front and rear braking functions through special hydraulic arrangements.
The service sequence can involve multiple reservoirs, valves, and bleed points.
A generic front-then-rear procedure may be incorrect.
When Should You Use a Professional Mechanic?
Professional service is especially appropriate when:
- The motorcycle has a complex ABS system.
- The brakes are electronically controlled.
- The bike uses linked or combined brakes.
- The reservoir has already run dry.
- Hydraulic components have been replaced.
- The correct bleeding sequence is unavailable.
- The brake lever remains soft after bleeding.
- The system has a leak.
Honda’s official motorcycle brake maintenance guidance advises that brake bleeding should be performed by a trained technician and identifies soft brake controls and fluid leaks as problems requiring attention.
Key Takeaway: ABS and combined-brake systems are not suitable for guessing or improvising. Follow the exact service manual or use a qualified motorcycle technician.
Which Brake Fluid Should You Use for a Motorcycle?
Brake fluid must meet the exact specification required by the manufacturer.
The correct type depends on the hydraulic-system design.
Motorcycle Brake Fluid Comparison
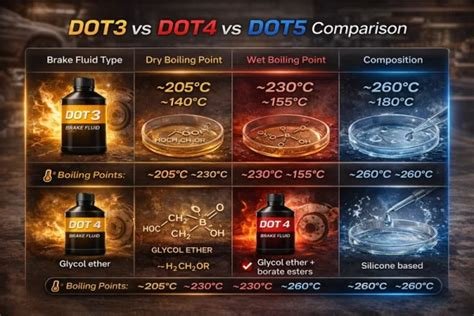
| Fluid type | General composition | Typical consideration |
| DOT 3 | Glycol-based | Used where specified |
| DOT 4 | Glycol-based | Common in modern motorcycles |
| DOT 4 LV | Low-viscosity glycol-based | Used where specifically required |
| DOT 5 | Silicone-based | Not interchangeable with glycol-based fluid |
| DOT 5.1 | Glycol-based | Different from DOT 5 despite similar name |
Can You Use DOT 4 Instead of DOT 3?
Some glycol-based brake fluids have defined chemical compatibility.
However, suitability depends on the manufacturer’s exact requirements.
Do not substitute a fluid solely because its DOT number is higher.
Can You Mix DOT 4 and DOT 5?
No.
Ordinary DOT 4 is glycol-based, while DOT 5 is silicone-based.
They must not be mixed.
Is DOT 5.1 the Same as DOT 5?
No.
DOT 5.1 is generally glycol-based.
DOT 5 is silicone-based.
The names are similar, but the fluid chemistry differs.
Can You Use Car Brake Fluid in a Motorcycle?
Yes, provided the product meets the motorcycle manufacturer’s exact fluid specification.
A brake fluid does not become unsuitable simply because it is marketed for automobiles.
However, not every automotive brake fluid is approved for every motorcycle.
Check the required specification, including any manufacturer-specific performance requirements.
Does Brake Fluid Brand Matter?
The fluid must satisfy the required performance and compatibility specifications.
Use a reputable product from a properly sealed container.
Do not rely on branding alone.
How Often Should You Change Motorcycle Brake Fluid?
Many motorcycle manufacturers recommend replacing brake fluid approximately every two years.
However, the correct interval varies.
Some manufacturers specify different requirements based on model, use, or fluid condition.
Typical Replacement Considerations
| Situation | Recommended approach |
| Manufacturer specifies 2 years | Replace every 2 years |
| Manufacturer specifies another interval | Follow that schedule |
| Motorcycle used infrequently | Follow time-based maintenance |
| Unknown service history | Arrange inspection and consider replacement |
| Fluid contaminated | Diagnose and replace as required |
| Hydraulic repair performed | Follow service bleeding requirements |
| Soft brake lever | Inspect for air, leaks, or hydraulic faults |
| Track or racing use | Follow the applicable high-performance maintenance schedule |
Why Does Brake Fluid Need Replacement?
Most motorcycles use glycol-based brake fluid.
These fluids gradually absorb moisture.
As moisture accumulates, the fluid’s boiling point can decrease.
This can increase the risk of vapor formation during demanding braking.
Moisture may also contribute to internal corrosion.
Does Low Mileage Make Brake Fluid Last Longer?
Not necessarily.
Brake fluid deteriorates partly through time and moisture exposure.
A motorcycle parked for most of the year may still require replacement.
What Do Manufacturers Recommend?
For example, Harley-Davidson’s official brake fluid maintenance instructions recommend replacing DOT 4 fluid every two years or earlier when moisture testing indicates excessive contamination for the covered model.
The instructions also emphasize using fresh fluid from a sealed container and protecting painted surfaces.
Other motorcycles may have different requirements.
Always check your exact owner’s manual.
How Much Brake Fluid Does a Motorcycle Need?
The required quantity varies by motorcycle and service procedure.
Factors include:
- Number of brake calipers.
- Number of brake circuits.
- Brake-line length.
- Reservoir capacity.
- ABS design.
- Number of bleed points.
- Amount of flushing required.
Is 250 mL Enough?
A small quantity may be sufficient for certain simple brake circuits.
However, it may not be enough for a complete front-and-rear fluid exchange, especially if repeated bleeding is necessary.
Do not assume every motorcycle requires the same quantity.
Is 500 mL Enough?
A 500 mL container may be sufficient for many straightforward motorcycle brake-fluid services.
However, actual requirements vary.
Follow the service manual and ensure enough suitable fresh fluid is available before beginning.
Should You Buy Extra Brake Fluid?
Having enough fresh fluid is important because the reservoir must never run dry during bleeding.
However, avoid opening more containers than necessary.
Brake fluid can absorb moisture after opening.
Use suitable fresh fluid and follow the product’s storage instructions.
How Long Does It Take to Change Motorcycle Brake Fluid?
The time depends on the brake system, equipment, and technician experience.
A straightforward conventional hydraulic-fluid replacement may take approximately 30–60 minutes.
More complex motorcycles can require considerably longer.
Factors Affecting Service Time
- Single or dual front discs.
- Number of bleed valves.
- Accessibility of the rear reservoir.
- Condition of bleed screws.
- ABS bleeding requirements.
- Presence of trapped air.
- Previous hydraulic repairs.
- Required inspection procedures.
Why Does Bleeding Sometimes Take Longer?
Air may become trapped in high points of brake lines or hydraulic components.
A leaking connection can also make the system difficult to bleed.
Repeated unsuccessful attempts should not be treated as normal.
Stop and identify the cause.
Can You Change the Fluid in 10 Minutes?
A quick reservoir fluid exchange does not necessarily replace fluid throughout the brake lines and calipers.
The objective is to renew the specified hydraulic circuit, not simply make the reservoir fluid look cleaner.
A complete service must follow the manufacturer’s requirements.
Motorcycle Brake Fluid Flush vs. Brake Bleeding
These terms are related but not identical.
What Is a Brake Fluid Flush?
A brake fluid flush replaces old fluid with fresh fluid through the specified hydraulic circuit.
Its main purpose is to remove aging or contaminated fluid.
What Is Brake Bleeding?
Brake bleeding removes air trapped in the hydraulic system.
Air is compressible.
If air remains in brake lines, the lever or pedal can feel soft.
Main Differences
| Service | Main purpose | Typical reason |
| Brake fluid top-off | Correct fluid level when appropriate | Only after checking why level is low |
| Brake bleeding | Remove trapped air | Hydraulic repairs or air entry |
| Brake fluid flush | Replace old fluid | Scheduled maintenance |
| Hydraulic brake repair | Correct component failure | Leaks or defective parts |
Does Flushing Also Bleed the Brakes?
A proper fluid exchange generally includes bleeding steps.
However, a fluid flush is not necessarily sufficient to correct an existing serious hydraulic fault.
Can You Bleed Motorcycle Brakes Without Changing All the Fluid?
Yes.
A limited bleeding procedure may remove air from part of the system.
However, it does not automatically replace all aging fluid.
If the fluid is due for replacement, perform the full manufacturer-specified service.
Why Are My Motorcycle Brakes Spongy After Changing Fluid?
A spongy brake lever or pedal is a serious warning sign.
It may indicate air trapped in the hydraulic system.
However, other problems are also possible.
1. Air Entered the Brake Lines
This can happen if the reservoir level becomes too low during bleeding.
Air may also enter through a loose connection or incorrect procedure.
2. The Bleeding Sequence Was Incorrect
Some motorcycles require a specific bleeding order.
If the sequence is not followed, air may remain in the system.
3. ABS Components Contain Trapped Air
Certain ABS systems require specialized bleeding equipment.
A conventional bleed may not remove air from every hydraulic passage.
4. Bleed Valve Is Not Sealed Properly
A damaged or improperly tightened bleed valve can cause leakage or other problems.
Follow the specified tightening procedure.
5. A Hydraulic Component Is Defective
Possible faults include:
- Master-cylinder problems.
- Damaged brake hoses.
- Leaking caliper seals.
- Loose hydraulic connections.
- Other internal defects.
What Should You Do?
Do not ride the motorcycle with a soft, sinking, or unreliable brake lever or pedal.
Have the system inspected and corrected by a qualified technician.
Do not attempt a high-speed road test to determine whether the brakes will improve.
Can You Change Motorcycle Brake Fluid Without Bleeding?
Not properly through an ordinary complete hydraulic-fluid replacement.
Removing fluid from the reservoir alone does not replace the old fluid inside the brake lines and calipers.
Why Is Reservoir-Only Replacement Incomplete?
The master-cylinder reservoir holds only part of the braking system’s total fluid volume.
Old fluid also remains inside:
- Brake lines.
- Caliper passages.
- Master-cylinder passages.
- Hydraulic control components.
- Other system-specific circuits.
A proper fluid exchange must address the required hydraulic components.
What About Vacuum Bleeders?
Vacuum bleeding equipment draws fluid through the hydraulic system.
It can be useful for certain motorcycles.
However, it must be used correctly.
Air bubbles observed in the hose may sometimes originate from leakage around bleed screw threads rather than from the hydraulic circuit itself.
A technician must interpret the result correctly.
What About Reverse Bleeding?
Reverse bleeding pushes fluid upward from a caliper toward the master cylinder.
Some motorcycle technicians use it to remove difficult trapped air.
However, it is not approved for every system.
It may be inappropriate where contamination could be pushed toward sensitive hydraulic components or where the manufacturer requires another procedure.
Do not use reverse bleeding on an ABS or other complex system without explicit service-manual approval.
How Much Does a Motorcycle Brake Fluid Change Cost?
Professional brake-fluid service costs vary by motorcycle type, location, and hydraulic-system design.
The main cost components are labor and brake fluid.
What Affects the Price?
Factors include:
- Number of calipers.
- Number of bleed points.
- Front and rear circuit complexity.
- Brake fluid specification.
- ABS service requirements.
- Electronic diagnostic procedures.
- Condition of hydraulic fittings.
- Regional labor rates.
Is Changing Motorcycle Brake Fluid Expensive?
For many conventional motorcycles, routine brake-fluid maintenance is relatively straightforward for a qualified technician.
However, complex linked or electronic braking systems may require additional time and equipment.
Ask the shop for an estimate that covers the complete fluid exchange.
Is DIY Cheaper?
Doing the work yourself can reduce labor charges.
However, the potential consequences of incorrect brake service are serious.
A mistake may require additional professional repair or create a risk of brake failure.
For inexperienced owners, professional servicing can be the better value.
What Should You Ask the Mechanic?
Confirm that the quoted work includes:
- Correct brake fluid.
- Front brake service.
- Rear brake service.
- Any required ABS procedure.
- Proper bleeding.
- Hydraulic leak checks.
- Final brake-operation verification.
A low quote may not include every required circuit.
How to Dispose of Used Motorcycle Brake Fluid
Used brake fluid should be handled as potentially hazardous automotive waste.
Do not pour it:
- Down household drains.
- Into storm drains.
- Onto soil.
- Into rivers or streams.
- Into ordinary household trash in an open container.
Safe Disposal Method
Collect the used fluid in a suitable labeled container.
Keep it separate from engine oil, gasoline, solvents, and other automotive fluids.
Contact a local automotive service facility or household hazardous-waste collection program.
Follow local disposal regulations.
Can You Reuse Old Brake Fluid?
No.
Do not reuse drained brake fluid.
It may contain moisture, debris, or other contaminants.
Fresh fluid is necessary for appropriate hydraulic maintenance.
Common Mistakes When Changing Motorcycle Brake Fluid
Avoid these errors during motorcycle brake maintenance.
1. Using the Wrong Brake Fluid
Incorrect fluid may damage hydraulic seals or fail to meet required performance specifications.
Always check the manufacturer’s requirements.
2. Letting the Reservoir Run Dry
This can introduce air into the hydraulic system.
On some motorcycles, removing that air may require a specialized procedure.
3. Releasing the Lever While the Bleed Valve Is Open
During conventional manual bleeding, this can draw air into the system.
Follow the correct squeeze-hold-open-close-release sequence.
4. Ignoring ABS Requirements
Not every ABS motorcycle can be serviced using a generic manual bleeding procedure.
Use the model-specific service instructions.
5. Mixing DOT 5 With Glycol-Based Fluid
DOT 5 silicone brake fluid is not interchangeable with glycol-based DOT 3, DOT 4, or DOT 5.1 fluids.
6. Overfilling the Reservoir
Fluid level must be checked with the motorcycle and reservoir positioned correctly.
Excess fluid can create problems during later brake maintenance.
7. Using Old Brake Fluid
Previously opened fluid may have absorbed moisture.
Use suitable fresh fluid.
8. Spilling Brake Fluid on Paint
Brake fluid can damage painted and certain plastic surfaces.
Protect nearby components before opening the reservoir.
9. Overtightening the Bleed Valve
Excessive torque can damage the valve or caliper.
Use the manufacturer’s specified torque.
10. Forgetting a Second Caliper
Some motorcycles have dual front brake discs.
The service may require bleeding both calipers and additional specified points.
11. Assuming Clear Fluid Means the System Is Fully Serviced
Fluid color is not a reliable measure of a complete exchange.
Follow the required bleeding procedure.
12. Riding With a Spongy Brake Lever
A soft brake lever can indicate air or another hydraulic problem.
Do not ride until the braking system has been properly verified.
How to Keep Motorcycle Brake Fluid in Good Condition
Regular maintenance can help protect the hydraulic braking system.
Follow the Manufacturer’s Replacement Schedule
Check the owner’s manual for the correct service interval.
Many motorcycles require periodic brake fluid replacement regardless of mileage.
Inspect the Brake Fluid Level
Check the front and rear reservoirs according to the owner’s manual.
Low fluid may indicate worn brake pads or a hydraulic leak.
Do not repeatedly add fluid without identifying the cause.
Inspect the Brake Pads
As disc brake pads wear, the caliper pistons move outward.
This can gradually lower the reservoir fluid level without fluid leaking from the system.
Monitor pad wear and replace components when required.
Keep the Reservoir Closed
Avoid unnecessary opening.
Moisture and dirt can enter the system during careless servicing.
Inspect Brake Hoses
Look for visible damage, leaks, and deterioration.
Hydraulic hoses require replacement when damaged or when their specified service life has been reached.
Watch for Abnormal Brake Feel
Seek immediate inspection if:
- The lever feels spongy.
- The pedal sinks unusually far.
- Braking force decreases.
- Fluid leaks appear.
- The brake warning light remains on.
- Brake operation becomes inconsistent.
Never treat these symptoms as ordinary brake-fluid aging without diagnosis.
Conclusion
Learning how to change motorcycle brake fluid begins with understanding the hydraulic braking system and its exact service requirements.
For a conventional hydraulic disc brake system, fluid replacement generally involves supplying fresh approved fluid through the master-cylinder reservoir while removing old fluid through the appropriate bleed valves.
During manual bleeding, the correct sequence is to apply the brake, hold pressure, open the bleed valve, close it, and then release the brake.
The reservoir must never run dry.
However, this basic procedure does not apply universally.
ABS, linked brakes, and electronically controlled hydraulic systems may require special tools and manufacturer-specific bleeding sequences.
Once the service is complete, the motorcycle must have the correct fluid level, properly sealed hydraulic connections, and normal brake lever and pedal operation.
My recommendation is to use the exact motorcycle service manual, replace brake fluid at the manufacturer’s specified interval, and choose professional service whenever the braking system is complex or you cannot confidently verify the finished repair.
Proper brake-fluid maintenance supports reliable braking, but safety must take priority over completing the work yourself.
FAQs About How to Change Motorcycle Brake Fluid
Can I Change Motorcycle Brake Fluid Myself?
Some experienced motorcycle owners can replace brake fluid on conventional hydraulic systems when they have the correct tools and factory service procedure. However, mistakes can introduce air or cause leaks. ABS and linked-brake systems may require specialized equipment. If you lack the necessary experience, use a qualified technician.
How Often Should You Change Motorcycle Brake Fluid?
Many motorcycle manufacturers recommend replacement approximately every two years. However, intervals vary by model and fluid specification. Follow the owner’s manual rather than relying on a universal schedule.
Can You Change Motorcycle Brake Fluid Without Bleeding?
A complete hydraulic-fluid exchange generally requires bleeding or an approved equivalent procedure. Replacing only the fluid inside the reservoir leaves old fluid in the lines and calipers.
How Much Brake Fluid Does a Motorcycle Need?
The quantity depends on the number of brake circuits, calipers, bleed points, and the service method. A small sealed bottle may be sufficient for a simple system, but more fluid may be needed. Check the service manual and have enough approved fluid available before starting.
Should You Change Front and Rear Motorcycle Brake Fluid Together?
If both brake circuits are due for replacement, servicing them during the same maintenance visit is often practical. However, the exact procedure depends on whether the motorcycle has separate, linked, or electronically controlled brakes.
How Do You Remove Air From Motorcycle Brake Lines?
Air is removed using a manufacturer-approved bleeding procedure. On a conventional hydraulic system, this may involve applying brake pressure, opening and closing the appropriate bleed valve, and replenishing fluid. If the brake lever remains soft, do not ride until a qualified technician has corrected the problem.
Can You Use DOT 4 Brake Fluid in Any Motorcycle?
No. Although DOT 4 is common in modern motorcycles, not every motorcycle uses it. Some require a different specification. Always check the owner’s manual or manufacturer-approved service documentation before selecting brake fluid.