How to Change a Master Cylinder for Brakes: Step-by-Step Guide
To change a brake master cylinder, disconnect the hydraulic brake lines, remove the old master cylinder from the brake booster or mounting assembly, bench bleed the replacement cylinder, install it securely, reconnect the brake lines, and bleed the braking system. Before driving, the system must be checked for leaks, trapped air, and proper hydraulic pressure.
A brake master cylinder is one of the most important components of a vehicle’s hydraulic braking system. It converts the force applied to the brake pedal into hydraulic pressure that activates the brakes.
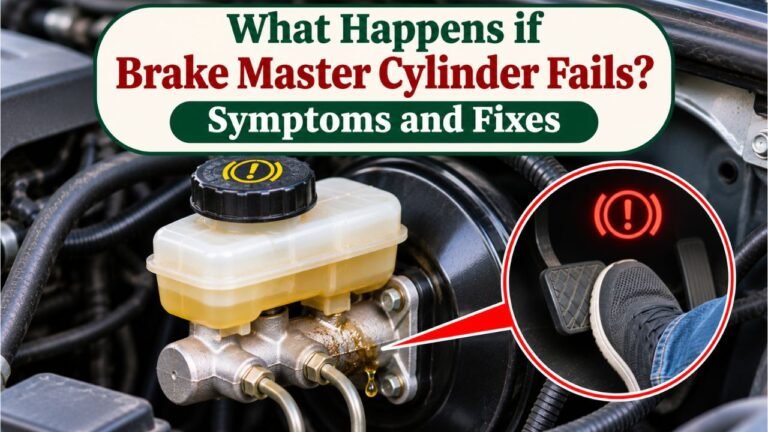
When the master cylinder fails, the brake pedal may slowly sink, hydraulic pressure may decrease, or brake fluid may leak. However, these symptoms can also indicate problems elsewhere in the braking system.
Replacing the master cylinder requires careful work because incorrect installation or incomplete bleeding can result in reduced braking performance or brake failure.
In this article, I explain how to change a master cylinder for brakes, including the necessary tools, removal procedure, bench bleeding, installation, and brake-line bleeding. You’ll also learn how to recognize master cylinder problems, handle ABS-equipped vehicles, avoid common replacement mistakes, and determine when professional service is the safer option.
How to Change a Master Cylinder for Brakes: Quick Overview
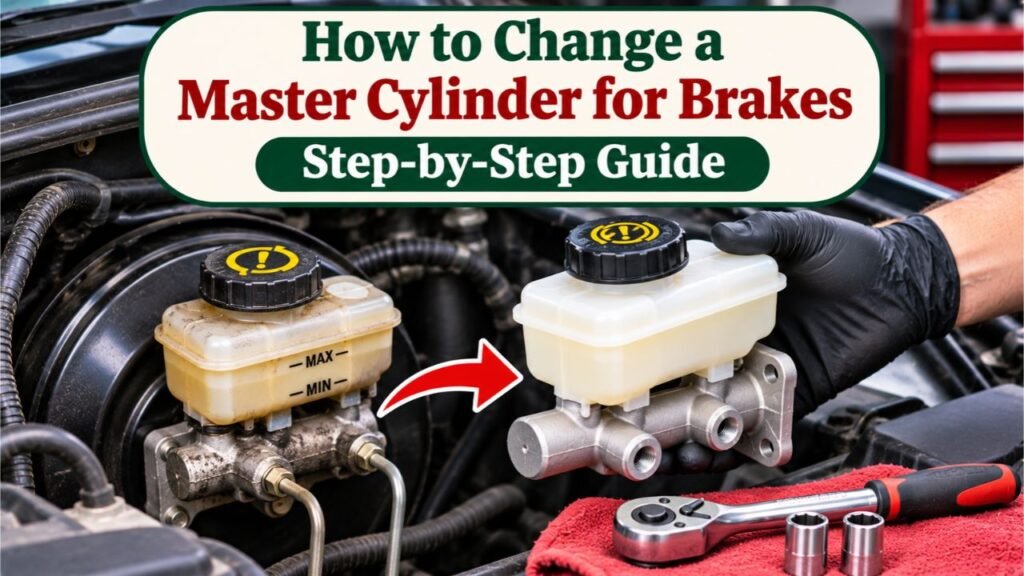
Replacing a conventional brake master cylinder involves removing the old hydraulic component and installing a compatible replacement.
The process also requires removing air introduced into the braking system.
Brake Master Cylinder Replacement Steps
| Step | Procedure | Main purpose |
| 1 | Confirm the master cylinder is faulty | Avoid unnecessary replacement |
| 2 | Get the correct replacement and tools | Ensure compatibility |
| 3 | Prepare the vehicle | Prevent injury and contamination |
| 4 | Locate and inspect the master cylinder | Identify connections and possible leaks |
| 5 | Disconnect the brake lines and mounting hardware | Remove the old cylinder |
| 6 | Bench bleed the new master cylinder | Remove trapped air before installation |
| 7 | Install the replacement cylinder | Restore the hydraulic assembly |
| 8 | Reconnect the brake lines and electrical connections | Complete the installation |
| 9 | Bleed the hydraulic brake system | Remove air introduced during replacement |
| 10 | Check pedal operation and leaks | Verify the system before driving |
These are general steps for a conventional hydraulic braking system.
The exact procedure depends on the vehicle’s make, model, year, brake booster design, and ABS configuration. Some modern vehicles require diagnostic software, hydraulic depressurization, or special manufacturer procedures.
The O’Reilly Auto Parts brake master cylinder replacement guide provides a practical replacement walkthrough with photographs of the major components and tools.
Can You Replace a Brake Master Cylinder Yourself?
An experienced DIY mechanic with the correct tools and vehicle-specific repair information may be able to complete the job.
However, brake master cylinder replacement is not a suitable beginner repair.
Incorrect bleeding, damaged fittings, or improper installation can make the vehicle unsafe.
If you cannot confidently perform and verify the entire procedure, have a qualified brake technician complete the replacement.
What Is a Brake Master Cylinder?
A brake master cylinder is a hydraulic component connected to the brake pedal through a mechanical or assisted braking mechanism.
It creates hydraulic pressure when the driver applies the brake pedal.
How Does a Brake Master Cylinder Work?
In a conventional braking system:
- The driver presses the brake pedal.
- The pedal mechanism and brake booster, if equipped, apply force to the master cylinder.
- Pistons inside the master cylinder move.
- Brake fluid is pressurized.
- Hydraulic pressure travels through the brake lines.
- Brake calipers or wheel cylinders apply the brakes.
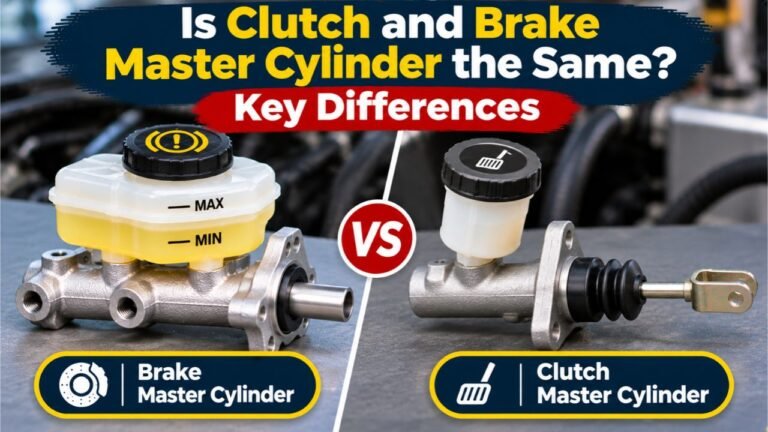
Most modern passenger vehicles use a tandem master cylinder with two hydraulic circuits.
This arrangement provides redundancy if one circuit develops certain failures.
However, losing one circuit can still result in seriously reduced braking performance.
Where Is the Brake Master Cylinder Located?
On many passenger vehicles, the master cylinder is mounted near the firewall on the driver’s side of the engine compartment.
It is usually attached to the front of a brake booster.
The assembly often includes:
- A metal master cylinder body.
- A brake fluid reservoir.
- Hydraulic brake line connections.
- A mounting flange.
- A fluid level sensor connector.
Some vehicles use remotely mounted reservoirs or integrated electronic braking assemblies.
Brake Master Cylinder vs. Brake Booster
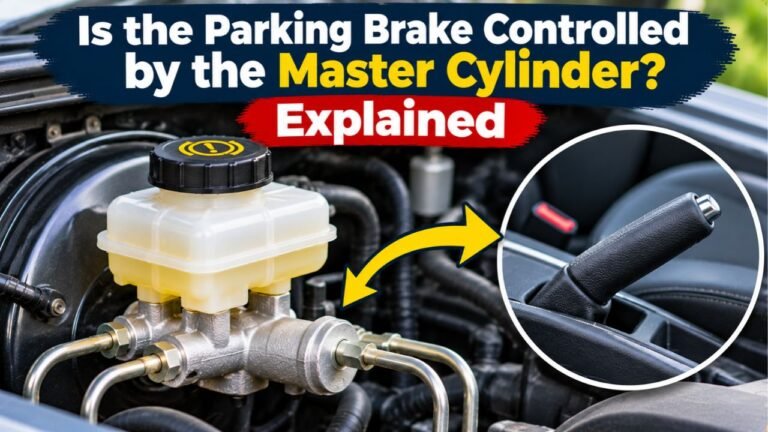
The master cylinder generates hydraulic pressure.
The booster helps reduce the driver’s pedal effort.
A traditional vacuum brake booster is usually a large, round housing behind the smaller metal master cylinder.
Although the two components are connected, they perform different functions.
How Do You Know When a Brake Master Cylinder Needs Replacing?
Before replacing the master cylinder, confirm that it is actually responsible for the braking problem.
Several other components can produce similar symptoms.
Signs of a Bad Brake Master Cylinder
| Symptom | Possible explanation |
| Brake pedal slowly sinks | Internal hydraulic pressure leakage |
| Fluid leaking around master cylinder | Damaged seals or connections |
| Brake fluid near booster | Possible rear master-cylinder seal leakage |
| Soft brake pedal | Air, hydraulic leaks, or other faults |
| Brake warning light | Low fluid or another hydraulic problem |
| Uneven braking | Possible pressure or brake component problem |
| Brake fluid level dropping | Hydraulic leak or brake pad wear |
These symptoms are not conclusive by themselves.
Brake Pedal Slowly Sinks
One possible symptom of internal master-cylinder failure is a brake pedal that continues moving downward under steady pressure.
This may happen when fluid bypasses worn internal piston seals.
However, an external leak or another hydraulic fault can also cause pressure loss.
Brake Fluid Leaking Near the Master Cylinder
A visible leak may occur around:
- Hydraulic line fittings.
- The reservoir connection.
- The master cylinder housing.
- The joint between the master cylinder and booster.
The exact source must be identified.
Master Cylinder Leaking Into the Brake Booster
Some master cylinders can leak through their rear seals.
Fluid may collect inside the booster, making the leak difficult to identify externally.
This can require additional inspection of the booster and related components.
Does a Spongy Pedal Mean the Master Cylinder Is Bad?
Not necessarily.
Air in the brake lines, improperly adjusted brake components, hydraulic leaks, or ABS problems can also cause abnormal pedal feel.
According to NAPA’s master cylinder diagnostic guide, sinking or spongy pedal symptoms require proper testing to distinguish master-cylinder problems from other hydraulic faults.
When Should You Stop Driving?
Do not drive if:
- The brake pedal sinks abnormally.
- Hydraulic braking pressure is unreliable.
- A significant fluid leak is present.
- Braking effectiveness is reduced.
- The brake warning system indicates a serious hydraulic fault.
Arrange inspection or towing.
Key Takeaway: Diagnose the braking problem before replacing the master cylinder. A new cylinder will not repair a leaking brake hose, defective caliper, or another unrelated fault.
Tools and Materials Needed to Replace a Brake Master Cylinder
Gather the correct tools before opening the hydraulic brake system.
Essential Tools
- Correct replacement brake master cylinder.
- Manufacturer-approved brake fluid.
- Brake line flare-nut wrench set.
- Socket and ratchet set.
- Torque wrench.
- Brake bleeding kit.
- Bench bleeding kit or manufacturer-specified equipment.
- Clean drain pan.
- Clean shop towels.
- Protective gloves.
- Safety glasses.
- Wheel chocks.
- Suitable line plugs or caps.
- Vehicle-specific service information.
Additional Equipment That May Be Needed
Depending on the vehicle, you may also need:
- Floor jack and properly rated jack stands.
- Pressure brake bleeder.
- Vacuum bleeding equipment.
- ABS-compatible diagnostic scan tool.
- Replacement reservoir seals.
- New mounting seals or gaskets.
- Replacement hydraulic line fittings.
- Brake fluid level sensor components.
Do not assume every vehicle requires the same equipment.
Why Is a Flare-Nut Wrench Important?
Brake lines generally connect to the master cylinder through threaded flare fittings.
A flare-nut wrench provides better contact around the fitting than an ordinary open-end wrench.
This reduces the chance of rounding the fitting.
Damaging a brake line fitting can turn a straightforward replacement into a more complicated hydraulic repair.
How Much Brake Fluid Do You Need?
The amount depends on the vehicle and bleeding procedure.
A full hydraulic bleeding operation may require more fluid than the system’s stated capacity because additional fluid is used to remove air.
Consult the service manual and obtain enough fresh, correctly specified fluid before beginning.
Never reuse contaminated fluid collected during bleeding.
How to Choose the Correct Replacement Master Cylinder
Before purchasing the replacement, verify that it matches the vehicle.
A master cylinder that looks similar may have different internal dimensions or hydraulic connections.
Check the Vehicle Information
Record the:
- Make.
- Model.
- Model year.
- Engine, where relevant.
- Trim or brake package.
- VIN.
- ABS configuration.
Compare the Master Cylinder Specifications
Important details include:
| Specification | Why it matters |
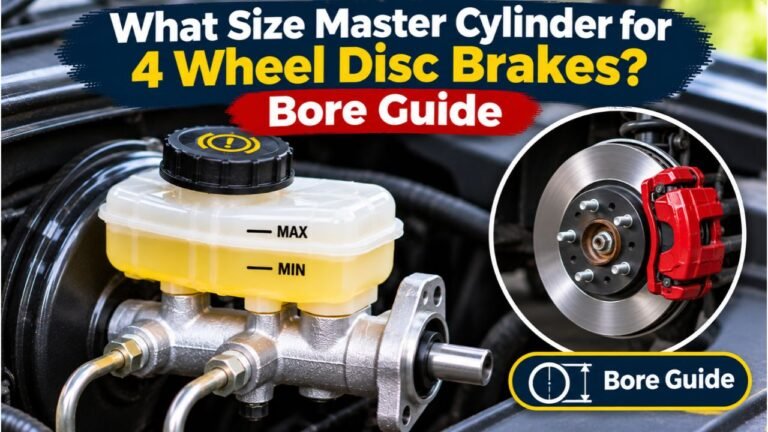
| Cylinder bore diameter | Affects hydraulic pressure and pedal travel |
| Hydraulic outlet ports | Must match brake line fittings and routing |
| Mounting flange | Must fit the booster or mounting assembly |
| Pushrod interface | Must be compatible with the pedal or booster mechanism |
| Reservoir design | Must fit the correct mounting and fluid arrangement |
| Fluid level sensor | Must match the vehicle’s electrical connection |
| ABS compatibility | Must suit the hydraulic system configuration |
New vs. Remanufactured Master Cylinder
Replacement master cylinders may be sold as new or remanufactured units.
A remanufactured cylinder has been rebuilt and tested according to the supplier’s process.
Either type must meet the correct vehicle specifications and quality requirements.
Can You Use a Master Cylinder From Another Car?
Only if the manufacturer or a reliable parts catalog confirms compatibility.
Similar appearance doesn’t guarantee the same bore diameter, port sizes, or internal design.
Do You Need to Replace the Reservoir?
Not always.
Some master cylinders come with a new reservoir.
Others require transferring the original reservoir.
When transferring it, replace the sealing grommets or related parts as required by the manufacturer.
How to Change a Master Cylinder for Brakes Step by Step
The following procedure outlines replacement on a conventional master cylinder mounted to a brake booster.
Before starting, obtain the exact vehicle service procedure and torque specifications. Integrated brake-by-wire systems, hybrid vehicles, and some ABS configurations may require procedures that differ significantly from these general steps.
Step 1: Prepare the Vehicle Safely
Park on a firm, level surface.
Place the transmission in Park or the appropriate gear.
Apply the parking brake and chock the wheels.
Turn off the engine.
Follow the manufacturer’s instructions for disabling any electrical systems that could activate the brakes.
Important Safety Precautions
- Wear safety glasses and protective gloves.
- Work in a clean, well-ventilated area.
- Keep dirt away from the brake fluid reservoir and hydraulic ports.
- Avoid spilling brake fluid on painted surfaces.
- Never work under a vehicle supported only by a jack.
- Do not open a pressurized hydraulic brake system without the specified depressurization procedure.
For certain conventional vacuum-assisted brakes, stored vacuum assist can be reduced by pressing the brake pedal several times with the engine off.
However, do not apply that procedure universally to electrically assisted or high-pressure brake systems. Use the vehicle manufacturer’s instructions.
Step 2: Locate the Old Master Cylinder
Open the hood.
On a conventional braking system, look near the firewall.
Find the brake fluid reservoir and the metal cylinder beneath it.
Identify:
- Brake line connections.
- Mounting nuts or bolts.
- Fluid level sensor wiring.
- Booster connection.
- Any nearby components restricting access.
Take reference photographs before disconnecting anything.
These can help confirm the original routing and installation.
Step 3: Clean the Area Around the Master Cylinder
Dirt entering the hydraulic system can damage internal components.
Before opening the system:
- Remove loose debris around the reservoir.
- Clean the exterior near hydraulic fittings.
- Wipe the surrounding area with suitable materials.
- Place clean absorbent towels beneath the connections.
- Position a drain pan to collect fluid.
Avoid allowing cleaning chemicals to enter the reservoir or brake lines.
Step 4: Remove Brake Fluid if Required
Some procedures involve removing part of the fluid from the master-cylinder reservoir before disconnecting the lines.
Use equipment dedicated to brake fluid.
Keep the surrounding area clean.
Do not reuse removed brake fluid.
Some vehicle procedures allow the old reservoir to remain filled until the cylinder is removed, so follow the manufacturer’s instructions.
Step 5: Disconnect the Electrical Connector
If the reservoir has a fluid-level sensor, carefully release the connector.
Avoid pulling directly on the wiring.
Inspect the connector for damage or corrosion.
Not every master cylinder has an electrical connection.
Step 6: Disconnect the Hydraulic Brake Lines
Identify the brake line connections before loosening them.
If necessary, label or photograph their locations.
Use the correct flare-nut wrench.
Carefully loosen the fittings and separate the lines according to the service procedure.
Important Precautions
- Do not twist or sharply bend the brake lines.
- Avoid damaging fitting threads.
- Prevent dirt from entering open hydraulic lines.
- Use appropriate clean plugs or caps when permitted.
- Do not allow brake fluid to spill onto painted components.
- Do not force a seized fitting.
If a brake line fitting is severely corroded or damaged, professional repair may be required.
Step 7: Remove the Master Cylinder Mounting Hardware
Most conventional master cylinders are secured to the booster by mounting nuts or bolts.
Use the correct socket or wrench.
Support the master cylinder while removing the hardware.
Then carefully separate it from the booster or mounting surface.
Do not pry against sensitive hydraulic components.
Step 8: Remove the Old Master Cylinder
Lift the master cylinder away from its mounting position.
Place it in a suitable collection pan.
Inspect the exposed area for:
- Brake fluid leakage.
- Damaged mounting surfaces.
- Corrosion.
- Improperly seated seals.
- Evidence of fluid entering the booster.
If brake fluid has leaked into the booster, additional inspection or repair may be required.
Step 9: Compare the Old and New Master Cylinders
Before installation, place the replacement beside the original.
Compare:
- Overall shape.
- Mounting holes.
- Hydraulic ports.
- Reservoir arrangement.
- Electrical connectors.
- Pushrod contact design.
- Manufacturer part information.
Do not install the replacement if important features do not match the specified part.
Step 10: Transfer the Reservoir if Required
Some replacement master cylinders do not include a reservoir.
If the original reservoir must be reused, follow the manufacturer’s transfer procedure.
Inspect it for cracks or damage.
Use new sealing grommets where specified.
Make sure the reservoir is correctly seated.
Do not transfer damaged seals into the replacement assembly.
Step 11: Bench Bleed the New Brake Master Cylinder
Bench bleeding is one of the most important parts of a conventional master cylinder replacement.
A replacement master cylinder can contain air inside its hydraulic chambers.
Installing it without removing that air can make it difficult to obtain a firm brake pedal.
The correct method depends on the cylinder design and the replacement manufacturer’s instructions.
What Is Bench Bleeding?
Bench bleeding removes trapped air from the master cylinder before it is mounted on the vehicle.
A typical method uses a bench bleeding kit with fittings and transparent hoses.
General Bench Bleeding Procedure
- Secure the master cylinder by its mounting flange in a suitable bench vise.
- Do not crush or clamp the hydraulic cylinder body.
- Install the specified bench bleeding fittings into the outlet ports.
- Connect the supplied transparent hoses.
- Route the hoses back into the reservoir as instructed.
- Fill the reservoir with fresh, manufacturer-approved brake fluid.
- Keep the hose ends submerged in the fluid where required by the kit.
- Slowly depress and release the piston using the approved tool and stroke length.
- Observe the fluid for escaping air bubbles.
- Repeat the specified procedure until air has been removed.
- Secure the outlet ports as directed to minimize fluid loss and prevent air entering before installation.
Do not use excessive force or an improvised sharp tool against the piston.
Some master cylinders require different bleeding methods, including special procedures for step-bore designs.
How Long Does Bench Bleeding Take?
The time varies.
A simple cylinder may bleed relatively quickly.
Another design may require additional strokes or special equipment.
The objective is removing trapped air, not completing a fixed number of repetitions.
Can You Bench Bleed the Master Cylinder on the Car?
Certain manufacturers provide on-vehicle bleeding procedures.
However, bench bleeding is commonly recommended because it helps remove air before the hydraulic lines are connected.
Follow the instructions for the specific replacement cylinder.
Step 12: Install the New Master Cylinder
After bench bleeding, prepare the mounting surface.
Check for any required seal or gasket.
Position the replacement cylinder correctly against the booster or mounting assembly.
Start the mounting hardware by hand.
Tighten the fasteners evenly using the manufacturer-specified torque.
Avoid overtightening.
Step 13: Check the Booster Pushrod Interface
The master cylinder must engage the brake booster or pedal pushrod correctly.
Some vehicles have a specified pushrod clearance or depth requirement.
An incorrect pushrod relationship can cause:
- Excessive brake pedal travel.
- Incomplete master cylinder piston return.
- Brake drag.
- Incorrect hydraulic operation.
Do not adjust the booster pushrod by guesswork.
If your vehicle requires a clearance measurement or adjustment, follow the factory service procedure using the specified tools.
Step 14: Reconnect the Brake Lines
Align each hydraulic line with its correct port.
Start the fittings by hand to avoid cross-threading.
Then tighten them using the appropriate flare-nut wrench and the manufacturer’s specifications.
Important Installation Rules
- Do not force misaligned brake lines.
- Do not cross-thread fittings.
- Do not use ordinary thread-sealing tape on brake flare connections.
- Do not substitute incompatible fittings.
- Do not reuse damaged hydraulic lines.
- Do not guess at tightening torque.
The hydraulic seal is formed by the fitting’s specified sealing surfaces, not by ordinary plumbing tape.
Step 15: Reconnect the Electrical Connector
Reconnect any brake fluid level sensor wiring.
Make sure the connector is fully seated and routed correctly.
Reinstall any brackets or components removed for access.
Step 16: Fill the Reservoir With Correct Brake Fluid
Use the fluid specified by the manufacturer.
Common specifications include:
- DOT 3.
- DOT 4.
- DOT 4 LV.
- DOT 5.1.
Some specialized vehicles use other approved hydraulic fluids.
Never assume that a higher DOT number is automatically suitable.
Use fresh fluid from a properly sealed container.
Avoid mixing incompatible fluids.
Step 17: Bleed the Hydraulic Brake System
After replacing the master cylinder, air introduced into the hydraulic system must be removed.
This is a critical safety step.
The correct bleeding procedure depends on the vehicle.
Some systems use manual bleeding, while others require pressure bleeding or diagnostic equipment.
Do not assume every vehicle follows the same wheel bleeding order.
Step 18: Verify the Brake Pedal and Hydraulic System
Once bleeding is complete, perform the manufacturer-specified checks.
The pedal must operate correctly, and the system must maintain hydraulic pressure.
Inspect every disturbed connection for leaks.
If the pedal remains soft, sinks abnormally, or the brakes do not operate correctly, do not drive the vehicle.
Step 19: Complete the Final Safety Inspection
Before returning the vehicle to service, verify:
- Proper fluid level.
- Correctly installed reservoir cap.
- No hydraulic leaks.
- Secure mounting hardware.
- Correctly connected brake lines.
- Normal brake pedal operation.
- No unresolved brake warning indications.
- Properly reinstalled wheels, if removed.
- Wheel lug nuts tightened to the correct specification.
A controlled operational check should occur only after the hydraulic system has been verified safe.
For any uncertainty about brake operation, have a qualified technician inspect the vehicle before driving.
Key Takeaway: Master cylinder replacement isn’t complete until the system is correctly bled, leak-free, and verified to provide proper braking.
How to Bleed Brakes After Replacing the Master Cylinder
Bleeding removes air from the hydraulic braking system.
Air is compressible, unlike liquid brake fluid.
Trapped air can cause excessive pedal travel and poor hydraulic response.
Why Does Replacing the Master Cylinder Introduce Air?
Disconnecting hydraulic brake lines opens the system.
Air can enter the disconnected lines and other components.
A replacement master cylinder also contains air before it is filled and properly bled.
What Is the Correct Brake Bleeding Order?
There isn’t one universal sequence.
Some vehicles use a traditional farthest-to-nearest sequence.
Others require a different order due to split hydraulic circuits, ABS design, or manufacturer requirements.
Always follow the service manual for the specific vehicle.
Manual Brake Bleeding
A conventional two-person bleeding procedure generally involves:
- Filling the reservoir with approved brake fluid.
- Connecting an appropriate hose to the designated bleeder.
- Following the manufacturer-specified pedal and bleeder sequence.
- Opening the bleeder while the pedal is held as directed.
- Closing the bleeder before the pedal is released.
- Repeating the procedure as specified until air is removed.
- Checking and replenishing the reservoir throughout the process.
Never allow the reservoir to run dry.
If it does, additional air may enter the system, potentially requiring the bleeding process to be repeated.
Some systems require controlled pedal travel rather than fully depressing the pedal.
Pressure Brake Bleeding
Pressure bleeding equipment supplies fresh fluid under controlled pressure.
This can make bleeding more consistent on certain vehicles.
However, equipment settings must follow the manufacturer and tool instructions.
Excessive pressure can damage components or cause leakage.
Vacuum Brake Bleeding
Vacuum bleeding equipment draws fluid through the bleeder fitting.
This method is suitable for certain systems.
However, air appearing around bleeder screw threads can sometimes complicate interpretation.
Follow the equipment and vehicle instructions.
How Do You Know the Brakes Are Fully Bled?
A properly serviced system should meet the vehicle’s brake pedal and hydraulic performance requirements.
The technician should verify:
- The correct bleeding procedure was completed.
- No air remains in the required hydraulic circuits.
- The pedal operates as specified.
- No leaks are present.
- The fluid level is correct.
- No unresolved brake-system faults remain.
A firm-feeling pedal alone doesn’t guarantee that every system requirement has been met.
Does a New Master Cylinder Need Bench Bleeding?
Yes, conventional replacement master cylinders generally require the air to be removed before the final hydraulic system bleeding procedure.
Bench bleeding is a standard method.
Why Bench Bleeding Matters
A new or remanufactured master cylinder may contain trapped air.
Without proper bleeding, the cylinder may not develop hydraulic pressure correctly.
What Happens if You Skip Bench Bleeding?
Possible problems include:
- Excessive pedal travel.
- Spongy pedal feel.
- Difficulty removing trapped air.
- Delayed hydraulic response.
- Repeated unsuccessful bleeding attempts.
Can Bench Bleeding Damage a Master Cylinder?
Incorrect technique can.
Potential mistakes include:
- Clamping the cylinder body too tightly.
- Using an unsuitable piston tool.
- Excessive piston travel.
- Allowing the reservoir to run dry.
- Introducing contaminants.
- Using incompatible brake fluid.
What if No Fluid Comes Out During Bench Bleeding?
Check whether the bleeding equipment and procedure match the cylinder design.
Some step-bore master cylinders use specialized bleeding methods.
Do not force the piston or assume the replacement is defective without checking the manufacturer’s instructions.
How to Change a Brake Master Cylinder With ABS
Replacing a master cylinder on an ABS-equipped vehicle may require additional work.
However, not every ABS-equipped vehicle requires the same special bleeding procedure.
The required steps depend on whether air entered the ABS hydraulic control unit and how the vehicle’s system is designed.
What Is the ABS Hydraulic Control Unit?
The ABS hydraulic control unit contains valves and passages used to regulate braking pressure during anti-lock operation.
Some assemblies also contain an electric pump.
These components can trap air under certain service conditions.
Does ABS Require a Scan Tool After Master Cylinder Replacement?
Sometimes.
Certain vehicles require electronic activation of ABS valves and pumps during bleeding.
This may require a compatible diagnostic scan tool.
Other vehicles can be bled using a specified conventional procedure when the ABS unit hasn’t been opened or exposed to air.
What Happens if You Skip a Required ABS Bleed?
Air may remain trapped in the hydraulic control unit.
This can contribute to an excessively low or soft brake pedal.
Brake manufacturer Wagner explains in its technical bulletin on no-pedal conditions after master cylinder installation that improper bleeding can cause serious pedal problems and that some vehicles require a separate ABS bleeding procedure.
What About Electronic Stability Control?
Electronic stability control uses components associated with the hydraulic braking and ABS systems.
Some vehicles require additional service steps after hydraulic repairs.
Follow the manufacturer’s procedures.
Can You Replace a Master Cylinder on a Hybrid or EV?
Yes, but the procedure may be substantially more complex.
Certain hybrid and electric vehicles have:
- Electrically powered brake boosters.
- High-pressure hydraulic accumulators.
- Integrated brake control units.
- Brake-by-wire systems.
- Automated hydraulic functions.
Some systems can activate electrically even when the gasoline engine is off.
Do not open these systems without the required deactivation or depressurization procedure.
Specialized training and diagnostic equipment may be necessary.
How Long Does It Take to Replace a Brake Master Cylinder?
A straightforward conventional master cylinder replacement may take a few hours.
However, the total time varies depending on access, component condition, and bleeding requirements.
Factors That Affect Replacement Time
- Vehicle design.
- Master cylinder location.
- Brake line condition.
- Access to mounting fasteners.
- Reservoir transfer requirements.
- Bench bleeding procedure.
- Wheel bleeding requirements.
- ABS diagnostic procedures.
- Corrosion or damaged fittings.
Why Can Bleeding Take Longer Than Replacement?
Removing and installing the cylinder may be mechanically straightforward.
However, removing all trapped air from the hydraulic system can take additional time.
This is especially true when specialized bleeding procedures are required.
Can You Finish the Job in One Hour?
It may be possible on certain straightforward vehicles with professional tools and an experienced technician.
However, don’t plan the repair around an unrealistically short time.
Allow enough time for proper bleeding and final safety checks.
How Much Does Brake Master Cylinder Replacement Cost?
The total price depends on the vehicle and the amount of work required.
Replacing a conventional master cylinder is usually less expensive than repairing a complex integrated electronic brake control system.
Main Cost Components
| Cost component | What affects the price |
| Replacement master cylinder | Vehicle, brand, and part design |
| Brake fluid | Required specification and amount |
| Labor | Access and installation complexity |
| Bench bleeding | Cylinder design and required preparation |
| Hydraulic bleeding | Brake configuration and service procedure |
| ABS service | Diagnostic equipment or electronic bleeding requirements |
| Additional repairs | Damaged lines, booster, fittings, or other components |
Is DIY Replacement Cheaper?
DIY work can reduce labor expenses.
However, it may require buying specialized tools.
Incorrect installation can also create expensive repairs and serious safety risks.
Is It Worth Hiring a Mechanic?
For drivers without significant brake repair experience, professional service is usually the safer choice.
A qualified technician can confirm the diagnosis, install the correct component, follow ABS procedures, and verify hydraulic braking performance.
Can You Replace the Master Cylinder Without Replacing the Brake Booster?
Yes, when the brake booster is functioning correctly and hasn’t been damaged.
The master cylinder and booster are separate components on conventional systems.
When Is Booster Replacement Unnecessary?
If the booster operates normally and the only confirmed problem is within the master cylinder, replacing both may not be required.
When Should the Booster Be Inspected?
Inspect the booster when:
- Brake fluid has leaked into it.
- The booster has damaged seals.
- The pedal assist is abnormal.
- There are vacuum or hydraulic assist problems.
- The manufacturer requires related inspection after master cylinder failure.
Can a Bad Booster Cause a Hard Brake Pedal?
Yes.
A failing booster can reduce power assistance, making the pedal unusually hard to press.
This differs from the classic sinking-pedal symptom associated with certain hydraulic pressure-loss problems.
However, diagnostic testing is necessary before replacing either part.
Why Is the Brake Pedal Soft After Master Cylinder Replacement?
A soft or low brake pedal after replacement indicates that the hydraulic system may not have been restored correctly.
Possible causes include:
- Air remaining in the master cylinder.
- Air trapped in hydraulic lines.
- An incomplete bleeding procedure.
- Air in the ABS hydraulic control unit.
- A hydraulic leak.
- Incorrect cylinder installation.
- Incorrect part specifications.
- Other brake system faults.
What Should You Check First?
Confirm the correct installation and that the required bleeding procedure was followed.
Check for visible hydraulic leakage.
If there is no firm, reliable pedal, do not drive.
Can a New Master Cylinder Be Defective?
Yes, replacement parts can have defects.
However, a low pedal immediately after installation is not definitive proof that the new master cylinder is faulty.
Air and bleeding problems are common possibilities.
Why Does the Pedal Go to the Floor?
The cause may be trapped air, hydraulic leakage, internal cylinder problems, or improper system bleeding.
A pedal that reaches the floor without building adequate pressure is unsafe.
Arrange professional diagnosis.
Why Is the Brake Pedal Hard After Replacement?
A hard pedal may indicate problems with booster assistance, incorrect installation, or pushrod adjustment.
However, pedal behavior differs between conventional vacuum boosters and electronic systems.
Use the vehicle’s diagnostic procedure.
Why Are the Brakes Dragging After Replacement?
Possible causes include:
- Incorrect pushrod clearance.
- Incomplete piston return.
- Blocked hydraulic compensation.
- Incorrect component installation.
- Other hydraulic or mechanical problems.
Do not continue driving with dragging brakes.
Overheating and brake damage may occur.
Common Mistakes When Replacing a Brake Master Cylinder
1. Replacing the Cylinder Without Confirming Failure
Sinking or spongy pedal symptoms can originate elsewhere.
Correct diagnosis prevents unnecessary repairs.
2. Installing the Wrong Master Cylinder
A cylinder with the wrong bore size or hydraulic port arrangement may cause incorrect brake operation.
Verify the part using reliable fitment information.
3. Skipping Bench Bleeding
Trapped air can prevent proper pedal operation.
Follow the replacement manufacturer’s bleeding procedure.
4. Using the Wrong Brake Fluid
Always use the manufacturer’s required specification.
Do not substitute ATF, power steering fluid, engine oil, or an incompatible DOT fluid.
5. Cross-Threading Brake Line Fittings
Damaged threads can prevent proper hydraulic sealing.
Start fittings by hand.
6. Overtightening Hydraulic Connections
Excessive torque may damage fittings or sealing surfaces.
Use vehicle-specific specifications.
7. Using Thread-Sealing Tape
Conventional brake flare fittings seal at their designated mating surfaces.
Ordinary thread-sealing tape isn’t an acceptable substitute for a correctly fitted hydraulic connection.
8. Letting the Reservoir Run Dry
Allowing the reservoir to empty during bleeding can introduce additional air.
Maintain the required fluid level throughout the procedure.
9. Following the Wrong Bleeding Order
Brake bleeding sequences vary by vehicle.
Use the specified sequence.
10. Ignoring ABS Requirements
Some vehicles require diagnostic equipment to complete hydraulic bleeding.
Failure to follow the proper procedure may leave trapped air.
11. Adjusting the Booster Pushrod Incorrectly
Incorrect pushrod clearance can cause brake drag or excessive pedal travel.
Only adjust it according to the manufacturer.
12. Reusing Old Brake Fluid
Removed brake fluid may contain moisture, dirt, or other contamination.
Use fresh approved fluid.
13. Failing to Check for Leaks
A system with loose or damaged hydraulic connections can lose pressure.
Inspect all disturbed fittings.
14. Driving With an Unverified Brake Pedal
A vehicle must not be driven when the brake pedal is soft, sinks, or fails to generate proper braking.
Have the system repaired and verified first.
Brake Master Cylinder Replacement Checklist
Use this checklist to track the major tasks.
- Confirm the master cylinder failure.
- Identify the correct replacement part.
- Check the vehicle service manual.
- Obtain the correct brake fluid.
- Gather appropriate tools and protective equipment.
- Park and secure the vehicle safely.
- Follow required system deactivation or depressurization steps.
- Locate the master cylinder and inspect connections.
- Protect surrounding painted surfaces.
- Disconnect electrical connections as required.
- Disconnect hydraulic lines carefully.
- Remove the old master cylinder.
- Inspect the brake booster mounting area.
- Transfer the reservoir if required.
- Bench bleed the new master cylinder.
- Install the replacement with correct hardware and torque.
- Verify the pushrod interface.
- Reconnect the hydraulic lines.
- Reconnect electrical connectors.
- Fill with fresh specified brake fluid.
- Bleed the hydraulic system in the correct sequence.
- Perform ABS bleeding if required.
- Check for leaks.
- Verify proper brake pedal operation.
- Confirm fluid level and warning system status.
- Complete the required safety inspection before driving.
Conclusion
Changing a brake master cylinder involves removing the old hydraulic component, bench bleeding the replacement, installing it correctly, reconnecting the brake lines, and bleeding the entire affected brake system.
Although the mechanical replacement may be straightforward on some conventional vehicles, the hydraulic service requires careful attention to detail.
A replacement master cylinder must match the original specifications, including bore size, mounting arrangement, and brake line connections.
Bench bleeding is particularly important because trapped air can prevent the replacement cylinder from building pressure properly.
After installation, the brake system must be bled according to the vehicle manufacturer’s procedure. Some ABS, hybrid, and electric braking systems require specialized diagnostic equipment or depressurization steps.
I recommend confirming the original fault before purchasing parts and obtaining the exact vehicle service information before beginning. If you cannot verify proper bleeding, hydraulic pressure, and leak-free operation, have the repair completed or inspected by a qualified technician.
A brake master cylinder replacement is only successful when the entire braking system has been restored to safe, reliable operation—not merely when the new component is bolted into place.
FAQs About How to Change a Master Cylinder for Brakes
How Do You Change a Brake Master Cylinder?
Remove the old master cylinder after safely disconnecting its hydraulic lines and mounting hardware.
Bench bleed the replacement, install it using the correct specifications, reconnect the lines, and bleed the brake system.
Verify proper pedal operation and check for leaks before driving.
Is Replacing a Brake Master Cylinder Hard?
It depends on the vehicle and your experience.
The mechanical replacement may be manageable on some conventional cars.
However, correctly bleeding the hydraulic system and handling ABS requirements can make the repair more complicated.
Can I Replace a Brake Master Cylinder Myself?
Yes, if you have sufficient brake repair experience, the correct tools, and the vehicle-specific service procedure.
However, incorrect installation can cause brake failure.
Professional service is recommended when the repair exceeds your experience.
Do You Have to Bleed Brakes After Replacing the Master Cylinder?
Yes.
Opening the hydraulic system introduces air.
The appropriate bleeding procedure is necessary to restore reliable hydraulic braking.
Do You Have to Bench Bleed a New Master Cylinder?
Conventional replacement master cylinders generally require bench bleeding or another manufacturer-approved procedure to remove internal air before final system bleeding.
Follow the replacement manufacturer’s instructions.
Can You Install a Master Cylinder Without Bench Bleeding?
Some manufacturers provide alternative bleeding methods.
However, skipping required bench bleeding can leave trapped air and make it difficult to obtain proper hydraulic pressure.
Use only the specified procedure.
How Long Does It Take to Replace a Brake Master Cylinder?
A straightforward replacement may take a few hours.
Complex ABS systems, difficult access, corroded fittings, or additional repairs can increase the time.
Can You Replace the Master Cylinder Without Removing the Brake Booster?
Yes, on many conventional vehicles.
The master cylinder is typically attached to the booster and can be removed separately.
However, the exact procedure varies.
Does a New Master Cylinder Come With a Reservoir?
Some replacements include a reservoir, while others require transferring the original.
Check the product description and manufacturer instructions.
How Much Brake Fluid Do You Need After Replacing a Master Cylinder?
The amount depends on the vehicle and the bleeding process.
Obtain enough fresh approved fluid to complete the specified procedure without allowing the reservoir to run dry.
What Brake Fluid Should You Use With a New Master Cylinder?
Use the exact specification required by the vehicle manufacturer.
Common examples include DOT 3, DOT 4, and specialized low-viscosity formulations.
Do not choose fluid solely by its DOT number.
Does Replacing a Master Cylinder Fix a Soft Brake Pedal?
It can if the master cylinder is the confirmed cause.
However, air in the hydraulic lines, leaks, brake component problems, or ABS issues can also cause a soft pedal.
Diagnose the cause before replacement.
Why Is My Brake Pedal Still Soft After Replacing the Master Cylinder?
Possible causes include trapped air, incomplete bench bleeding, incorrect ABS bleeding, leaks, or another brake system problem.
Do not drive until the issue is corrected.
Does a Brake Master Cylinder Need Programming?
Many conventional replacement master cylinders don’t require programming.
However, integrated electronic braking systems may require diagnostic initialization, calibration, or other special procedures.
Check the vehicle service manual.
Can You Replace a Master Cylinder on an ABS Car?
Yes.
However, some ABS systems require special bleeding procedures or a compatible diagnostic scan tool.
Follow the manufacturer’s instructions.
Do You Need to Replace the Brake Booster With the Master Cylinder?
Not automatically.
If the booster is functioning correctly and has not been damaged or contaminated, replacing it may not be necessary.
Inspect it according to the service procedure.
Can a Bad Master Cylinder Cause Brakes to Lock Up?
Certain internal or installation problems can contribute to brakes failing to release correctly.
However, sticking calipers, damaged hoses, and other hydraulic issues can produce similar symptoms.
Proper diagnosis is required.
Can You Drive With a Bad Brake Master Cylinder?
No, if the master cylinder is causing pressure loss, hydraulic leakage, or unreliable braking.
Arrange towing or professional repair before driving.
How Do You Know if a New Master Cylinder Is Working?
The hydraulic system must be correctly bled, maintain the specified pedal pressure, show no leaks, and pass the manufacturer’s brake system checks.
Normal pedal feel alone isn’t sufficient if other faults remain.
Is It Better to Rebuild or Replace a Brake Master Cylinder?
Replacement is often the more practical option for modern passenger vehicles.
Rebuilding may be possible on some designs, but it requires appropriate parts, equipment, and inspection of the cylinder bore.
Follow the manufacturer’s repair guidance.