How to Clean Brake Master Cylinder Reservoir: Detailed Steps
To clean a brake master cylinder reservoir, first clean its exterior and cap, then inspect the fluid and interior. If the inside contains sediment, remove and clean the reservoir only when the vehicle’s service procedure allows it, using an approved cleaning method before refilling and bleeding the brakes as needed.
The reservoir supplies brake fluid to the master cylinder, so dirt, water, or chemical residue inside it can create problems far beyond an untidy engine compartment. Removing old fluid with a syringe may improve visibility, but it does not necessarily remove sludge lodged behind internal baffles. Cleaning a reservoir incorrectly can introduce air, damage seals, or contaminate the hydraulic system.
The safest approach depends on whether the contamination is on the outside, floating in the fluid, or stuck inside the plastic container. This guide explains how to assess the reservoir, prepare your tools, clean a removable unit step by step, choose safe cleaning materials, and check whether the brake system needs additional service afterward.
When Does a Brake Master Cylinder Reservoir Need Cleaning?
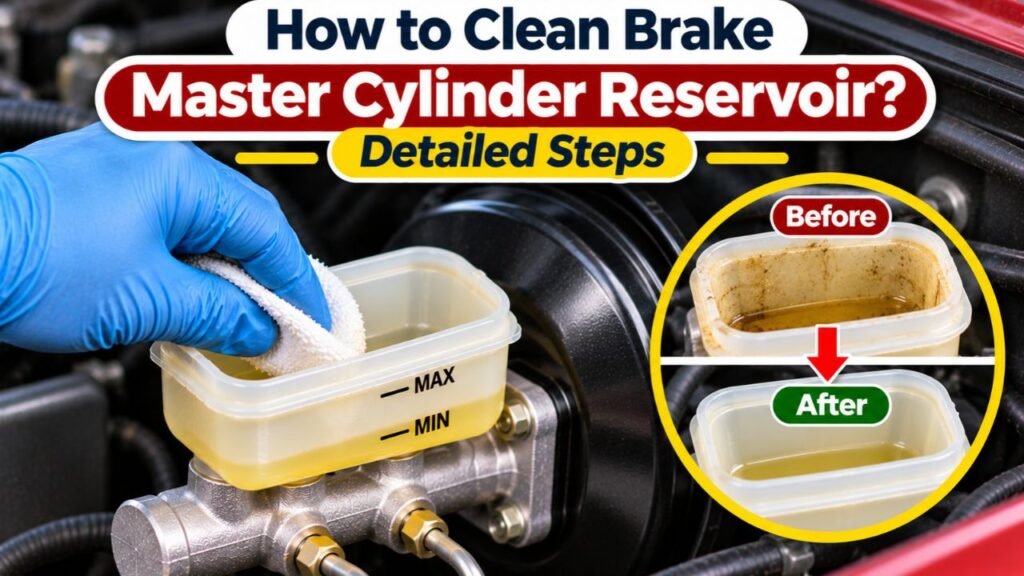
Clean the outside whenever dust, grease, or grime collects near the filler cap. This simple job helps prevent debris from falling into the reservoir when you check or add fluid. It normally does not require draining or disconnecting anything.
Interior cleaning is different. Visible grit, particles, sludge, or an oily film may indicate contamination that needs investigation. A discolored plastic reservoir is not necessarily dirty on the inside, and dark brake fluid does not automatically mean the plastic container needs scrubbing. Old fluid generally calls for a properly performed fluid change, not merely wiping out the tank.
| What You Notice | Appropriate Next Action |
| Dust around the cap | Wipe the outside before opening |
| Dark fluid without visible debris | Check the fluid-service schedule and condition |
| Loose dirt or sediment inside | Investigate the source; clean or replace as approved |
| Oil-like contamination or swollen seals | Stop using the vehicle and have the entire system assessed |
| Cracked reservoir or leaking grommets | Replace damaged parts, then service and bleed as required |
Important: If the brake-fluid level is falling unexpectedly, investigate brake-pad wear and potential leaks. Cleaning the container will not correct a hydraulic leak.
Tools and Supplies for Reservoir Cleaning
Collect the materials appropriate to the procedure approved for your vehicle:
- Clean, lint-free shop cloths and protective fender covers
- Safety glasses and brake-fluid-resistant gloves
- Fresh brake fluid meeting the exact vehicle specification
- A clean, dedicated fluid extractor or syringe and waste container
- Correct hand tools for approved reservoir removal
- Replacement reservoir seals or grommets, if required
- Manufacturer-approved cleaning material for a detached reservoir
- Approved oil-free, filtered drying equipment, if specified
- Suitable brake-bleeding equipment when the hydraulic system is opened
Keep tools used with oil, power-steering fluid, or other chemicals away from the reservoir. A clean syringe designated only for brake fluid is safer than a reused household baster.
How to Clean Brake Master Cylinder Reservoir Step by Step
The following sequence covers both simple exterior cleaning and the more involved cleaning of a removable reservoir. If you only need to clean the cap and outside, stop after the exterior-cleaning and inspection steps. If internal cleaning is necessary, follow your exact vehicle’s service instructions rather than assuming every reservoir disconnects the same way.
Step 01: Identify the Type and Source of Contamination
Look through the translucent reservoir wall without opening the cap. Check for sediment resting on the bottom, unusual cloudiness, droplets, damaged plastic, and signs of leakage around the attachment points. A flashlight held beside the reservoir may improve visibility.
Remember that fluid can darken with use while a reservoir remains clean. If the fluid level is low, do not assume that dirt is the cause. Check for worn friction materials and hydraulic leaks. If oil, fuel, power-steering fluid, or another unknown liquid may have entered, do not proceed with routine cleaning; professional diagnosis of the whole brake system is needed.
Step 02: Check the Vehicle’s Brake Fluid and Service Instructions
Find the specified fluid grade on the reservoir cap or in the owner’s manual. DOT 3, DOT 4, DOT 5.1, and silicone DOT 5 are not interchangeable simply because their names look similar. Use the fluid specified for that particular vehicle.
Next, check the service manual to determine whether the reservoir is removable, what holds it in place, and whether reservoir removal requires master-cylinder or wheel-circuit bleeding. Some vehicles share the reservoir with a hydraulic clutch. Others have electronic brake controls that require additional precautions. Do not open or disconnect components until these requirements are clear.
Step 03: Park Safely and Protect the Work Area
Park on a level surface, set the parking brake, switch off the vehicle, and keep the keys away from the work area. Follow any special shutdown procedure for a hybrid, electric, or electronically controlled brake system. Allow nearby hot components to cool.
Wear gloves and eye protection. Cover adjacent painted panels because glycol-based brake fluid can damage finishes. Put a clean collection tray beneath the work area and keep the reservoir opening away from blowing dust. Prepare an appropriate container for discarded fluid before taking off the cap. Never pour waste fluid into a drain.
Step 04: Clean the Reservoir Exterior and Cap
Wipe the top and sides of the reservoir, especially the seam around the cap and connections leading into the master cylinder. Use a clean cloth and a cleaner approved for exterior use if ordinary wiping is insufficient. Avoid spraying products toward the filler opening or electrical connectors.
Ford’s brake-fluid service guidance specifically directs owners to clean the reservoir and cap before opening them so dirt or water does not enter. Once the surrounding area is clean, carefully remove the cap and set it on a clean surface. Wipe the underside with a lint-free cloth, without damaging the flexible diaphragm or seal.
Step 05: Inspect the Inside Without Pushing Dirt Into the Ports
With the cap removed, look at the fluid surface and accessible reservoir walls. Notice whether particles are floating, settled, or stuck to the plastic. Check the diaphragm for damage and make sure no loose fibers or dirt have fallen into the opening.
Avoid stirring sediment with a screwdriver, brush, cotton swab, or other improvised tool. Loose particles can migrate into the master cylinder’s feed passages. If the reservoir appears clean and you only wanted to remove grime around the cap, reinstall the cap correctly and finish with the final inspection. There is no benefit in opening the hydraulic system unnecessarily.
Step 06: Extract Old Fluid Only When the Service Plan Requires It
If the reservoir needs to be removed or the brake fluid is being renewed, use a clean dedicated syringe or extractor to withdraw the fluid into an approved waste container. Keep the extractor tip away from the bottom so it does not grind accumulated grit into the outlet areas.
If you are keeping the reservoir installed and are not performing a full bleed, never lower the fluid enough to expose the master-cylinder feed ports. Drawing air into those openings can leave the pedal soft and require additional bleeding. Fluid extraction alone is not a complete brake-fluid flush because old fluid remains in the lines, ABS unit, calipers, and wheel cylinders.
Step 07: Remove the Reservoir Only If the Design Permits It
Follow the manufacturer-approved removal sequence. Depending on the vehicle, this may involve disconnecting a fluid-level sensor, undoing a retaining screw or pins, isolating a clutch-feed hose, and lifting the reservoir from rubber grommets. Some procedures require taking the master cylinder off the vehicle first.
Keep open passages protected from dust and moisture using appropriate clean caps or plugs. Never lever aggressively against the plastic reservoir or aluminum cylinder body. If a fitted reservoir will not release as described in the manual, do not force it. A cracked outlet or distorted sealing surface can cause brake-fluid leakage after reassembly.
Step 08: Clean the Detached Reservoir With an Approved Material
Once the reservoir is fully detached, follow its specific cleaning instructions. The 2006 Isuzu i-280 reservoir service procedure calls for denatured alcohol or an equivalent cleaner followed by drying with clean, non-lubricated, filtered air. That instruction is model-specific, not permission to pour alcohol into every vehicle’s installed brake reservoir.
Other service instructions specify cleaning reusable components with fresh brake fluid. Work gently around baffles and narrow compartments. Do not use gasoline, engine degreaser, mineral spirits, or petroleum-based cleaners. Do not add soap and water unless an applicable procedure explicitly permits them and explains how to eliminate every trace of moisture afterward.
Step 09: Dry the Reservoir and Examine Its Seals
A cleaned reservoir must be completely free of cleaner, water, lint, and loose debris before it is fitted again. Use only the drying method approved for that part. If filtered, oil-free air is specified, use the prescribed equipment carefully; ordinary shop-air systems can carry oil or moisture.
Inspect the reservoir for cracks, warped mounting outlets, stubborn deposits, damaged baffles, and discoloration that hides the fluid level. Examine the rubber grommets, diaphragm, and level-sensor parts for wear or distortion. Replace seals when directed, especially if the reservoir has been separated from the master cylinder. Reusing damaged parts only because they still appear to fit is not worth the leak risk.
Step 10: Reinstall the Reservoir and Reconnect Everything
Ensure all openings and mating surfaces are clean. Install new seals in their specified positions, then lubricate them only with the manufacturer-approved fluid. Seat the reservoir evenly without forcing its outlets sideways. Refit its retaining hardware and reconnect the fluid-level sensor and any approved clutch-feed connection.
Use service-manual tightening specifications for fasteners and fittings. Check that the container is securely mounted, its seals are seated, and no wiring or hoses are pinched. If the master cylinder itself was removed, reinstall it according to the vehicle’s separate master-cylinder service procedure.
Step 11: Refill With Fresh Fluid and Bleed the System if Needed
Fill the reservoir using fresh fluid from a clean, sealed container. Follow the specified fill range rather than automatically filling to the very top. Reinstall the cap to limit moisture and debris exposure when the system is not being serviced.
If the reservoir was removed, a feed port was exposed, or a hydraulic connection was opened, follow the manufacturer’s required master-cylinder and brake-circuit bleeding procedures. Some ABS systems require a scan-tool-assisted bleed when air reaches the hydraulic control unit. Do not assume that topping up the reservoir removes air. Keep the fluid level adequately high during every bleeding operation.
Step 12: Check for Leaks and Verify Brake Pedal Operation
Inspect the reservoir connections, grommets, cap, hoses, and any disturbed hydraulic lines for fluid seepage. Confirm that the fluid-level warning system is connected and that the level remains within its specified range.
With the vehicle stationary, check pedal response according to its service procedure. A pedal that feels abnormally soft, travels excessively, or slowly sinks needs diagnosis before driving. Recheck for leaks after any required bleeding. Do not road-test a vehicle with uncertain braking; arrange professional inspection or transport instead.
What Should Never Go Inside a Brake Fluid Reservoir?
Do not put engine oil, power-steering fluid, petroleum degreaser, gasoline, or general-purpose household cleaner into an installed reservoir. These products can contaminate the fluid and attack rubber seals. A spray labeled brake cleaner is not automatically approved for the reservoir’s interior or its plastic components.
The Ram brake master-cylinder fluid guidance warns against petroleum contamination and recommends keeping brake fluid clean and protected from moisture. That is why an unapproved cleaner is a poor shortcut even if it appears to remove stains quickly.
Never pour water into an installed reservoir to rinse it. If water is part of a documented cleaning process for a detached component, the part must be dried completely before reuse. Do not use a wire brush or abrasive pad that can shed particles or scratch plastic.
Does Cleaning the Reservoir Replace a Brake Fluid Flush?
No. Reservoir cleaning addresses the container and accessible deposits, while a brake fluid flush replaces fluid throughout the hydraulic system using the prescribed procedure. Removing fluid from the top does not exchange fluid trapped in brake lines, calipers, ABS passages, or wheel cylinders.
If the reservoir was merely dusty outside, there is no reason to flush the brakes because of that dust alone. If the brake fluid is overdue for replacement, follow the vehicle’s maintenance schedule. If foreign liquid, rubber fragments, or significant sludge is present, first identify how it entered. The repair may require more than cleaning and flushing, particularly when seals have been chemically damaged.
When Replacing the Reservoir Is Safer Than Cleaning It
Replace a reservoir that is cracked, leaking, distorted, or so internally stained that the fluid level cannot be checked reliably. Replacement may also be sensible when internal baffles prevent complete removal of debris or when an approved cleaning procedure is unavailable.
Select a reservoir that matches the exact master cylinder and vehicle configuration. Its mounting shape, outlet spacing, level sensor, cap, and any clutch-fluid connection must be compatible. Replace required seals and retainers rather than improvising a fit. If contamination has spread beyond the reservoir, replacing that one plastic part will not make the hydraulic system safe by itself.
FAQs About How to Clean Brake Master Cylinder Reservoir
Can You Clean a Brake Master Cylinder Reservoir Without Removing It?
Yes, you can clean the exterior and cap without removal. You can also inspect the fluid through the filler opening, but deep internal washing is generally inappropriate while the reservoir remains connected to the brake system.
Can You Use Brake Cleaner Inside the Reservoir?
Not unless the specific vehicle or component service instructions approve that product for internal cleaning. Many brake-cleaner sprays are not intended for plastic reservoirs and rubber seals. Follow the approved reservoir-cleaning procedure instead.
Is It Safe to Clean the Reservoir With Water?
Only when an applicable procedure permits cleaning a detached reservoir with water and requires complete drying. Never pour water into an installed reservoir or leave moisture behind before refilling it with brake fluid.
Will a Dirty Reservoir Cause a Soft Brake Pedal?
Dirt alone does not always change pedal feel. A soft pedal may indicate air, leaking fluid, damaged seals, or another hydraulic problem. Contamination that damages components requires diagnosis and repair, not simply a cleaner container.
Do You Have to Bleed Brakes After Cleaning the Reservoir?
Not when you only wipe the exterior or cap without opening the hydraulic system. Bleeding may be necessary after removing the reservoir, exposing its feed ports, or disconnecting lines. Follow the vehicle-specific procedure.
Keep the Brake Master Cylinder Reservoir Clean Without Risking Brake Performance
The safest way to handle how to clean brake master cylinder reservoir is to match the work to the problem. Exterior dust usually needs only a careful wipe, while internal sediment may require approved reservoir removal, detailed cleaning, and new seals. Dark fluid alone is a reason to check fluid condition and service history, not automatically to scrub the tank.
Use only the specified brake fluid and approved cleaning materials, keep contaminants away from open passages, and complete any required bleeding and leak checks. If the reservoir is damaged, contaminated by petroleum products, or connected to a system you cannot safely service, replacement and qualified brake-system inspection are the better choices.