How to Remove a Brake Master Cylinder: Tools, Steps, and Tips
To remove a brake master cylinder, identify its mounting points, protect the surrounding paint, disconnect the brake fluid sensor and hydraulic lines, then unbolt the cylinder from the brake booster or firewall. Carefully lift it out without bending the brake pipes, and cap the open connections to prevent contamination. The exact sequence depends on the vehicle, so its factory service manual takes priority.
On many conventional gasoline cars, the master cylinder is bolted to a round brake booster behind the fluid reservoir. Removal may require clearing nearby air-intake parts or battery components. Some vehicles also share a reservoir with the hydraulic clutch, creating another connection to handle.
This repair opens a safety-critical hydraulic system. Brake fluid can damage paint, and trapped air after reassembly can compromise braking. Certain ABS, hybrid, electric, and brake-by-wire systems require special depressurization or diagnostic procedures; ordinary removal instructions may be unsafe for them.
In this article, I explain how to remove a brake master cylinder step by step, which tools to use, how to handle brake lines and mounting hardware, and what to inspect afterward. You’ll also learn when the booster can stay installed, what reinstallation requires, and which problems call for professional service.
How to Remove a Brake Master Cylinder: Quick Overview
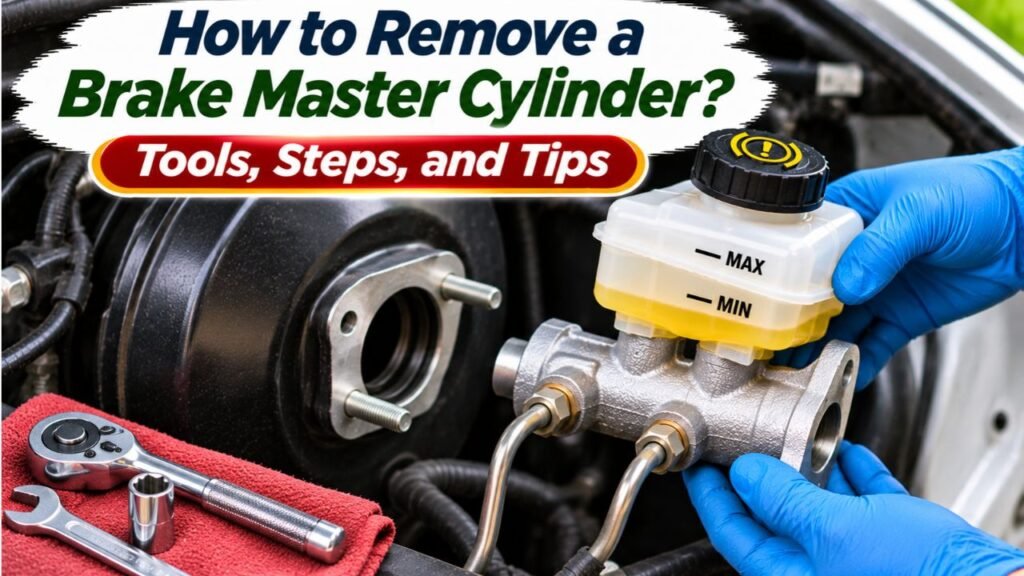
On many conventional passenger vehicles, removing the brake master cylinder involves disconnecting the hydraulic lines and removing the fasteners holding it to the brake booster.
The basic procedure is relatively straightforward, but the hydraulic system requires careful handling.
Brake Master Cylinder Removal Summary
| Step | Main Task | Important Precaution |
| 1 | Confirm the correct service procedure | Check ABS and electronic brake requirements |
| 2 | Secure the vehicle | Prevent movement and unintended system activation |
| 3 | Locate the master cylinder | Identify the reservoir, brake lines, and mounting points |
| 4 | Clear surrounding components | Avoid damaging hoses and wiring |
| 5 | Protect painted surfaces | Brake fluid can damage paint |
| 6 | Disconnect electrical connectors | Release locking tabs carefully |
| 7 | Prepare for fluid loss | Use a collection pan and appropriate plugs |
| 8 | Loosen brake line fittings | Use a flare-nut wrench |
| 9 | Remove mounting nuts or bolts | Support the cylinder during removal |
| 10 | Disconnect remaining hydraulic lines | Avoid bending or twisting the pipes |
| 11 | Separate the cylinder from its mounting | Protect the booster pushrod and seal |
| 12 | Remove and inspect the assembly | Cap openings and examine for leaks |
The exact order of loosening the brake lines and mounting fasteners can vary.
For example, Brembo’s official brake master cylinder replacement instructions recommend loosening the hydraulic pipe fittings, removing the mounting fasteners, and then fully disconnecting the pipes while carefully withdrawing the cylinder.
Other service procedures may specify disconnecting the pipes before removing the mounting nuts.
Key Takeaway: A conventional master cylinder is usually removed by disconnecting its hydraulic connections and mounting fasteners. However, vehicle-specific brake service instructions must determine the exact procedure.
Where Is the Brake Master Cylinder Located?
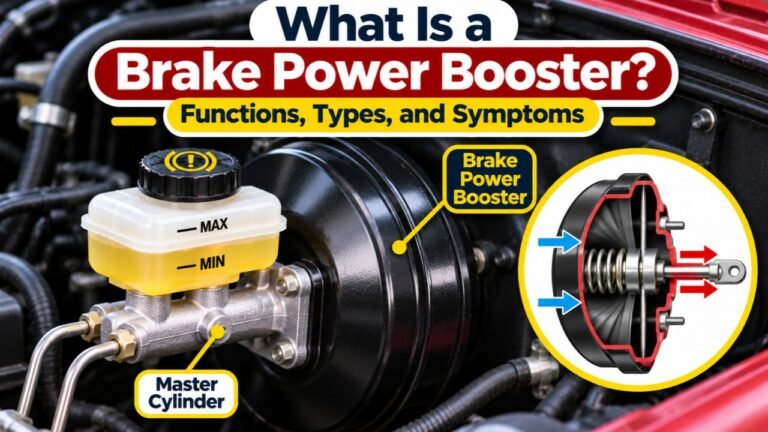
On many conventional passenger cars, the brake master cylinder is mounted in the engine compartment against the brake booster.
The booster is usually attached to the firewall, which separates the engine compartment from the passenger cabin.
How to Identify the Master Cylinder
Look for a component with:
- A brake fluid reservoir
- A metal cylinder housing
- Hydraulic brake pipes connected to it
- Mounting nuts or bolts
- A connection to the brake booster or firewall
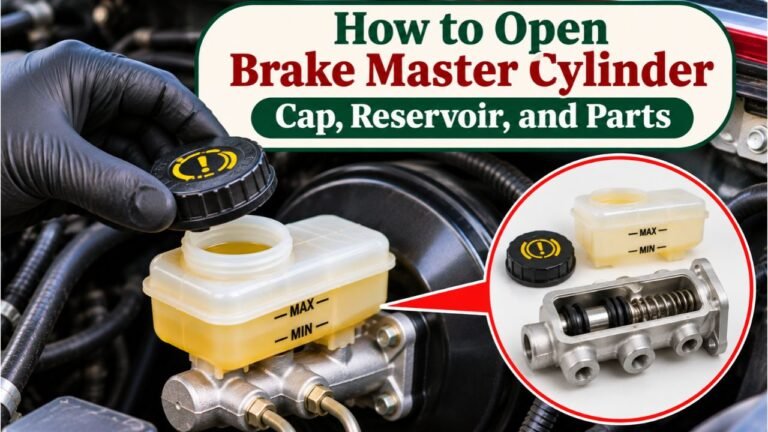
The reservoir is frequently made from translucent plastic.
It may display MIN and MAX fluid-level markings.
Where Is It on a Left-Hand-Drive Car?
On many U.S.-market left-hand-drive vehicles, the brake master cylinder is located toward the driver’s side of the engine compartment.
However, the exact position varies.
Some vehicles have additional components that partially conceal it.
Is the Master Cylinder Always Attached to a Brake Booster?
No.
Many conventional vehicles use a vacuum booster, but others use different brake-assist systems.
Some older vehicles have manual brakes without a booster.
Modern vehicles may use electric or integrated hydraulic pressure-generating assemblies.
The mounting and removal procedures can differ substantially.
How Can You Avoid Removing the Wrong Part?
Identify the actual master cylinder before disconnecting anything.
The brake fluid reservoir, clutch master cylinder, ABS hydraulic unit, and brake booster are separate components or assemblies, although some may be closely connected.
Consult a model-specific service diagram if the layout is unclear.
What Tools Do You Need to Remove a Brake Master Cylinder?
Using the correct tools reduces the risk of damaging brake line fittings, nearby components, and the master-cylinder mounting hardware.
Brake Master Cylinder Removal Tools
| Tool or Material | Purpose |
| Flare-nut wrench set | Loosens hydraulic brake line fittings |
| Socket and ratchet set | Removes mounting nuts and bolts |
| Combination wrenches | Accesses certain mounting hardware |
| Brake fluid siphon or syringe | Removes reservoir fluid when the procedure requires it |
| Drain pan | Collects discharged brake fluid |
| Approved brake line plugs or caps | Protects open hydraulic fittings |
| Clean protective covers | Protects surrounding painted areas |
| Safety glasses | Protects against fluid splashes |
| Chemical-resistant gloves | Reduces skin contact |
| Flashlight | Helps locate fasteners and connections |
| Plastic trim removal tool | Releases certain clips or covers |
| Torque wrench | Tightens fasteners correctly during reinstallation |
| Vehicle service manual | Provides exact procedures and specifications |
Additional equipment may be required for ABS or electronically controlled brake systems.
Why Should You Use a Flare-Nut Wrench?
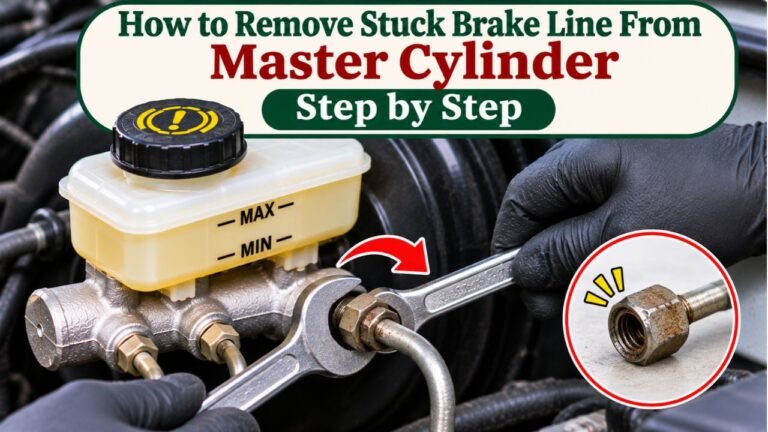
A flare-nut wrench, sometimes called a line wrench, is designed to grip more sides of a hydraulic fitting than a standard open-end wrench.
Brake line fittings can be difficult to loosen because of corrosion or age.
Using an ordinary open-end wrench increases the risk of rounding the fitting.
A damaged fitting may require brake line replacement.
What Size Wrench Fits the Brake Lines?
Sizes vary by manufacturer and vehicle.
Many passenger vehicles use metric brake line fittings, but you should confirm the correct size rather than assuming a particular wrench will fit.
Do You Need to Remove the Wheels?
Not usually to remove the master cylinder itself.
However, after replacement, the braking system may need to be bled at the wheel brakes.
Depending on access and the service procedure, wheel removal may be necessary for that work.
Do You Need a Brake Bleeder?
If the master cylinder is removed and replaced, appropriate hydraulic bleeding is generally necessary.
Some vehicles require a pressure bleeder or a diagnostic scan tool.
Removing the cylinder is only one part of the complete repair.
Safety Precautions Before Removing a Brake Master Cylinder
A master cylinder is a safety-critical component.
Opening the hydraulic brake system without appropriate preparation can introduce air, contamination, or fluid loss.
Confirm the Brake System Type
Before starting, determine whether the vehicle uses:
- Conventional vacuum-assisted hydraulic brakes
- Hydraulic brake assist
- ABS
- Electronic brake assist
- Integrated brake control
- Brake-by-wire technology
These systems may require different servicing procedures.
Check for Stored Hydraulic Pressure
Certain electronically controlled and accumulator-equipped braking systems can retain hydraulic pressure even after the vehicle is switched off.
Some systems may activate automatically under particular conditions.
Do not disconnect brake lines until the manufacturer’s required depressurization and disabling procedures have been completed.
Simply turning off the ignition or disconnecting the battery does not guarantee that every braking system has been depressurized.
Secure the Vehicle
Park on level ground.
Use suitable wheel chocks and follow the manufacturer’s parking and shutdown instructions.
Prevent unintended vehicle movement.
Protect the Paint
Glycol-based brake fluid can damage painted surfaces.
Cover nearby body panels and place an appropriate collection pan below the work area.
If brake fluid spills onto paint, promptly rinse it according to the vehicle and product manufacturer’s instructions.
Keep Dirt Out of the System
Dirt and foreign materials can damage hydraulic seals and interfere with brake operation.
Clean the exterior of the master cylinder and fittings before opening the system.
Use appropriate protective caps when hydraulic connections are disconnected.
Wear Protective Equipment
Use safety glasses and chemical-resistant gloves.
Avoid direct skin or eye exposure to brake fluid.
Use the Correct Brake Fluid
If the master cylinder will be reinstalled or replaced, use only the fluid specification approved for the vehicle.
Do not mix silicone-based DOT 5 with glycol-based DOT 3, DOT 4, or DOT 5.1.
Know When to Stop
If the service manual requires equipment or procedures you don’t have, do not continue dismantling the brake system.
Arrange professional repair instead.
How to Remove a Brake Master Cylinder Step by Step
The following instructions describe a typical conventional master cylinder mounted to a brake booster.
They are not a universal procedure for electronic or integrated braking systems.
Step 1: Consult the Vehicle’s Service Manual
Find the factory master-cylinder removal procedure for the exact year, make, model, and brake configuration.
Check:
- Removal sequence
- Brake line arrangement
- Required fluid handling
- Electrical connector locations
- Booster preparation
- Mounting fastener specifications
- Seal replacement requirements
- Reinstallation and bleeding procedures
This preparation is important because the replacement procedure affects how the cylinder should be removed.
For example, the O’Reilly Auto Parts brake master cylinder replacement guide demonstrates removing the electrical connector, mounting nuts, and hydraulic brake lines from a conventional booster-mounted assembly.
However, the guide also emphasizes checking the specific procedure for the vehicle being serviced.
Step 2: Park and Prepare the Vehicle
Park on a level surface and secure the vehicle against movement.
Switch off the engine according to the service instructions.
On many conventional vehicles, disconnecting the negative battery terminal may be part of the preparation.
However, battery disconnection and brake depressurization requirements differ for certain modern electronic, hybrid, and electric systems.
Follow the manufacturer’s instructions rather than using a universal battery-disconnection procedure.
Step 3: Release Brake Booster Vacuum if Required
For certain conventional vacuum-assisted brake systems, the service procedure calls for pressing the brake pedal several times with the engine off.
This releases stored vacuum assistance.
Some manufacturers specify this step to prevent problems when separating the master cylinder from the booster.
However, this is not a substitute for the special hydraulic depressurization required by some electronically controlled systems.
Do not apply the same procedure to an unfamiliar braking system.
Step 4: Locate and Inspect the Master Cylinder
Open the hood and identify the master-cylinder assembly.
Inspect its position relative to:
- Brake booster
- Firewall
- Brake fluid reservoir
- Hydraulic brake lines
- Electrical connectors
- Nearby hoses
- Air intake components
Check whether any brackets or covers must be removed for access.
Take photographs of the original connections if useful.
Step 5: Remove Components Blocking Access
Depending on the vehicle, you may need to remove or reposition certain nearby components.
These can include:
- Air cleaner housing
- Air intake duct
- Battery cover
- Battery tray
- Wiring brackets
- Plastic engine covers
Remove only what the factory procedure requires.
Do not pull on wiring or bend brake pipes to create space.
Step 6: Clean the Master Cylinder Area
Before opening the hydraulic system, clean the exterior of the reservoir and master cylinder.
Pay particular attention to the brake line fittings.
Dirt around the connections could enter the lines during removal.
Use a suitable cleaning method that won’t introduce contamination into the hydraulic system.
Protect the surrounding paint.
Step 7: Prepare for Brake Fluid Loss
Place an appropriate drain pan under the master cylinder.
Depending on the service procedure, some fluid may be removed from the reservoir using a clean, compatible suction device.
Other procedures allow the assembly to remain filled until it has been removed.
Avoid draining the entire braking system unless the required service procedure calls for it.
Never reuse removed brake fluid.
Step 8: Disconnect the Brake Fluid Level Sensor
Many master-cylinder reservoirs have an electrical connector for a brake fluid level sensor.
Locate the connector.
Release its locking tab carefully and disconnect it.
Do not pull directly on the wires.
Some vehicles have additional electrical connections or brackets.
Identify each before removal.
Step 9: Identify the Hydraulic Brake Lines
Most modern conventional tandem master cylinders have separate hydraulic connections serving two brake circuits.
The brake pipes are commonly made of steel or another approved metal.
Identify the connections and their original positions.
If necessary, label them in a way that won’t contaminate the hydraulic fittings.
Some manual-transmission vehicles have an additional clutch fluid connection from a shared reservoir.
Don’t confuse a reservoir supply hose with a pressurized brake pipe.
Step 10: Loosen the Brake Line Fittings
Use the correct flare-nut wrench.
Follow the manufacturer’s specified order.
On some vehicles, it is helpful to loosen the line fittings slightly while the master cylinder is still securely mounted.
The cylinder’s mounting helps prevent it from moving while the fittings are loosened.
Other procedures may require removing mounting fasteners before fully separating the hydraulic lines.
Do not force a seized fitting.
If a brake pipe begins twisting with its fitting, stop immediately.
The pipe may be damaged if the fitting is forced.
Step 11: Remove the Master Cylinder Mounting Nuts
Locate the fasteners attaching the master cylinder to the booster or firewall.
Many conventional booster-mounted units use two retaining nuts.
However, fastener arrangements vary.
Use the correct socket or wrench.
Support the master cylinder while removing the mounting hardware.
Avoid allowing the cylinder’s weight to hang from the brake lines.
Step 12: Disconnect the Hydraulic Lines Completely
Once the cylinder is adequately supported, disconnect the hydraulic lines in the manner specified by the service instructions.
Move each pipe only as much as necessary.
Do not sharply bend or deform the lines.
Brake pipes damaged during removal may require replacement.
Immediately protect open connections with suitable clean hydraulic-system caps or plugs.
Avoid using improvised materials that can shed debris or contaminate the fluid.
Step 13: Remove the Master Cylinder From the Booster
Carefully pull the master-cylinder assembly away from its mounting surface.
On a conventional booster-mounted system, the master cylinder usually separates from the booster without requiring booster removal.
Move it straight back where possible.
Avoid damaging:
- Booster pushrod
- Master-cylinder piston
- Mounting studs
- Sealing surfaces
- O-ring or gasket
- Nearby brake lines
Do not alter the booster pushrod adjustment unless the factory procedure specifically requires it.
Step 14: Inspect the Mounting Seal
Some master cylinders use an O-ring or other seal between the master cylinder and brake booster.
Inspect the seal and determine whether the service procedure requires replacement.
Also inspect the mounting surface for damage.
The exact sealing arrangement varies by vehicle.
Step 15: Place the Removed Cylinder in a Drain Pan
The removed assembly may still contain brake fluid.
Place it in a suitable collection pan.
Keep the open hydraulic ports protected.
Avoid spilling fluid onto the vehicle or the work surface.
Step 16: Inspect for Evidence of Leakage
Examine the rear of the master cylinder and the booster mounting area.
Brake fluid found around the rear seal can indicate master-cylinder leakage.
If fluid has entered the brake booster, additional inspection may be required.
The booster itself may also need attention.
Key Takeaway: Handle the brake pipes gently, protect every open hydraulic connection, and keep the booster pushrod and mounting surfaces undamaged during removal.
How to Remove a Brake Master Cylinder Without Removing the Brake Booster
On many conventional vehicles, the master cylinder can be removed while the brake booster remains attached to the firewall.
The booster and master cylinder are separate components.
Why the Booster Usually Stays in Place
The master cylinder is typically attached to studs or mounting points on the front of the booster.
Removing its mounting nuts allows the master cylinder to separate from the booster.
The booster remains connected to the firewall and brake pedal linkage.
Do You Need to Disconnect the Booster Vacuum Hose?
Not usually for a straightforward master-cylinder replacement.
The vacuum hose belongs to the booster.
If the factory procedure doesn’t require booster removal or repositioning, disconnecting the vacuum hose may be unnecessary.
Do You Need to Disconnect the Brake Pedal?
Generally, no.
On a conventional booster-mounted design, the brake pedal remains connected to the booster.
Disconnecting the pedal linkage is more commonly associated with removing the booster itself.
However, manual-brake systems and other designs may use different connections.
Can You Remove the Master Cylinder With the Booster Installed?
Yes, on many conventional cars.
However, limited engine-compartment space or additional components may affect access.
The factory service manual determines the correct method.
Can You Move the Master Cylinder Without Disconnecting Brake Lines?
Sometimes, but this is different from completely removing it from the vehicle.
During certain brake booster repairs, a technician may unbolt the master cylinder and move it aside while leaving the hydraulic pipes connected.
This can avoid opening the braking system.
When Is This Possible?
It may be possible when:
- The brake lines have enough movement available.
- The master cylinder can be safely supported.
- The factory procedure permits it.
- No hydraulic connections need to be opened.
What Are the Risks?
Moving the cylinder too far can bend or damage the brake pipes.
A pipe can crack or develop a leak if forced.
Never allow the master cylinder to hang by its hydraulic connections.
Does This Method Require Brake Bleeding?
If no hydraulic connections are opened and no air enters the system, bleeding may not be necessary.
However, this depends on the repair and the vehicle’s instructions.
Can You Fully Replace the Master Cylinder Without Disconnecting Brake Lines?
No.
Replacing the complete master cylinder generally requires disconnecting the hydraulic lines from the old unit and reconnecting them to the replacement.
Some vehicles also require disconnecting additional reservoir or clutch connections.
How to Remove a Brake Master Cylinder From the Brake Booster
Separating a conventional master cylinder from its booster requires care because the two components meet at a precisely designed mounting interface.
Check the Mounting Fasteners
Confirm that all master-cylinder mounting fasteners have been removed.
Do not confuse them with the booster mounting nuts inside the passenger compartment.
Pull the Cylinder Away Carefully
The master cylinder should separate from its mounting studs or interface according to the service procedure.
Avoid pulling at an angle that could damage the pushrod or seal.
What if the Master Cylinder Is Stuck?
Corrosion, contamination, or a tight seal may make the assembly difficult to separate.
Do not strike the hydraulic body aggressively or pry against the pushrod.
Use the manufacturer’s approved removal method.
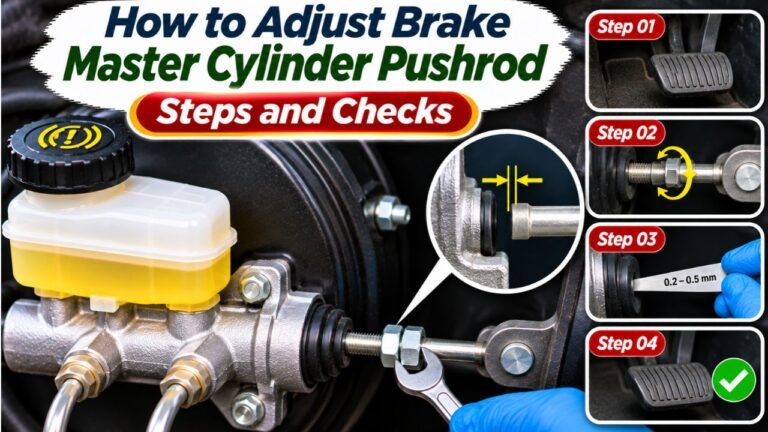
Should You Adjust the Booster Pushrod?
Not unless the service procedure requires it.
Pushrod position can affect brake pedal travel and hydraulic pressure release.
An incorrect adjustment may cause brake drag or other serious problems.
What if Brake Fluid Is Inside the Booster?
This can indicate leakage from the rear of the master cylinder.
The booster may require additional inspection or repair.
Simply installing a new master cylinder without inspecting the affected area may leave another problem unresolved.
How to Remove Brake Lines From a Master Cylinder Without Damage
Hydraulic brake pipes deserve particular attention during removal.
They carry pressure and must remain structurally sound.
Use a Proper Line Wrench
A flare-nut wrench provides better contact with the fitting than a standard open-end wrench.
Use the exact size required.
Clean the Fitting First
Dirt and corrosion can interfere with wrench engagement.
Clean the exterior carefully before loosening the connection.
Avoid Twisting the Brake Pipe
If the line rotates with the fitting, the pipe may be seized to the nut.
Forcing it can damage the pipe.
Stop and use an appropriate professional repair method.
Do Not Force a Rounded Fitting
A badly rounded or seized fitting may require additional work or brake pipe replacement.
Improvised methods can damage the connection.
Protect the Open Line
Use an approved clean cap or plug after disconnection.
Do not insert dirty cloth, tape fragments, or other contamination into the hydraulic opening.
Do Brake Lines Need Replacing After Master Cylinder Removal?
Not automatically.
However, any damaged, corroded, deformed, or leaking pipe must be repaired according to the vehicle manufacturer’s requirements.
Never reuse a hydraulic pipe that has been compromised during removal.
Does the Brake Fluid Reservoir Need to Be Removed?
Not always.
Many master cylinders are removed with their reservoirs still attached.
Other designs require the reservoir to be disconnected or transferred separately.
Reservoir Attached to Master Cylinder
Some replacement assemblies include the reservoir.
Others are supplied without one.
If the reservoir remains with the old cylinder, additional steps may be needed before installing the replacement.
Separate Reservoir
Some vehicles use a remote reservoir or fluid hose connections.
These must be handled according to the service instructions.
Shared Brake and Clutch Reservoir
Certain manual-transmission vehicles supply the brake and hydraulic clutch systems from a shared reservoir.
A clutch fluid hose may need to be disconnected as part of master-cylinder removal.
This connection must be handled without introducing contamination.
Can You Reuse the Old Reservoir?
Sometimes, if the replacement part and manufacturer permit it and the reservoir is in suitable condition.
However, seals or grommets may require replacement.
Inspect the reservoir for cracks, damage, and contamination.
Should You Wash the Reservoir With Water?
Not as a generic procedure.
Water can contaminate glycol-based brake fluid.
Use only the cleaning method specified by the component manufacturer.
Do not introduce household cleaners or unapproved solvents into the hydraulic system.
How to Remove a Brake Master Cylinder With ABS
Some ABS-equipped vehicles use a master cylinder that can be removed similarly to a conventional system.
However, other models have additional requirements.
Does ABS Change Master Cylinder Removal?
It can.
ABS hydraulic components may be positioned near the master cylinder, and some vehicles have special bleeding procedures.
The exact design matters.
What About Electronic Brake Systems?
Certain modern vehicles use electronically controlled hydraulic braking systems.
Some contain pressure accumulators or pumps that can activate unexpectedly.
Opening hydraulic lines without following the proper disabling and depressurization procedure can be hazardous.
Can Disconnecting the Battery Make the System Safe?
Not necessarily.
Stored hydraulic pressure may remain.
Some systems also require specific power-down steps.
Follow the manufacturer’s procedure.
Can You Use a Regular Brake Bleeding Kit Afterward?
Sometimes.
However, if air enters the ABS hydraulic unit, certain vehicles require a diagnostic scan tool to operate internal valves during bleeding.
Example of a Manufacturer-Specific Procedure
Mitsubishi’s factory master-cylinder removal and installation instructions show separate operations for the reservoir level connector, brake pipe connections, mounting nuts, and master-cylinder bleeding.
The instructions also warn against altering the brake booster pushrod adjustment.
This illustrates why manufacturer-specific procedures matter even when the basic master-cylinder layout appears familiar.
Key Takeaway: Do not assume the conventional removal procedure applies to every ABS, hybrid, or electronically controlled braking system.
What Should You Do After Removing the Brake Master Cylinder?
Removing the cylinder is only part of the repair.
The next steps depend on whether it will be replaced, inspected, or temporarily moved for another repair.
Inspect the Old Cylinder
Check for:
- Visible fluid leakage
- Damaged seals
- Corrosion
- Contaminated fluid
- Reservoir damage
- Worn mounting areas
Some problems may not be visible externally.
Compare the Replacement Part
If installing a new master cylinder, compare its specifications with the original.
Confirm:
- Correct vehicle application
- Hydraulic port positions
- Port thread specifications
- Mounting pattern
- Piston and bore specifications
- Reservoir arrangement
- Booster compatibility
- Required seals
Do not assume visually similar master cylinders are interchangeable.
Inspect the Brake Booster
Check the mounting area for fluid leakage or damaged sealing components.
A leaking rear master-cylinder seal may affect the booster.
Replace Required Seals
Some master cylinders use a specific O-ring or mounting seal.
Install new seals when required by the service information.
Prepare the Hydraulic System for Reassembly
Keep exposed connections clean and protected.
Do not allow dirt, moisture, or incorrect fluid to enter the system.
Does a New Master Cylinder Need to Be Bench Bled?
Many conventional replacement master cylinders require a bench-bleeding or pre-bleeding procedure.
However, the exact method varies.
What Is Bench Bleeding?
Bench bleeding removes trapped air from a master cylinder before installation.
It helps prepare the internal hydraulic chambers for normal operation.
Why Is It Important?
A replacement master cylinder may contain air.
If the air isn’t removed properly, the brake pedal can remain soft even after the hydraulic lines are connected.
Do All Master Cylinders Use the Same Procedure?
No.
Some manufacturers specify bench bleeding.
Others use an on-vehicle bleeding method.
Integrated electronically controlled systems may require specialized service procedures.
Can You Skip Bench Bleeding?
Not when the manufacturer requires it.
The correct bleeding method must be completed before the vehicle returns to service.
What if the Pedal Remains Spongy?
Trapped air, a hydraulic leak, an ABS bleeding requirement, or another problem may remain.
Do not drive with abnormal pedal response.
How to Install the Brake Master Cylinder After Removal
Installation is not simply the reverse of removal in every case.
Additional bleeding, seal replacement, and hydraulic checks may be required.
Confirm the Correct Replacement
Use the model-specific part.
Check the master-cylinder bore, hydraulic fittings, mounting design, and other required specifications.
Prepare the New Cylinder
Complete any required pre-bleeding procedure.
Install the specified seals and grommets.
Position the Cylinder Correctly
Align it with the booster or firewall mounting points.
Protect the pushrod and sealing surfaces.
Install the Mounting Fasteners
Use the required fasteners and tighten them to the manufacturer’s specified torque.
Reconnect Hydraulic Lines
Start threaded connections carefully to prevent cross-threading.
Use the specified tightening torque.
Do not force the fittings.
Restore Additional Connections
Reconnect the reservoir sensor, approved hoses, mounting brackets, and other components removed for access.
Fill With the Correct Fluid
Use fresh, manufacturer-approved brake fluid.
Do not reuse drained fluid.
Bleed the Hydraulic System
Follow the exact bleeding procedure required by the vehicle.
Some ABS or electronic systems require specialized diagnostic equipment.
Check for Leaks and Proper Operation
Before any vehicle movement, confirm:
- Correct reservoir level
- No visible hydraulic leaks
- Correctly tightened hydraulic fittings
- Normal pedal response
- No unresolved brake-system warnings
- Completion of all manufacturer-required tests
If any part of the hydraulic system remains questionable, have the vehicle inspected by a qualified technician.
Can You Reuse a Brake Master Cylinder After Removing It?
Sometimes.
If the cylinder was removed to access another component and is confirmed serviceable, reinstallation may be permitted.
However, seals and other components may need replacement.
When Reuse May Be Appropriate
Reuse may be possible when:
- The cylinder has no known defect.
- The internal components haven’t been damaged.
- The mounting surfaces are suitable.
- The manufacturer permits reuse.
- Correct seals and procedures are followed.
When Replacement Is Better
Replacement may be necessary when:
- Hydraulic pressure cannot be maintained.
- Internal seals have failed.
- The housing is damaged.
- External leakage is present.
- Corrosion or contamination has compromised the assembly.
- The manufacturer specifies replacement.
Can You Repair a Master Cylinder?
Certain older designs may have rebuilding options.
However, many modern master cylinders are replaced as complete assemblies.
The correct approach depends on the particular component.
Should You Disassemble It?
Not unless the manufacturer permits disassembly and provides the necessary instructions.
Some master cylinders are not designed for internal repair.
Improper disassembly can damage components or compromise braking safety.
Common Problems When Removing a Brake Master Cylinder
Master-cylinder removal may become difficult because of corrosion, limited access, or vehicle-specific components.
Brake Line Fittings Are Stuck
Corrosion may seize the fittings.
Do not force a fitting that begins twisting the pipe.
A damaged line may require replacement.
Mounting Nuts Won’t Loosen
Rust or restricted access may make removal difficult.
Use an appropriate tool and approved service method.
Avoid damaging mounting studs or surrounding components.
The Cylinder Is Stuck to the Booster
Corrosion or tight mounting seals may hold the assembly in place.
Do not pry against the booster pushrod or damage sealing surfaces.
Brake Fluid Keeps Dripping
Residual fluid may remain inside the reservoir and cylinder.
Collect it in a suitable container and protect exposed openings.
Do not allow the fluid to contact painted surfaces.
The Reservoir Won’t Separate
Some reservoirs are retained by grommets, clips, or other mounting features.
Confirm the correct removal procedure before applying force.
Electrical Connector Is Stuck
Release the locking mechanism properly.
Avoid pulling on the wiring.
Damaged fluid-level sensor wiring may trigger warning messages.
Brake Pipes Don’t Line Up With the New Cylinder
The replacement may be incorrect, or the cylinder may not be positioned properly.
Never force the pipes into the hydraulic ports.
The Brake Pedal Feels Soft After Replacement
Possible causes include:
- Trapped air
- Incomplete bleeding
- Incorrect master-cylinder preparation
- Hydraulic leakage
- ABS bleeding requirements
- Incorrect component installation
Do not drive until the problem is corrected.
How Long Does It Take to Remove a Brake Master Cylinder?
The time varies by vehicle design and accessibility.
A straightforward conventional master-cylinder removal may take approximately 30–90 minutes for an experienced technician.
However, this is only a rough estimate for removal, not a guaranteed repair time.
What Makes Removal Faster?
The process is generally simpler when:
- The cylinder is easily accessible.
- Hydraulic fittings are in good condition.
- No major components block access.
- The vehicle uses a conventional booster-mounted system.
- The correct tools and instructions are available.
What Can Make It Take Longer?
Removal may require additional time when:
- Brake line fittings are seized.
- The battery tray obstructs access.
- The reservoir has extra connections.
- The mounting area is corroded.
- The vehicle has a specialized braking system.
- Diagnostic procedures are required.
How Long Does Complete Replacement Take?
Replacing a master cylinder also involves installation, fluid service, bleeding, and verification.
These tasks may require considerably more time than removal alone.
A complex electronically controlled braking system can take longer and require specialized equipment.
Signs That the Brake Master Cylinder Needs Replacement
A suspected master-cylinder problem should be diagnosed before the component is removed.
Several symptoms can indicate hydraulic trouble.
Brake Pedal Slowly Sinks
A pedal that continues moving downward under steady pressure may indicate internal hydraulic bypass or an external leak.
A failing master cylinder is one possible cause.
Visible Fluid Leakage
Fluid around the master-cylinder housing or its mounting area may indicate seal failure.
However, leaking line fittings or reservoir connections can create similar symptoms.
Reduced Braking Performance
Failure to develop or maintain the required hydraulic pressure can reduce braking effectiveness.
This is a serious safety concern.
Spongy Brake Pedal
A soft pedal may result from trapped air, fluid vapor, leakage, or another hydraulic fault.
It doesn’t automatically prove master-cylinder failure.
Low Brake Fluid Level
The reservoir level may drop due to brake pad wear or hydraulic leakage.
The cause must be investigated.
Common Symptoms and Possible Causes
| Symptom | Possible Cause | Is Master Cylinder Replacement Certain? |
| Pedal slowly sinks | Internal bypass or external hydraulic leak | No |
| Fluid leaking from rear of cylinder | Possible master-cylinder seal failure | Requires inspection |
| Spongy pedal | Air, vapor, or another hydraulic problem | No |
| Low fluid level | Pad wear or leak | No |
| Hard pedal | Brake booster or assist problem | No |
| Brake warning light | Fluid level or braking-system issue | No |
| Weak braking | Hydraulic or mechanical fault | No |
Important: If the pedal sinks toward the floor, braking power decreases, or fluid is leaking, do not drive. Arrange professional diagnosis or towing.
Common Mistakes to Avoid During Master Cylinder Removal
Removing the Cylinder Without the Service Manual
Generic steps may not apply to the vehicle’s ABS or electronic braking system.
Disconnecting Pressurized Hydraulic Lines
Certain systems retain stored hydraulic pressure.
Follow the manufacturer-approved depressurization procedure.
Using the Wrong Wrench
An ordinary open-end wrench may damage brake line fittings.
Use the correct flare-nut wrench.
Bending Brake Pipes
Brake pipes must not be forced or sharply bent during removal.
Damaged pipes may leak or fail.
Leaving Hydraulic Connections Open
Open fittings can allow moisture, dirt, and foreign materials to enter.
Use suitable clean caps.
Damaging the Brake Booster Pushrod
The pushrod must remain correctly positioned.
Improper adjustment can affect brake application or release.
Forgetting the Mounting Seal
A missing or damaged seal can create problems with the master-cylinder-to-booster interface.
Replace it when required.
Using the Wrong Replacement Part
Port positions, mounting dimensions, bore specifications, and other details can differ.
Confirm the complete part application.
Skipping Master Cylinder Bleeding
A replacement cylinder may contain trapped air.
Follow the required bleeding procedure.
Reusing Contaminated Brake Fluid
Drained brake fluid may contain moisture or debris.
Use suitable fresh fluid.
Ignoring Brake Fluid Spills
Brake fluid can damage painted surfaces.
Protect surrounding areas and clean spills promptly.
Driving Before Confirming Brake Operation
A brake system with trapped air, leaks, or incorrect installation is unsafe.
Complete all required inspections and tests before returning the vehicle to service.
When Should a Professional Remove the Brake Master Cylinder?
Master-cylinder removal is not a good trial-and-error repair.
Professional service is especially important when the braking system includes specialized components or uncertain hydraulic problems.
Situations Requiring Extra Expertise
| Situation | Why Professional Service Matters |
| Integrated electronic brake system | May contain stored pressure and complex controls |
| Hybrid or electric vehicle | May require special activation and depressurization precautions |
| ABS unit contains air | Scan-tool bleeding may be necessary |
| Seized hydraulic fittings | Brake pipe damage is possible |
| Incorrect fluid introduced | Contamination may affect seals and hydraulic parts |
| Leaking brake booster interface | Additional components may require inspection |
| Unknown master-cylinder fault | Proper diagnosis prevents unnecessary replacement |
| Soft pedal after replacement | Braking system may remain unsafe |
| Manufacturer-specific bleeding process | Specialized tools or procedures may be required |
A qualified technician can verify the failed component, remove it using the proper procedure, and ensure the braking system operates correctly afterward.
Conclusion
Removing a brake master cylinder generally involves disconnecting its electrical and hydraulic connections, removing the mounting fasteners, and carefully separating it from the brake booster or firewall.
On many conventional passenger cars, the brake booster can remain installed during master-cylinder removal.
However, the exact procedure depends on the vehicle’s brake system design.
Before starting, verify the manufacturer-specific instructions, prepare the correct tools, and protect the vehicle from brake fluid spills.
Use a flare-nut wrench for hydraulic fittings and avoid twisting or damaging brake pipes.
Cap open hydraulic connections to prevent contamination.
When separating the cylinder from the booster, protect the mounting seal and pushrod.
After removal, inspect the assembly for leaks and other damage.
If replacing it, confirm that the new cylinder matches the vehicle and complete the required pre-bleeding, installation, hydraulic bleeding, and safety checks.
Some ABS, hybrid, electric, and electronically controlled braking systems require specialized equipment or procedures.
Never return a vehicle to service with a soft pedal, hydraulic leak, unresolved brake warning, or incomplete bleeding procedure. When the correct service process is uncertain, professional repair is the safest choice.
FAQs About How to Remove a Brake Master Cylinder
How Do You Remove a Brake Master Cylinder From a Car?
On many conventional cars, removal involves disconnecting the brake fluid sensor, preparing for fluid loss, loosening the hydraulic brake lines, removing the mounting nuts, and carefully separating the master cylinder from the brake booster.
Follow the vehicle’s specific service procedure.
Is It Hard to Remove a Brake Master Cylinder?
The mechanical removal may be relatively straightforward on a conventional vehicle.
However, brake fluid handling, seized fittings, electronic systems, and post-installation bleeding make the complete repair more demanding.
What Tools Do I Need to Remove a Master Cylinder?
Common tools include a flare-nut wrench, socket set, ratchet, fluid collection pan, suitable hydraulic caps, protective gloves, and safety glasses.
A torque wrench and brake bleeding equipment are generally needed for reinstallation.
Do You Have to Drain Brake Fluid Before Removing the Master Cylinder?
Not always.
Some service procedures specify removing fluid from the reservoir first, while others permit removal with the cap installed and residual fluid still inside.
Follow the manufacturer’s instructions and prepare to catch spills.
Do You Have to Remove the Brake Booster to Remove the Master Cylinder?
Usually not on conventional booster-mounted systems.
The master cylinder is commonly attached to the front of the booster with mounting nuts.
The booster can generally remain installed.
Can You Remove the Master Cylinder Without Disconnecting Brake Lines?
You may be able to unbolt and reposition the master cylinder without opening the hydraulic lines during certain booster repairs.
However, completely removing or replacing the master cylinder normally requires disconnecting its hydraulic connections.
Do You Need to Disconnect the Battery?
Some vehicle procedures require battery disconnection.
However, certain electronic braking systems have additional safety and shutdown requirements.
Use the exact vehicle-specific instructions.
Do You Need to Disconnect the Brake Pedal?
Usually not when removing a conventional master cylinder from a brake booster.
Brake pedal linkage disconnection is more commonly associated with booster removal or certain manual brake designs.
How Many Bolts Hold a Brake Master Cylinder?
Many conventional booster-mounted master cylinders use two mounting nuts.
However, the number and arrangement of fasteners vary by vehicle.
What Size Wrench Removes Brake Master Cylinder Lines?
Brake line fitting sizes vary.
Use the exact flare-nut wrench size required by the vehicle.
An incorrect wrench can damage the fittings.
Can You Remove a Master Cylinder Without Bleeding the Brakes?
Completely disconnecting and replacing a master cylinder generally requires appropriate hydraulic bleeding afterward.
If the cylinder is only repositioned and no hydraulic connections are opened, bleeding may not be necessary when permitted by the manufacturer.
Does a New Master Cylinder Need to Be Bench Bled?
Many conventional new master cylinders require bench bleeding or another specified pre-bleeding procedure.
However, the exact method varies by manufacturer and braking system.
Can a Brake Master Cylinder Be Removed With ABS?
Yes, but the approved procedure depends on the vehicle.
Some ABS-equipped systems use conventional removal steps, while others require specialized hydraulic or diagnostic procedures.
Will Removing the Master Cylinder Damage the Brake Booster?
Not when the correct procedure is followed.
However, forcing the assembly, damaging the pushrod, or mishandling the mounting seal can cause problems.
Brake fluid leakage into the booster can also require additional inspection.
What Happens if You Disconnect Brake Lines Without Capping Them?
Brake fluid may leak out, and air, dirt, or moisture can enter the open hydraulic connections.
Use suitable clean caps or plugs during removal.
How Do You Remove a Stuck Master Cylinder?
First confirm that all required fasteners and connections have been released.
If the cylinder remains seized, use the manufacturer’s recommended separation method.
Do not strike the assembly aggressively or pry against the booster pushrod.
Can You Reuse the Old Brake Fluid After Master Cylinder Removal?
No.
Drained brake fluid may contain moisture and contamination.
Use fresh fluid that meets the vehicle manufacturer’s specification.
Can You Reuse the Master Cylinder After Removing It?
Sometimes, if the cylinder is serviceable and the manufacturer permits reuse.
Required seals may need replacement.
A defective or leaking master cylinder should be repaired or replaced according to the service instructions.
How Long Does It Take to Remove a Brake Master Cylinder?
A straightforward conventional removal may take approximately 30–90 minutes for an experienced technician.
However, seized fittings, limited access, and specialized systems can increase the time.
Complete replacement takes longer because installation and bleeding are also required.
Can You Remove a Master Cylinder Without a Mechanic?
An experienced person with the correct tools and factory service information may be able to remove a conventional master cylinder.
However, improper work can compromise braking.
Professional service is preferable when the procedure or required equipment is uncertain.
What Happens if You Don’t Bleed the Brakes After Replacing the Master Cylinder?
Air may remain in the hydraulic system.
This can cause a spongy pedal, excessive pedal travel, or reduced braking effectiveness.
The required bleeding procedure must be completed before the vehicle is returned to service.
Why Is My Brake Pedal Soft After Master Cylinder Replacement?
Possible causes include trapped air, incomplete master-cylinder bleeding, an unaddressed hydraulic leak, or a vehicle-specific ABS bleeding requirement.
Do not drive until the cause is identified and corrected.
Can You Remove the Brake Fluid Reservoir Separately?
On some master-cylinder designs, yes.
The reservoir may attach with grommets, clips, or other hardware.
However, certain assemblies are intended to be handled or replaced together.
Check the factory procedure before separating the parts.