How to Plug a Brake Line at the Master Cylinder During Repairs
To plug a brake line at the master cylinder, disconnect the line only when the vehicle is safely parked and the system is depressurized as specified, then protect the open master-cylinder port with a correctly matched temporary plug. Cap the disconnected brake line separately with a compatible fitting. Never drive with either brake circuit intentionally blocked.
This procedure is useful during master cylinder replacement, certain hydraulic repairs, or a controlled diagnostic test. The aim is to keep dirt and moisture out, limit fluid loss, and protect the connections until the original brake circuit can be restored. It is not a way to make a leaking brake line safe for the road.
The biggest challenge is fitting compatibility. A plug can have threads that appear to fit while its sealing end is wrong for the port. Another risk is letting air enter the hydraulic system, which may require a more involved brake bleeding procedure, particularly on vehicles with advanced ABS or electrically controlled brakes.
Below, I explain how to identify the correct fittings, protect each open connection, handle the plugs without damage, reconnect the line, and determine when professional bleeding or testing is necessary.
When Should a Brake Line Be Plugged at the Master Cylinder?
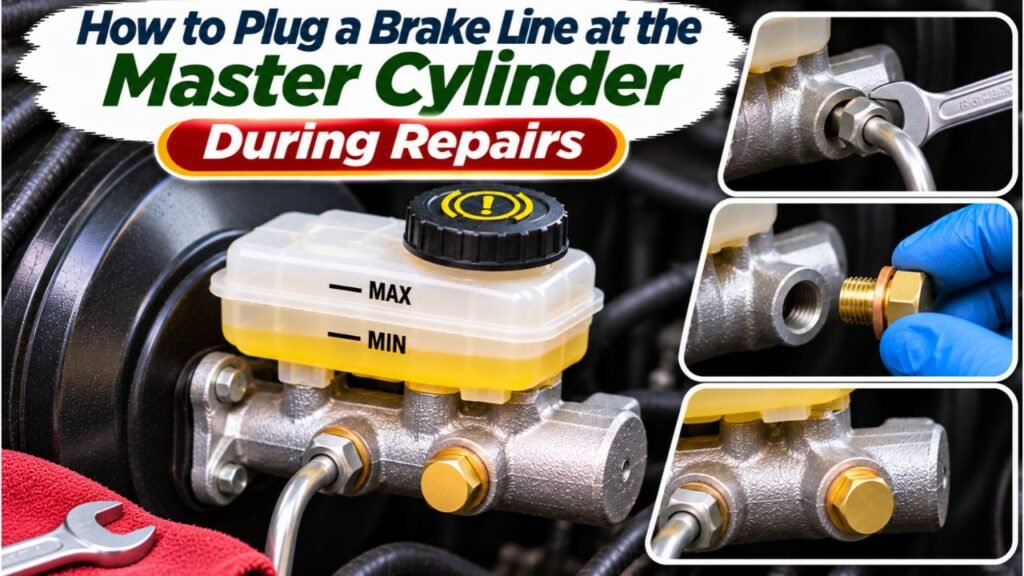
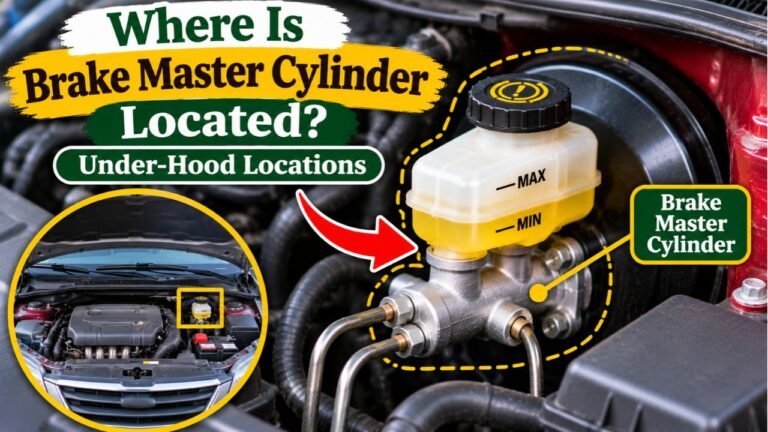
A brake master cylinder converts pedal force into hydraulic pressure. Its outlet ports connect to lines that carry fluid toward the rest of the braking system. On many vehicles, separate hydraulic circuits provide a degree of redundancy, but neither circuit should be deliberately disabled for driving.
Temporary plugging has three legitimate purposes. During master cylinder replacement, it helps prevent fluid loss and contamination while the new part is prepared. During brake line replacement, capping the disconnected line can keep grit away from its flare. During professional diagnosis, purpose-made block-off plugs can isolate the master cylinder from downstream components to help identify a hydraulic fault.
These are different tasks. A master cylinder port plug closes the opening in the cylinder. A brake line end cap protects the loose line. One does not automatically fit the other. If a line has ruptured or corroded through, the solution is to repair or replace it properly, not leave the master cylinder outlet plugged.
Tools and Fittings Needed to Plug a Master Cylinder Brake Line
Gather suitable tools before loosening anything:
- A vehicle-specific service manual or verified brake-system procedure
- Properly matched master-cylinder outlet plug and, if needed, brake-line end cap
- A flare-nut wrench sized for the existing tube nut
- Safety glasses and brake-fluid-resistant gloves
- Clean lint-free wipes and a catch container
- Protective covers for nearby painted surfaces
- Correct new brake fluid from a sealed container
- A suitable light, and calipers or a thread-pitch gauge if identifying fittings
- Appropriate bleeding equipment for the eventual reconnection
A clean dust cap may protect a stored fitting from dirt, but it is not automatically a pressure-rated hydraulic plug. For a diagnostic procedure that pressurizes a blocked port, use the exact fitting and method specified for that purpose. Do not substitute bolts, rubber vacuum caps, screws, tape, or miscellaneous plumbing fittings.
Match the Threads and the Flare Seat
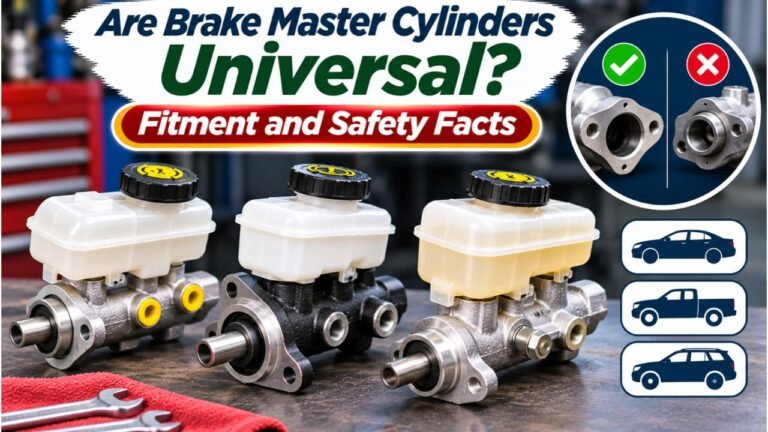
Brake fittings may use metric or inch threads, and two common sealing arrangements are SAE inverted double flare and ISO bubble flare. The tube’s flare must seat against a matching surface; tightening an incompatible fitting harder will not create a safe seal.
The manufacturer’s AGS guide to brake line flare types explains the two common flare designs and why the sealing surfaces must match. Check the vehicle’s exact port design and the removed line fitting rather than selecting a plug by thread diameter alone.
| Fitting | Where It Goes | What It Must Match |
| Master cylinder port plug | Into the exposed outlet on the master cylinder | Port threads and internal sealing design |
| Brake line end cap | Onto the disconnected tube nut and flared line end, when applicable | Tube nut threads and flare sealing geometry |
| Protective dust cap | Over a disconnected component during handling or storage | Physical fit and contamination protection, not hydraulic pressure |
If the original flare is cracked, crushed, heavily corroded, or misshapen, replace or professionally repair the line before reassembly. A new cap cannot restore a damaged sealing surface.
How to Plug a Brake Line at the Master Cylinder: Step-by-Step
The steps below describe temporary isolation for service on a conventional hydraulic brake system. If the vehicle uses brake-by-wire, regenerative braking, an electrically driven hydraulic pump, or a charged accumulator, follow its specified shutdown and depressurization procedure instead. Some systems can build pressure without anyone pressing the pedal.
Step 01: Confirm the Reason for Plugging the Brake Line
Identify exactly which line must be disconnected and why. Is the master cylinder being replaced? Are you preparing to change a damaged hard line? Or are you attempting a diagnostic isolation test recommended by a service manual?
Trace the line from the correct master cylinder outlet toward the ABS hydraulic unit or downstream connection. Photograph its routing and label the connection if several lines are close together. Do not guess which port controls a particular wheel; many vehicles use diagonal brake circuits rather than a simple front-versus-rear arrangement.
If the goal is to stop an active leak so the vehicle can be driven, do not proceed with that plan. Arrange a proper repair and towing if needed. Plugging a master cylinder port intentionally removes hydraulic service to the corresponding circuit.
Step 02: Park Securely and Follow the Brake System Shutdown Procedure
Use a flat work area, turn the vehicle off, secure it against rolling, and chock the wheels. Wear eye protection because brake fluid can squirt when a connection is opened. Keep ignition keys away from the work area if the service instructions require it.
Read the vehicle’s procedure for hydraulic pressure release before touching the connection. With some conventional systems, the open line is not continuously pressurized while at rest. That assumption is unsafe for every vehicle, especially models with electrically controlled pumps or accumulators. Never loosen a fitting to find out whether pressure is present.
Keep bystanders away, and avoid operating the brake pedal or activating a scan-tool bleed function while a connection is open.
Step 03: Inspect the Master Cylinder Port and Identify the Correct Plug
Locate the selected outlet and inspect the surrounding line nut, master cylinder casting, and any nearby proportioning or distribution components. Check whether the line enters the master cylinder directly or first passes through an adapter. The adapter’s external connection may use a different fitting from the master cylinder body.
Consult the parts information or service manual for the exact thread and seat specification. Compare the replacement plug with a confirmed matching fitting before installation. A plug that starts threading is not proof of compatibility. Close-looking metric and inch threads can damage one another, and different flare seats can leak despite matching threads.
Do not remove an adapter merely to make an available plug fit unless the prescribed repair requires it.
Step 04: Protect Paint and Clean the Connection
Place a catch container underneath the work area and clean cloths around the master cylinder. Glycol-based brake fluid can damage painted finishes, so address spills immediately using the vehicle manufacturer’s cleaning guidance. Avoid introducing dirty cleaning fluid or lint into any hydraulic opening.
Brush loose grit away from the surrounding area with a suitable clean tool, then wipe the fitting before disassembly. The goal is to prevent external dirt from falling into the open master cylinder. Keep replacement plugs clean and in their protective packaging until needed.
Check the brake fluid reservoir level. Record any unexplained low level before doing work, since a leak or worn brake components may need attention independently of the planned repair.
Step 05: Loosen the Brake Line Fitting Without Twisting the Tube
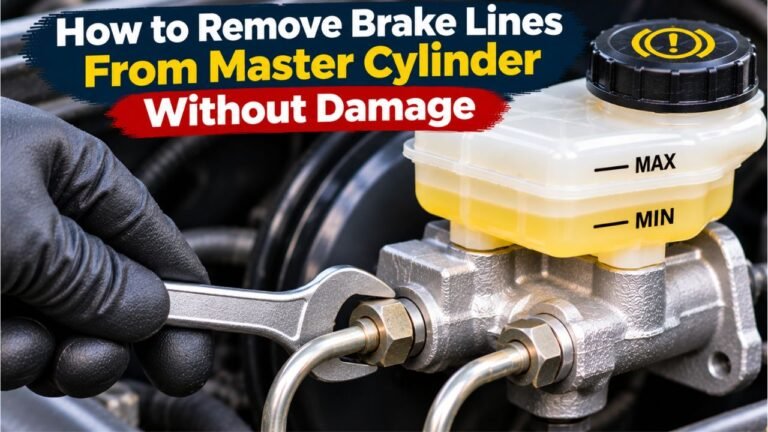
Use a correctly sized flare-nut wrench on the brake line fitting. Its wider grip reduces the risk of rounding the nut compared with an open-end wrench. If the connection includes a removable adapter, support the adapter with the appropriate backup wrench where the service instructions call for it.
Apply steady force and watch the hard line carefully. The tube should not rotate with the nut. If corrosion has seized them together, stop before the line kinks or twists; a damaged hard line must be replaced or repaired by an approved method.
Once loose, unthread the fitting carefully. Keep a catch container positioned to collect fluid and do not let the open tube end scrape against surrounding metal or dirty surfaces.
Step 06: Separate the Line Gently and Protect Its Flared End
Move the brake line only far enough to clear its seat. Do not pull it into a sharp bend to create extra working room. Brake tubing that has been repeatedly bent or stressed near the flare may be weakened, even if the damage is not immediately obvious.
Inspect the exposed flare without touching its sealing surface. Look for cracks, corrosion, uneven edges, and debris. If the line is being reused, keep it supported in its natural position. For a line being replaced, mark the routing and connection locations before removing more clips or brackets.
Install a correctly matched line-end cap if the cap is designed for that tube nut and flare. Otherwise use an appropriate clean protective cover for contamination control, recognizing that a non-sealing cover cannot prevent every drip or withstand hydraulic pressure.
Step 07: Install the Temporary Master Cylinder Port Plug
With the outlet accessible, check the port for visible dirt or damage. Do not push rags, metal picks, or other objects into the opening. If the port is contaminated or the seat is damaged, stop and follow the manufacturer’s cleaning or replacement procedure.
Place the specified plug squarely against the opening and start it by hand. It should turn smoothly for several threads. Resistance from the beginning usually means misalignment, wrong threads, or a damaged part. Back it out and investigate rather than forcing it with a wrench.
Seat the plug according to its instructions. Some plastic bleeding plugs are intended for a particular short-term procedure, while metal diagnostic block-off plugs have different requirements. Use only the specified tightening method; there is no universal plug torque. Do not add thread-sealing tape or compound to flare-seat connections unless the component manufacturer explicitly requires it.
Step 08: Keep the Open Circuit Protected During the Repair
At this point the master cylinder outlet and disconnected line should be protected separately. Position the line so that its cap stays clean and the tube does not carry unnecessary strain. Keep the reservoir covered, maintain suitable fluid levels, and avoid leaving the hydraulic connections exposed longer than needed.
Do not press the brake pedal with an open or temporarily blocked circuit, unless a qualified technician is performing the exact pressure-isolation test specified for that brake system using approved equipment. A pedal can feel unusually hard with outlets blocked, but that does not mean the vehicle has functioning wheel brakes.
If fluid leaks through a plug while the system is at rest, do not solve the problem by overtightening an unverified fitting. Recheck the part’s intended application and sealing surface.
Step 09: Complete the Underlying Brake Repair
Replace the defective line, master cylinder, or related component according to the vehicle’s service instructions. New brake tubing must have the proper material, routing, supports, flare geometry, and fittings. Do not patch a pressurized brake line with ordinary compression plumbing fittings, rubber hose, or sealant.
If installing a master cylinder, prime or bench bleed it by the manufacturer-approved method before the final hydraulic connections are made. The Alltech Automotive master cylinder bench bleeding instructions describe using threaded outlet plugs during preparation, then removing them one at a time as the brake lines are reconnected. This is a service procedure, not permission to operate a vehicle with the plugs installed.
Before reconnection, verify that the replacement part’s ports and the vehicle’s brake lines align naturally without forcing the tubing.
Step 10: Remove the Plugs and Reconnect the Brake Line
Prepare the cleaned line fitting and the correct brake fluid before removing the master cylinder port plug. Remove the temporary protective parts, inspect both sealing surfaces again, and align the flare with its seat. Start the original tube nut by hand to avoid cross-threading.
Tighten the connection to the vehicle-specific specification using the recommended tool. Avoid guessing a torque based on another car, and never assume that extra tightening will repair a leaking flare. Refit retaining clips, brackets, and any electrical connectors removed during service.
The line should sit in its normal routing without rubbing against moving parts, sharp edges, or hot components. Replace parts with damaged threads or sealing surfaces rather than attempting to reshape them with excessive force.
Step 11: Bleed the Hydraulic System and Verify Normal Brake Operation
When a hydraulic line has been disconnected, air may enter and must be removed as specified for the vehicle. Refill the reservoir with the required fresh brake fluid and follow the manufacturer’s bleeding sequence. Keep the reservoir from running low during the process.
Some ABS and electronic brake systems require a scan tool, special service mode, or pressure-bleeding equipment. If you lack the required procedure or tool, have a qualified technician complete the repair. Never assume that repeatedly pumping the brake pedal will purge every part of an ABS unit.
With all connections restored, check for leaks, appropriate fluid level, warning lights, and a firm, consistent pedal while stationary. Do not drive until normal braking has been verified. If pedal travel is excessive or a fitting weeps, stop and diagnose the fault before any road test.
Can a Plugged Master Cylinder Port Be Used to Diagnose a Soft Pedal?
A blocked-port test is sometimes used by experienced technicians to distinguish a master cylinder problem from a problem farther downstream. It works only when the correct ports are closed by purpose-built, compatible pressure-test plugs and the vehicle’s service procedure allows the test.
AGCO Automotive’s discussion of low brake pedal diagnosis describes plugging master cylinder outlets with properly matched threaded plugs. It also warns that the wrong thread or sealing style can damage the master cylinder. A persistently sinking pedal with the ports properly blocked can indicate internal bypassing, while a firm pedal directs attention toward components outside the master cylinder. Results still require correct interpretation, particularly on vehicles with ABS hydraulic control units.
A diagnostic plug isolates a component for a stationary test; it does not restore braking at the wheels. Do not perform a high-pressure test with shipping caps, generic plastic dust covers, or unverified hardware. If the procedure is not available for your specific car, use a professional repair service.
Mistakes That Can Damage the Master Cylinder or Brake Lines
Using a Bolt or Tapered Plumbing Plug
A random bolt may have the right-looking diameter but the wrong pitch or sealing face. Master cylinder outlets are not universal pipe-thread openings. Driving a mismatched plug into the port can ruin the threads or internal seat and create a permanent leak.
Capping Only the Port and Leaving the Brake Line Open
Closing the master cylinder outlet reduces fluid loss from the cylinder but does not protect the detached tube from grit, moisture, or handling damage. Protect both openings separately. Keep the work area clean and reconnect components as promptly as practical.
Letting the Reservoir Empty or Reusing Old Fluid
Air introduced through a low reservoir can complicate bleeding. Keep the reservoir at the specified service level and use fresh fluid from a sealed container that matches the vehicle’s required specification. Never add used extracted fluid back into the system.
Driving With One Hydraulic Circuit Blocked
Blocking one outlet is not an acceptable way to bypass a failed brake line, a seized caliper, or a leaking wheel cylinder. The remaining circuit may not provide normal stopping performance, and braking balance or stability can be compromised. Keep the vehicle parked until every required hydraulic circuit is correctly restored and tested.
FAQs About How to Plug a Brake Line at the Master Cylinder
What Can I Use to Plug a Master Cylinder Brake Port?
Use a purpose-made master cylinder port plug matched to the specific port threads and sealing seat. A shipping dust cap, random screw, or rubber hose plug is not a substitute for an approved hydraulic fitting.
Can I Cap a Brake Line Without Removing the Master Cylinder?
Yes. Depending on access and vehicle design, the line can often be disconnected and protected while the master cylinder remains mounted. Follow the prescribed depressurization procedure and keep both open ends clean.
Do I Have to Bleed the Brakes After Disconnecting a Master Cylinder Line?
Plan on the vehicle’s specified bleeding procedure after a hydraulic line is opened. Some systems need special ABS or electronic brake bleeding steps, even when the reservoir never ran completely dry.
Can I Plug One Brake Line and Drive on the Other Circuit?
No. A temporary plug is for service or controlled diagnosis, not road use. Restore the damaged circuit and verify the complete brake system before driving.
Are Plastic Master Cylinder Bleeding Plugs Safe to Use?
They may be appropriate for bench bleeding or short-term installation steps when supplied or specified for that exact cylinder. Do not assume they are suitable for diagnostic pressure testing or permanent use.
Keep a Plugged Brake Line Temporary Until the Brake System Is Restored
Knowing how to plug a brake line at the master cylinder starts with choosing the correct fitting and understanding what needs protection: the cylinder’s open outlet, the detached tube end, or both. Cleanliness, careful hand-threading, and avoiding damage to the flare and threads matter more than trying to stop every drop with excessive tightening.
Use temporary plugs only while completing a proper repair or an approved stationary diagnostic procedure. Afterward, reconnect the line with the specified fittings, bleed the system as required, and confirm normal braking before the vehicle moves. If the fitting specification or electronic brake procedure is uncertain, a qualified brake technician is the safer choice.