How to Adjust Brake Master Cylinder Pushrod: Steps and Checks
To adjust a brake master cylinder pushrod, first measure the clearance between the brake booster output rod and the master cylinder piston, then change the adjustable rod length only as the vehicle’s service instructions specify. The setting must let the piston return fully without leaving excessive travel before the brakes respond.
A pushrod that is too long can keep the master cylinder slightly applied. That may produce dragging brakes, heat, and poor fluid return. A rod that is too short can create excessive pedal travel or delayed braking. The correct distance is small and varies by vehicle, so guessing or adjusting by pedal feel alone is unsafe.
This guide explains which pushrod you are adjusting, what equipment is needed, and how to measure and correct the setting in detailed steps. It also covers service-manual differences, common errors, brake bleeding, final checks, and the symptoms of an incorrect adjustment. Because this work directly affects stopping ability, use the procedure as a framework alongside the exact factory instructions, not as a substitute for them.
What Does the Brake Master Cylinder Pushrod Do?
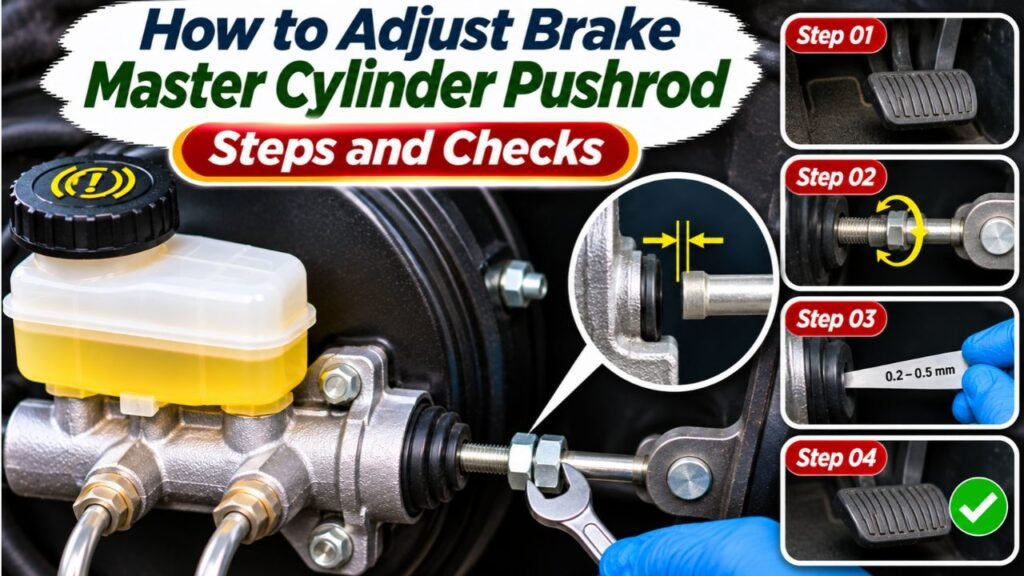
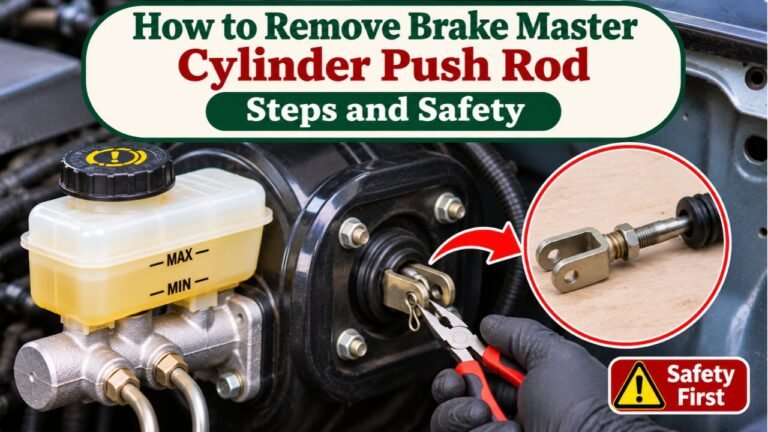
The master cylinder converts movement from the brake pedal into hydraulic pressure. On many power-assisted vehicles, a brake booster sits between the pedal linkage and the master cylinder. A short booster output pushrod projects toward a recess in the back of the master cylinder piston.
When the driver presses the pedal, the booster transfers force through that rod to move the piston. When the driver releases the pedal, the piston must return to its designed rest position. The rod’s length helps determine whether that movement begins promptly and whether the piston can return completely.
Wilwood’s explanation of tandem master cylinder pressure problems describes why the piston must return far enough to uncover its compensating port. A rod that holds the piston forward can interfere with fluid return and cause braking problems.
Booster Output Rod vs. Brake Pedal Input Rod
These are different parts, even though both may be called a master cylinder pushrod:
- Booster output rod: Located between the booster and master cylinder; its position controls the rod-to-piston relationship discussed in this guide.
- Brake pedal input rod: Connects the pedal to the booster or, on some manual-brake systems, directly to the master cylinder; its adjustment may affect pedal height and free play.
Do not turn the under-dash pedal clevis when the actual problem is an incorrect booster output rod length. Changing pedal linkage can also disturb the brake-light switch or keep the booster partly activated.
When Does a Master Cylinder Pushrod Need Adjustment?
Pushrod clearance is worth checking when the service manual requires it after replacing a master cylinder or booster, when installing a compatible aftermarket braking setup, or when a verified clearance problem appears after repair. A rod normally does not need periodic adjustment just because a vehicle is getting older.
Symptoms that justify investigation include a low pedal immediately after installation, brakes that begin dragging after several stops, or wheels that stay partially braked when the pedal is released. These symptoms are not proof that the rod is misadjusted. Air in the hydraulic lines, damaged hoses, sticking calipers, incorrect pedal stops, and master cylinder defects can cause similar complaints.
Do not adjust the rod to compensate for a soft pedal until other causes have been checked. If braking is unreliable or a wheel overheats, stop driving and arrange professional diagnosis.
Tools and Safety Preparation for Pushrod Adjustment
Use the vehicle’s year-, model-, and brake-system-specific repair procedure. Depending on the design, the job may require:
- A specified pushrod clearance gauge or depth-setting tool, sometimes supplied with the replacement master cylinder.
- A depth gauge or precise measuring equipment only if the manufacturer allows an alternate measurement method.
- Correct hand tools, a torque wrench, and a rod-holding tool where required.
- A feeler gauge or vacuum gauge when the factory procedure calls for one.
- Approved brake fluid, brake-line wrenches, and bleeding equipment if the hydraulic connections must be opened.
- Wheel chocks, eye protection, gloves, and clean materials for controlling brake-fluid spills.
Do not substitute an arbitrary clearance number from another vehicle. Some designs use special tools with built-in offsets, so a gauge reading may not equal the actual free gap. Similarly, do not assume the booster should be tested with its vacuum removed: some procedures require vacuum applied during measurement.
How to Adjust Brake Master Cylinder Pushrod Step by Step
The following steps describe the general measurement-and-adjustment workflow for an adjustable booster output pushrod. The exact location of the adjuster, required vacuum condition, permitted clearance, hardware torques, and bleeding steps must come from the specific service manual. If those details cannot be confirmed, have a qualified brake technician perform the adjustment.
Step 01: Identify the Vehicle and Confirm That the Pushrod Is Adjustable
Record the vehicle’s make, model, year, engine, and braking configuration. Check whether it has a conventional vacuum booster, hydraulic assist, manual brakes, or an electronically integrated braking unit. They do not all use the same pushrod arrangement.
Find the factory procedure for booster pushrod-to-master cylinder piston clearance rather than relying on a general pedal-height adjustment. Note its required tool, measurement reference surface, acceptable clearance, and conditions for applying or releasing booster vacuum.
Some rods have a threaded adjusting tip, while others are fixed or incorporated into a non-serviceable unit. If the factory instructions do not authorize adjustment, do not try to make the rod adjustable by cutting, grinding, adding washers, or replacing its tip with an improvised part.
Step 02: Park Securely and Prepare a Clean Work Area
Stop on firm, level ground, shift into Park or the appropriate manual gear, and chock the wheels. Set up enough light to see the master cylinder mounting face and all connected lines. Keep children and bystanders away from the work area.
Switch off the engine for initial setup, but follow the service manual for any later vacuum-assisted measurement. A booster can retain vacuum after shutdown; do not assume pumping the pedal to exhaust it is appropriate for every test. If engine operation is required, control ventilation and keep clear of moving or hot components.
Brake fluid can damage painted surfaces. Protect surrounding panels, clean the reservoir exterior before opening anything, and keep dirt out of all hydraulic openings.
Step 03: Check Pedal Return and Rule Out Obvious Brake Faults
Before removing parts, verify that the brake pedal returns freely to its stop. Check for a displaced floor mat, binding pedal pivot, incorrect brake-light switch position, or altered pedal linkage. Each can keep the system partially applied even when the booster output rod is correctly adjusted.
Inspect the reservoir level and accessible brake components for leakage. If the pedal feels spongy after hydraulic work, trapped air may be the more likely cause. If a wheel alone drags, investigate its caliper, hose, and parking-brake hardware rather than immediately shortening the pushrod.
Write down the complaint and any changes made during recent repairs. This prevents a mechanical adjustment from masking an unrelated problem.
Step 04: Expose the Pushrod Without Damaging Brake Lines
Following the vehicle’s instructions, remove or carefully move the master cylinder away from the booster to access the output rod and rear piston recess. On some vehicles there is enough permitted brake-line movement to separate the mounting faces without disconnecting the lines. On others, hydraulic connections must be removed.
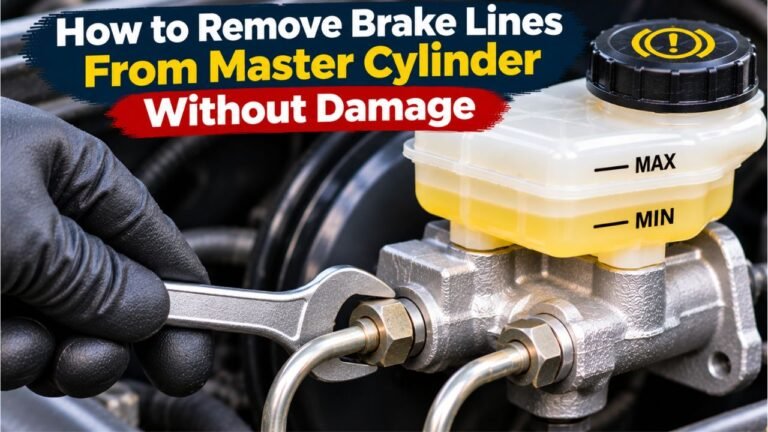
Never bend, twist, or stretch rigid brake lines to gain room. If the master cylinder cannot be moved without stress, disconnect and cap the lines as the factory procedure directs. Protect fittings from contamination and plan for the required bleeding afterward.
The original Acura RDX pushrod clearance procedure reproduced from the service manual specifies using the particular tool supplied with a replacement master cylinder. This illustrates why a convenient generic gauge is not always an acceptable substitute.
Step 05: Measure the Master Cylinder Piston Recess
The first measurement establishes where the master cylinder piston sits relative to its mounting face. Position the specified clearance gauge on the master cylinder flange, including any gasket or adapter required by the instructions. Bring the gauge’s movable contact gently against the piston contact surface.
Do not push hard enough to move the piston inward. The purpose is to record its natural rest position, not to compress internal springs. Lock or record the gauge position as directed so the setting does not change when the gauge is transferred.
Check that the gauge sits squarely against a clean, undamaged reference surface. Paint buildup, debris, the wrong gasket thickness, or a tilted gauge can create a false reading large enough to matter.
Step 06: Measure the Brake Booster Output Rod
Place the same gauge, or the designated companion tool, against the booster mounting face. The tool must align with the output rod tip as it would meet the master cylinder piston. Verify whether the reading indicates a gap, contact, or interference under that specific tool’s design.
The required booster condition is vehicle dependent. CARDONE’s technical bulletin on Honda and Acura brake lockup explains that its covered booster adjustment requires applied vacuum and a special gauge. A procedure for a different vehicle may specify another condition, so do not borrow this requirement universally.
If a vacuum gauge or controlled vacuum source is called for, use the designated setup. Do not simply start the engine beside an open hydraulic system unless the exact approved procedure calls for it.
Step 07: Compare the Measurement With the Correct Specification
Determine whether the rod is too long, too short, or already within specification. With a straightforward common-datum measurement, the piston recess depth minus the booster rod projection gives the approximate clearance. However, a special tool may use a built-in offset, reversing how its visible gap is interpreted.
For illustration only, if the piston recess is 0.520 inch from its reference face and the rod projects 0.500 inch from the matching face, the calculated gap is 0.020 inch. That example is arithmetic, not a recommended specification for every car. Your vehicle may require a different figure or a tool-defined contact condition.
Write down the initial reading and the desired factory reading before touching the adjuster. If the measurement is correct, stop; changing it is not a cure for unrelated pedal complaints.
Step 08: Adjust the Threaded Pushrod in Small Increments
If the service procedure permits adjustment, hold the rod with the specified tool so its internal assembly does not twist. Release the adjusting tip or locknut as directed. Turn the adjuster a small amount, then measure again before making another change.
Lengthening the output rod reduces the gap; shortening it increases the gap. The direction to turn a particular screw depends on its threading and construction. Use the vehicle’s instructions rather than assuming clockwise always means longer.
Avoid trying to improve pedal response by removing all free play. A preloaded master cylinder may not uncover its return ports. Never force a stuck adjuster or modify a fixed rod with a grinder unless a manufacturer-approved procedure specifically authorizes that operation.
Step 09: Repeat the Clearance Check and Secure the Adjuster
Recheck the rod against the master cylinder using the same reference surfaces and booster conditions as the first measurement. Repeat small changes only until the specified condition is met. A single measurement made before tightening a locknut may not be enough because parts can shift slightly while they are secured.
Tighten the adjuster locknut to the specified torque if the design uses one, then measure again. Confirm the rod and contact surfaces remain aligned, the adjuster is secure, and the master cylinder piston can return fully.
Do not treat the adjustment as successful simply because the master cylinder can be bolted onto the booster.
Step 10: Reinstall the Master Cylinder Correctly
Reinstall the correct gasket or seal, positioning hardware, and master cylinder according to the manufacturer’s instructions. The mounting flange should seat properly against its designed surface without using the nuts to force the piston inward.
If the cylinder resists seating before the mounting faces meet, stop and recheck the pushrod and parts compatibility. Tightening the mounting nuts to pull the cylinder into place can hide dangerous preload. Do not install stacks of washers or homemade spacers to disguise a rod that is too long.
Tighten mounting fasteners and hydraulic fittings to vehicle-specific specifications. Reconnect sensors and related components exactly as removed.
Step 11: Restore Fluid and Bleed the Brakes if Necessary
If brake lines were disconnected or air entered the master cylinder, follow the prescribed master-cylinder and brake-circuit bleeding procedures. Some systems require bench bleeding, a specific wheel sequence, a pressure bleeder, or scan-tool operations involving the ABS hydraulic unit.
Use only the specified clean brake-fluid type. Keep the reservoir at the correct level throughout the process, and inspect all opened connections for leaks. Do not substitute incompatible fluid or reuse collected brake fluid.
A correct pushrod adjustment cannot compensate for air trapped in the hydraulic system. A low or soft pedal after reassembly must be diagnosed before the car moves.
Step 12: Verify Pedal Feel, Brake Release, and Safe Operation
With the vehicle secured, perform the manufacturer’s stationary pedal checks. Confirm the pedal returns fully, the brake-light switch operates correctly, and the master cylinder and line connections stay dry under pressure. Follow the prescribed engine-on or engine-off checks as applicable.
Check for abnormal pedal travel and indications that the brakes remain applied after the pedal is released. Any wheel dragging, rapidly heating, or resisting rotation requires further investigation. Do not mistake a firm pedal for proof that clearance and hydraulic operation are correct.
Only after all stationary checks pass should a qualified person carry out the manufacturer’s controlled low-speed road test in a safe area. If the brakes bind, pull, overheat, or feel unreliable, stop immediately and arrange professional inspection rather than attempting a longer test drive.
How Much Master Cylinder Pushrod Clearance Is Correct?
There is no single safe gap specification for every vehicle. The correct value depends on the master cylinder piston design, booster geometry, mounting surfaces, and measurement method. Some aftermarket assemblies specify a small positive gap; some factory gauges are designed around an indicated zero-contact condition or include an internal offset.
For that reason, a figure found in an online discussion cannot replace the matching factory specification. The same warning applies when switching from a stock master cylinder to a different aftermarket unit. Its piston recess may not match the original, even when mounting bolts line up.
If the actual specified clearance is not available, the safe choice is to obtain the proper procedure or have a brake specialist measure it. The goal is full piston return with controlled, predictable initial pedal travel—not simply the smallest possible gap.
Symptoms of a Pushrod That Is Too Long or Too Short
| Pushrod Condition | What Can Happen | Why It Matters |
| Too long or preloading the piston | Brakes drag, build heat, or fail to release fully | Compensating ports may remain blocked |
| Too short or excessive gap | Extra pedal travel before braking begins | Available pedal reserve is reduced |
| Correctly adjusted | Piston returns and force transfers as designed | Brake response matches the system’s intended geometry |
These are possible effects, not definitive diagnoses. A collapsed flexible brake hose can also trap pressure, and air in the hydraulic system can make the pedal travel too far. If a problem appeared suddenly on an otherwise unchanged car, investigate failure or damage before assuming the pushrod needs a new setting.
Pushrod Adjustment Mistakes That Can Create Brake Problems
One mistake is adjusting the wrong rod. The pedal input linkage and booster output tip do not share the same job. Changing pedal height can disrupt the brake switch or booster release without correcting master cylinder clearance.
Another is measuring from the wrong surface. A gasket, adapter plate, or manufacturer-specific tool offset changes the relationship between the measured distances. If the mounting faces or contact points are inconsistent, the final clearance cannot be trusted.
A third is compensating for unrelated faults by changing rod length. Bleeding problems, sticking wheel brakes, worn pedal components, and damaged hydraulic parts need their own repairs. Pushrod adjustment should correct a measured clearance error, not conceal an unexplained symptom.
Finally, skipping post-repair checks can leave a dangerous condition unnoticed. The system must release fully, maintain pressure when commanded, and operate without leaks before the vehicle returns to use.
What if the Master Cylinder Pushrod Is Not Adjustable?
Some vehicles have a fixed-length rod, factory-matched components, or an integrated brake unit that is not intended for field adjustment. In those cases, verify part numbers, the mounting arrangement, gasket selection, and whether a correct replacement component is required.
Do not grind the rod, add improvised extensions, or shim the master cylinder away from the booster as a general fix. Workarounds can interfere with alignment, mounting strength, and braking performance. A replacement part that does not match the required geometry should be returned or evaluated by a qualified technician.
FAQs About How to Adjust Brake Master Cylinder Pushrod
Can I Adjust the Pushrod Without Removing the Master Cylinder?
Usually, the master cylinder must at least be separated from the booster to measure the output rod against the piston recess. Whether the brake lines can stay connected depends on the available clearance and the service procedure. Never force the lines to bend.
Does a Longer Pushrod Make the Brake Pedal Firmer?
Not necessarily. A longer output rod reduces the initial gap and may make the pedal engage earlier, but too much length can preload the piston and cause brake drag. A soft pedal caused by air or a hydraulic defect needs a different repair.
Should the Pushrod Touch the Master Cylinder Piston at Rest?
That depends on the manufacturer and the measuring tool. Some service procedures use a specified small clearance, while certain special gauges indicate a zero condition that has its own meaning. Never treat metal-to-metal contact as a universal adjustment target.
Can Incorrect Pushrod Adjustment Cause Brakes to Lock Up?
Yes. A rod that prevents full piston return can block pressure release and allow the brakes to remain applied, sometimes worsening as heat develops. Other faults can cause similar symptoms, so the complete system still needs inspection.
Do I Need to Bleed Brakes After Pushrod Adjustment?
Not if the hydraulic circuit remained sealed and no air entered, assuming the vehicle’s service procedure agrees. If lines were opened, the master cylinder drained, or air was introduced, proper bleeding is required before the vehicle is driven.
Is Brake Pedal Free Play the Same as Pushrod Clearance?
No. Pedal free play is movement measured at the pedal, while booster output rod clearance is a small distance at the master cylinder interface. Pedal linkage geometry, booster operation, and adjustment method affect how the two relate.
Making Sure the Pushrod Adjustment Is Safe and Accurate
Knowing how to adjust brake master cylinder pushrod starts with measuring the correct rod against the correct master cylinder piston surface. A small, specification-based change can correct a real clearance problem, but adjusting by guesswork can leave the brakes dragging or create too much pedal travel.
Use the vehicle-specific gauge, vacuum conditions, and torque requirements, and remeasure after securing the adjuster. Finish with hydraulic bleeding if needed, leak checks, proper pedal return, and a controlled performance verification. If the procedure or specification is uncertain, professional brake service is the safer choice.