What Tools Do I Need to Change Brake Pads? Complete Tool List
For a typical disc-brake pad replacement, you need a floor jack, jack stands, wheel chocks, a lug wrench or suitable socket, a ratchet and socket set, a torque wrench, a caliper piston tool or approved clamp, a caliper hanger, brake cleaner, brake lubricant, gloves, and eye protection. Some rear brakes also need a piston wind-back tool or electronic parking-brake service procedure.
Missing the correct tool can leave the car stuck on stands or lead to damaged fasteners, incorrect piston retraction, or poor reassembly.
A proper setup covers safe lifting, wheel removal, caliper support, piston retraction, cleaning, and correct fastener tightening.
For U.S. safety context, a NHTSA functional-safety assessment using 2012 crash databases identified 32,477 police-reported crashes that were at least partly attributed to braking issues. That figure covers braking faults broadly and does not isolate DIY pad work, but it shows why brake-system procedures and fastener specifications deserve careful attention.
In my research, the most useful answer to what tools do I need to change brake pads was to split the list into three groups: tools almost every disc-brake job needs, tools that depend on the caliper design, and supplies that protect the new pads from contamination or binding. Edmunds, NAPA, and AutoZone all center their basic lists on safe lifting equipment, wheel-removal tools, hand tools, and a way to retract the caliper piston.
Rear brakes deserve extra attention before you buy anything. Some pistons push straight back, some must rotate while retracting, and some vehicles with an electronic parking brake require a service mode or diagnostic procedure before rear brake work begins. Ford service instructions, for example, warn that certain electronic parking-brake systems must be placed in brake service mode before rear brake service.
The sections below separate must-have tools from optional items, explain what each tool does, show which extras may be needed for rear brakes or stubborn hardware, and point out the tools you should not substitute with improvised methods.
What Tools Do I Need to Change Brake Pads at Home?
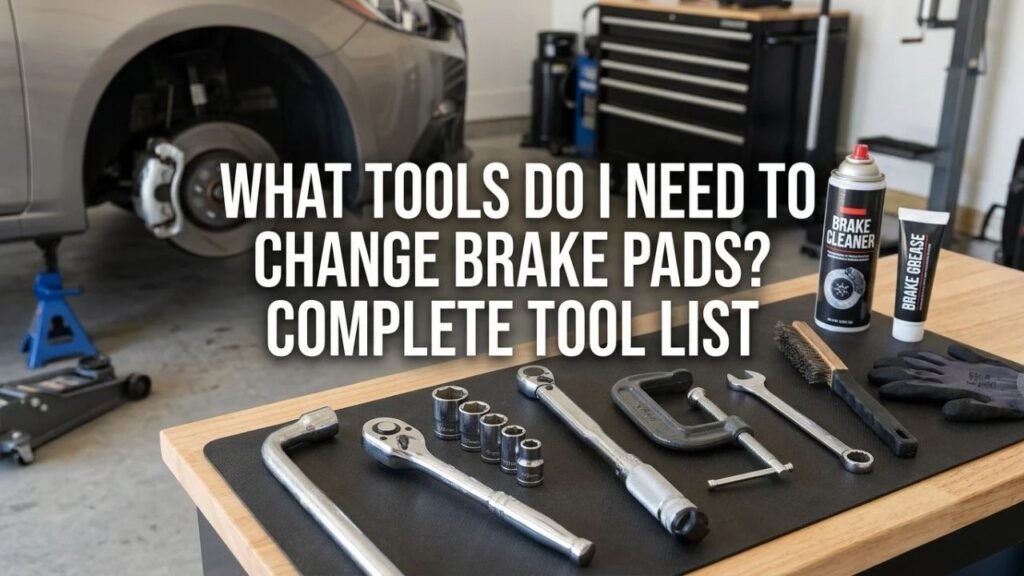
Most conventional floating-caliper brake jobs can be handled with a modest set of hand tools. Exact socket, hex, and Torx sizes vary by vehicle, so check the service information before taking the wheel off.
| Tool or Supply | Typical Need | Main Job |
| Floor jack | Required for most home jobs | Raises the vehicle |
| Jack stands | Required | Supports the vehicle after lifting |
| Wheel chocks | Required | Prevents vehicle movement |
| Lug wrench or wheel socket | Required | Removes and installs lug nuts |
| Ratchet and socket set | Required | Removes caliper fasteners |
| Combination wrench | Often needed | Holds slide pins or removes bolts |
| Torque wrench | Required for correct reassembly | Tightens fasteners to specification |
| Caliper piston tool or approved clamp | Usually required | Retracts the piston |
| Caliper hanger or strong hook | Strongly recommended | Supports the caliper |
| Brake cleaner and clean rags | Required for clean work | Removes residue from approved surfaces |
| Brake lubricant | Usually required | Lubricates specified sliding/contact points |
| Gloves and eye protection | Required safety gear | Protects hands and eyes |
| Hex or Torx bits | Vehicle-specific | Fits certain caliper bolts |
| Wind-back tool | Vehicle-specific | Retracts screw-type rear pistons |
| Scan tool/service mode | Vehicle-specific | Releases or services some electronic parking brakes |
Floor Jack
A floor jack raises the vehicle so the wheel can be removed. Use the lift points specified for the vehicle.
The jack is a lifting device, not your sole support while working. Once the vehicle is raised, place it on properly rated jack stands before working around the brake assembly.
Jack Stands
Jack stands carry the vehicle’s weight while the wheel is off.
Use stands rated for the vehicle and position them only at approved support points. NAPA and Edmunds both state that a vehicle should be supported on stands rather than left supported only by a jack during brake work.
Wheel Chocks
Chocks keep the wheels that remain on the ground from rolling.
Place them according to the vehicle’s lifting procedure. The parking brake may not always be usable during rear-brake work, so chocks become even more important on those jobs.
Lug Wrench or Correct Wheel Socket
You need a lug wrench, breaker bar with the correct socket, or another approved wheel-removal tool to loosen and remove the wheel fasteners.
Loosen tight lug nuts while the tire is still on the ground unless the vehicle’s service procedure says otherwise. Use a torque wrench for final tightening rather than an impact wrench alone.
Key Takeaway: Safe lifting equipment comes before brake-specific tools. A floor jack raises the vehicle, but jack stands and wheel chocks are what keep the work area secure.
Hand Tools Needed for Caliper Removal
Once the wheel is off, the next tool group handles caliper pins, mounting bolts, brackets, clips, and hardware.
Ratchet and Socket Set
A ratchet and socket set handles many caliper slide bolts and bracket fasteners.
Do not assume a socket size from another car will fit yours. Metric fasteners are common on modern vehicles, but some applications use different systems or special bolt heads.
Combination Wrenches
Some floating-caliper slide pins rotate when you loosen the bolt.
A combination wrench can hold the slide-pin flats while the ratchet turns the fastener. It is also useful in tight areas where a socket cannot sit squarely.
Hex, Allen, and Torx Bits
Some calipers use recessed hex or Torx fasteners rather than standard external hex-head bolts. AutoZone specifically advises checking the vehicle before buying these bits because fastener style changes across manufacturers and models.
Inspect the bolt head before starting. Using a nearly fitting bit can round the fastener and turn a simple job into an extraction problem.
Breaker Bar
A breaker bar is useful for wheel fasteners or caliper-bracket bolts that are too tight for a short ratchet.
Use the correct socket and keep the tool square to the fastener. A breaker bar is for loosening; a torque wrench is for controlled final tightening.
Torque Wrench
A torque wrench belongs in the core brake-tool kit.
Wheel fasteners, caliper bolts, and bracket bolts can have different torque specifications. Guessing by feel can leave a fastener loose or overtighten threads.
I would not treat the torque wrench as an optional upgrade. Check the factory service information for the exact values and use a wrench whose operating range covers those specifications.
Key Takeaway: The correct sockets, bits, holding wrench, and torque wrench prevent damaged fasteners and let you reinstall the brake hardware to the vehicle’s specified values.
Tools for Compressing the Brake Caliper Piston
New pads are thicker than worn pads, so the caliper piston usually has to retract before the caliper will fit over the new set.
The correct piston tool depends on the caliper design.
Caliper Piston Compression Tool
A dedicated piston compression tool pushes a conventional piston back into its bore in a controlled, square direction.
This is my preferred tool for a first DIY brake job because it is made for the task and reduces the temptation to place force on an unsuitable part of the caliper.
C-Clamp
A C-clamp can work on some conventional single-piston calipers if the vehicle’s service procedure permits straight piston compression.
Do not assume it is safe for every caliper. Some rear pistons must rotate as they retract, and forcing those with a clamp can damage the parking-brake mechanism.
Piston Wind-Back Tool
Many rear calipers with an integrated mechanical parking brake use a piston that turns while moving back into the caliper.
A wind-back kit uses adapters that engage the piston face while the tool applies inward pressure and rotation.
Before buying one, look at the service procedure for your exact rear caliper. The required direction, adapter shape, and method can differ.
Electronic Parking-Brake Service Tool or Mode
An electronic parking brake changes the tool list on some vehicles.
The system may need to enter a maintenance or service mode before the piston can be retracted. That mode may be available through vehicle controls on some models or require a compatible diagnostic scan tool on others.
Ford service documentation warns that unexpected electronic parking-brake application can cause injury during rear brake service and directs technicians to activate brake service mode on affected systems.
Key Takeaway: Identify the caliper type before forcing the piston back. Straight-push, wind-back, and electronic parking-brake calipers can require different tools and procedures.
Cleaning, Lubrication, and Caliper-Support Tools
Caliper Hanger, Hook, or Strong Support Wire
Once the caliper is removed, support it from a suspension component or another approved location.
Do not let the caliper hang by the flexible brake hose. The hose is meant to carry hydraulic pressure, not the suspended weight of the caliper.
Brake Cleaner
Brake cleaner removes grease and residue from approved brake surfaces.
Follow the product label, use it with suitable ventilation, and keep it away from painted or plastic surfaces if the product maker warns against contact.
Do not use compressed air to blow old brake dust around the work area. OSHA’s brake-service rules for workplaces use wet-cleaning or HEPA-based methods to control asbestos exposure and prohibit dry brushing under its wet-method procedure. Older brake components can still present unknown dust hazards.
Brake Lubricant
Use brake-specific lubricant only at the points identified by the vehicle or brake-pad maker.
Common approved locations may include slide pins and selected pad-to-bracket contact points. The exact lubricant can matter because some products are not compatible with rubber boots or seals.
Never put lubricant on the pad friction surface or rotor face.
Brush and Clean Rags
A suitable brush can remove corrosion and debris from bracket areas where pads are meant to slide.
Choose the cleaning method with brake-dust control in mind. Avoid aggressively dry-brushing dusty assemblies in a way that sends particles into the air.
Clean, low-lint rags are useful for wiping approved surfaces after cleaner is applied.
Key Takeaway: A caliper hanger protects the hose, while controlled cleaning and the correct brake lubricant keep pads and slide parts moving as intended without contaminating friction surfaces.
Safety Gear You Need for a Brake Pad Change
Brake work puts you close to dust, chemical cleaner, sharp metal edges, heavy wheels, and a raised vehicle.
Safety Glasses
Wear eye protection while removing hardware, cleaning components, and working beneath wheel-well parts.
Rust flakes, cleaner spray, and small hardware can fall or rebound toward your face.
Mechanic’s Gloves
Gloves keep brake dust, grease, cleaner, and sharp edges away from your skin.
They do not replace careful chemical handling. Change contaminated gloves before touching the pad or rotor friction surfaces.
Suitable Dust Control
Do not create clouds of brake dust.
OSHA notes that automotive brake and clutch work can involve asbestos exposure and sets specific wet-cleaning or HEPA-control methods for covered workplaces. DIY work is outside OSHA employer rules, but the dust-control principle is still sensible: keep unknown brake dust from becoming airborne.
Closed-Toe Footwear and Stable Work Area
Work on a flat, hard surface with enough room to place the jack and stands correctly.
A wheel or brake component can be heavy enough to injure a foot if dropped, so sturdy footwear is a sensible part of the setup.
Key Takeaway: Eye protection, gloves, controlled brake-dust handling, and a stable work surface should be part of the tool plan before the first lug nut comes off.
Optional Tools That Make Brake Pad Replacement Easier
Some items are not required on every car but can save time or improve inspection quality.
Impact Wrench
An impact wrench can speed wheel removal, but final lug-nut tightening should still be done with a torque wrench set to the vehicle maker’s specification.
Brake Pad Spreader
A pad spreader or purpose-made piston press can be cleaner to use than a general C-clamp, especially on multi-piston calipers.
Make sure force is applied evenly so one piston does not extend while another is being pushed back.
Rotor Measuring Tools
If you are inspecting rotors during the job, a micrometer can measure thickness against the minimum specification, and a dial indicator may be used for runout when the service procedure calls for one.
Fluid Syringe or Turkey Baster
Pushing caliper pistons back can raise the level in the master-cylinder reservoir.
If the reservoir is very full, a clean fluid-removal tool may be needed to prevent overflow. Use a tool dedicated to brake fluid, and do not reuse contaminated fluid.
Key Takeaway: Impact tools and measuring tools are convenience or inspection items; they do not replace the core lifting, piston, hand-tool, and torque equipment.
Tools You May Need for Rear Brake Pads
Rear brake work can differ sharply from front brake work because the service brake and parking brake may share components.
Wind-Back Kit for Screw-Type Pistons
If the rear caliper piston has slots or recesses intended for rotation, the job may require a wind-back tool.
Do not use pliers on the piston face. Damaging the piston or boot can create a larger repair.
Scan Tool for Electronic Parking Brakes
Some vehicles need a diagnostic function to retract or release the electronic parking brake.
Other models provide a manual service-mode sequence. Check the factory instructions before disconnecting the caliper or attempting to compress the piston.
Special Sockets or Bits
Rear caliper bolts may use different fasteners from the front brakes.
Check both axles before assuming one socket set covers the entire job.
Parking-Brake Adjustment Tools
Some rear disc systems use a small drum-style parking brake inside the rotor hat.
If that system needs service or adjustment, extra tools may be required beyond those used for the disc pads themselves.
Key Takeaway: Rear brakes can add a wind-back kit, scan tool, service-mode procedure, special bits, or parking-brake tools to an otherwise basic pad-change kit.
Do You Need a Brake Bleeder to Change Brake Pads?
Usually, a straightforward brake-pad replacement does not require opening the hydraulic system, so routine bleeding is not automatically part of the job.
A bleeder kit becomes relevant if you disconnect a brake hose, replace a caliper, open a bleeder screw as part of the specified piston-retraction method, or perform a fluid flush.
If air enters the hydraulic system, it has to be removed using the correct bleeding procedure for that vehicle.
Modern vehicles can have ABS modules, electronic brake boosters, or service procedures that change how bleeding is performed. Do not assume the old two-person pedal method applies to every model.
If the pedal stays soft after brake work or hydraulic lines were opened and you are not confident in the bleeding procedure, professional service is the safer direction.
Supplies to Buy With the Tools
Tools alone are not enough. Have all replacement parts and consumables before raising the vehicle.
Typical items include:
- Correct brake pads for the exact vehicle and brake package
- New pad hardware if specified or supplied
- Brake-specific lubricant
- Brake cleaner
- Clean rags
- Correct brake fluid only if fluid service or topping up is actually required
- Rotors if inspection shows replacement is needed
- Wear sensors if the vehicle uses replaceable sensors
- Single-use bolts if the service procedure calls for new fasteners
Do not automatically add brake fluid because the reservoir looks low before pad replacement. A low level can be related to pad wear or a leak, and adding fluid before retracting the pistons can overflow the reservoir.
Tools You Should Not Improvise During Brake Work
Some substitutions create more risk than they save.
Do not support the vehicle with only the floor jack.
Do not use locking pliers or a nearly fitting socket on caliper fasteners if the correct tool is available.
Do not force a screw-type or electronic parking-brake piston backward with a standard C-clamp.
Do not let the caliper hang from the brake hose.
Do not tighten wheel nuts or caliper fasteners only by impact-gun feel when a torque specification is provided.
Do not blow brake dust away with compressed air.
Do not put general grease, oil, or anti-seize on pad or rotor friction surfaces.
My preference is to stop the job and get the correct tool if the brake design differs from what you expected. Brakes are a poor place to solve a tool mismatch with force.
Conclusion
If you are asking what tools do I need to change brake pads, start with a floor jack, jack stands, wheel chocks, wheel-removal tools, the correct sockets or bits, a torque wrench, a piston-retraction tool, a caliper hanger, brake cleaner, brake lubricant, gloves, and eye protection.
Check the rear brake design before buying the piston tool. A conventional front caliper may only need straight compression, while a rear screw-type piston can need a wind-back kit and an electronic parking brake may call for service mode or a diagnostic tool.
Get the exact socket sizes and torque values from service information for your year, make, model, and brake package before lifting the vehicle.
I would spend money first on safe lifting equipment, a reliable torque wrench, and the correct piston tool. Convenience tools can come later; those three areas have the biggest effect on doing the basic job without unsafe shortcuts.
FAQs About Tools for Changing Brake Pads
Can I Change Brake Pads With Basic Hand Tools?
Yes, many conventional disc-brake jobs can be completed with basic hand tools plus safe lifting equipment, a torque wrench, and a way to retract the caliper piston.
The exact job may also need Torx or hex bits, a wind-back tool, or an electronic parking-brake service procedure. Check the vehicle before assuming a universal tool list.
Do I Need a C-Clamp to Change Brake Pads?
Not always. A C-clamp can retract some straight-push caliper pistons if the service procedure permits it.
A purpose-made piston tool is often easier to control. Rear screw-type pistons need a wind-back tool, and some electronic parking-brake calipers require service mode instead of simple clamp pressure.
Do I Need a Torque Wrench for Brake Pads?
Yes, a torque wrench should be part of the brake-job kit.
Wheel fasteners, slide-pin bolts, and caliper-bracket bolts can have specific tightening values. Use the manufacturer’s specification rather than estimating tightness by feel.
Can I Change Brake Pads Without Jack Stands?
You should not work on a wheel-off brake job with the vehicle supported only by a floor jack.
Use approved lift points, properly rated jack stands, and wheel chocks. A hydraulic jack can lose pressure or move, so it should not be treated as the sole support.
Do I Need a Brake Caliper Tool for Front Pads?
Many front calipers need their piston pushed back to make room for the thicker new pads.
A caliper piston compressor is the preferred tool. Some conventional single-piston designs may permit an appropriate C-clamp, but check the vehicle procedure before applying force.
What Tool Do I Need for Rear Brake Pads?
It depends on the rear caliper. A normal push-back caliper may use a piston compressor, a screw-type piston may need a wind-back tool, and an electronic parking brake may need service mode or a scan tool.
Identify the caliper type before buying or renting the tool.
Do I Need to Bleed the Brakes After Changing Pads?
Not for every pad replacement. If the hydraulic system stays closed and the pedal returns to a firm, normal feel after the pistons and pads are seated, bleeding is not automatically required.
If a hose, caliper, or hydraulic fitting is opened, air can enter the system and the correct bleeding procedure becomes necessary.
What Is the Most Important Tool for a DIY Brake Job?
There is no single tool that replaces the rest, but safe support equipment comes first. A floor jack lifts the vehicle, while properly rated jack stands and wheel chocks keep it stable.
After that, the correct piston tool and torque wrench are the two items I would refuse to substitute with guesswork.