How to Install a Brake Booster and Master Cylinder Step by Step
To install a brake booster and master cylinder, remove the old components, mount the replacement booster to the firewall, connect the brake pedal linkage, verify the booster pushrod clearance, and install the properly bled master cylinder. After connecting the hydraulic lines and vacuum supply, the brake system must be bled and thoroughly inspected before the vehicle can be driven.
Although the brake booster and master cylinder work together, they perform different functions. The booster reduces the force needed to press the brake pedal, while the master cylinder converts that force into hydraulic pressure for the brakes.
Replacing both components requires careful attention to part compatibility, mounting hardware, pedal adjustment, and hydraulic bleeding. Incorrect installation can cause a hard brake pedal, excessive pedal travel, dragging brakes, or complete braking failure.
The exact procedure varies by vehicle. Some vehicles have vacuum-operated boosters, while others use hydraulic or electronically controlled systems that require specialized service procedures.
In this article, I explain how to install a brake booster and master cylinder, the necessary tools, and the correct general installation sequence. I also cover master cylinder bench bleeding, pushrod clearance, ABS bleeding, common mistakes, troubleshooting, and the safety checks required before driving.
How to Install a Brake Booster and Master Cylinder: Overview
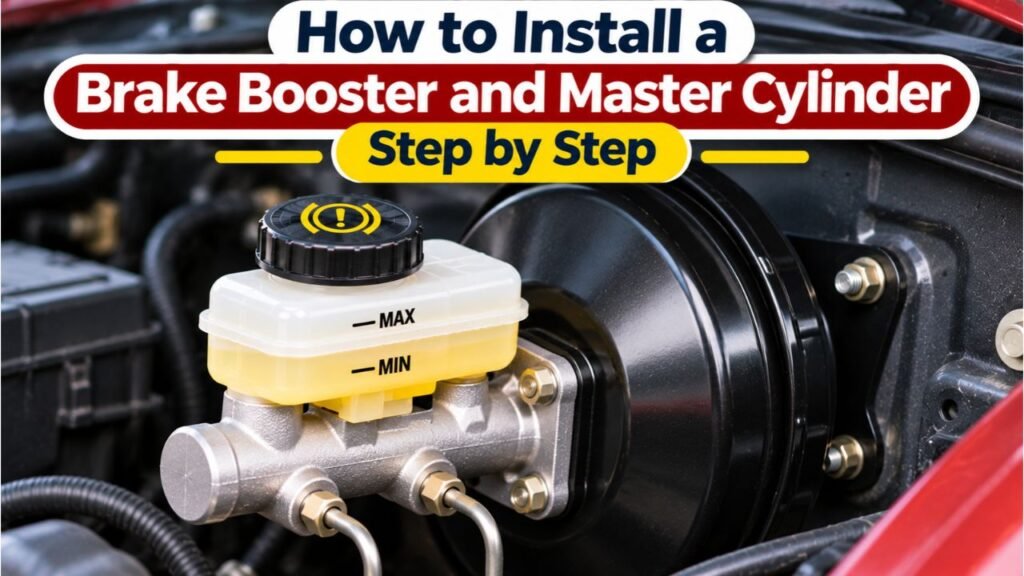
The brake booster and master cylinder are normally installed together near the firewall in a conventional power-assisted hydraulic braking system.
The master cylinder is mounted to the front of the booster, while the booster’s input pushrod connects to the brake pedal inside the passenger compartment.
The general replacement process involves removing the master cylinder and booster, installing the new booster, preparing the replacement master cylinder, and restoring hydraulic operation.
Brake Booster and Master Cylinder Installation Steps
| Step | Main Task | Important Consideration |
| 1 | Identify the brake system | Confirm whether it uses a vacuum, hydraulic, or electronic booster |
| 2 | Prepare the vehicle | Follow shutdown and pressure-release procedures |
| 3 | Disconnect old components | Protect brake lines, fittings, and electrical connections |
| 4 | Remove the old master cylinder | Prevent contamination and brake fluid spills |
| 5 | Disconnect brake pedal linkage | Preserve correct linkage components and retainers |
| 6 | Remove the brake booster | Avoid damage to the firewall and brake pipes |
| 7 | Install the replacement booster | Use specified mounting hardware and torque |
| 8 | Check pushrod clearance | Follow the vehicle-specific procedure |
| 9 | Bench bleed the master cylinder | Remove trapped air before installation when required |
| 10 | Install the master cylinder | Align components and secure hydraulic connections |
| 11 | Bleed the brake system | Use the manufacturer-specified procedure |
| 12 | Verify brake operation | Confirm pedal feel, assistance, free play, and absence of leaks |
According to NAPA Auto Parts’ brake booster replacement guide, booster replacement generally involves disconnecting the master cylinder, brake pedal linkage, and booster mounting hardware before installing the replacement assembly.
Important: This is a general explanation for conventional braking systems, not a substitute for a vehicle-specific service manual. Incorrect brake installation can cause serious injury or death. If you lack the required service information, bleeding equipment, or experience, have a qualified automotive technician perform the repair.
What Do the Brake Booster and Master Cylinder Do?
Before replacing these components, it helps to understand their functions.
Brake Booster
The brake booster provides power assistance.
In a conventional vacuum-assisted system, the booster uses a pressure difference to multiply the force applied through the brake pedal.
This allows the driver to generate substantial braking force without pressing the pedal excessively hard.
A typical vacuum brake booster includes:
- A booster housing.
- Internal diaphragm or power piston assembly.
- Control valve.
- Input pushrod.
- Output pushrod.
- Vacuum connection.
- Check valve.
- Mounting studs.
A failed booster commonly causes a hard brake pedal and increased braking effort.
Master Cylinder
The master cylinder converts mechanical force into hydraulic pressure.
It contains internal pistons, seals, chambers, and ports that control fluid movement.
When the brake pedal is pressed, the master cylinder sends pressurized brake fluid through the braking circuits.
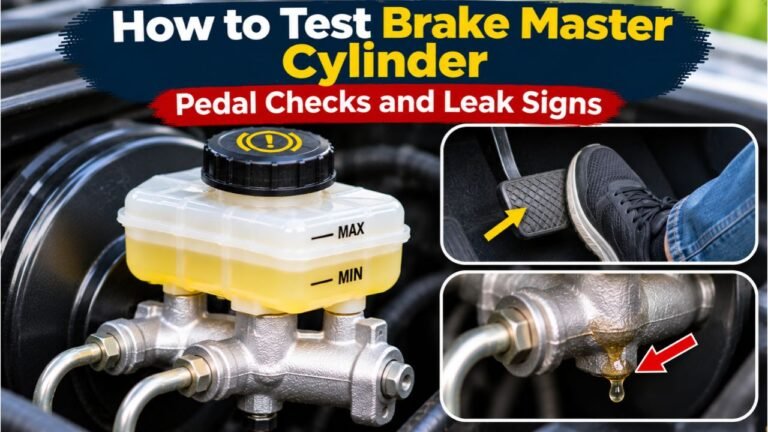
A faulty master cylinder may cause a soft pedal, sinking pedal, external fluid leakage, or reduced braking pressure.
How They Work Together
The general operating sequence is:
Brake Pedal → Brake Booster → Master Cylinder → Hydraulic Brake Lines → Brake Calipers or Wheel Cylinders → Brake Pads or Shoes
The booster assists pedal force.
The master cylinder generates hydraulic pressure.
The wheel brakes use that pressure to create friction and slow the vehicle.
Brake Booster vs. Master Cylinder
| Feature | Brake Booster | Master Cylinder |
| Primary purpose | Reduces brake pedal effort | Generates hydraulic pressure |
| Typical location | Mounted against firewall | Mounted to front of booster |
| Common input | Brake pedal force and power assistance | Mechanical force from booster or pedal |
| Common failure symptom | Hard brake pedal | Soft, sinking, or ineffective pedal |
| Contains hydraulic brake fluid | Normally no in a vacuum booster | Yes |
| Requires hydraulic bleeding when replaced alone | Not if hydraulic lines remain closed | Generally yes |
| Requires pushrod compatibility | Yes | Yes |
Key Takeaway: The booster supplies assistance, while the master cylinder supplies hydraulic pressure. Both must be correctly matched and installed.
Tools and Materials Needed
Replacing a brake booster and master cylinder involves mechanical and hydraulic service.
The exact tools depend on the vehicle.
Common Tools
| Tool | Purpose |
| Socket and ratchet set | Remove booster and master cylinder hardware |
| Combination wrenches | Work with mounting fasteners |
| Brake line flare-nut wrenches | Reduce the risk of damaging hydraulic fittings |
| Torque wrench | Tighten fasteners to specified values |
| Screwdrivers and suitable pliers | Disconnect selected clips and connectors |
| Brake pedal linkage tools | Remove applicable pins and retainers |
| Master cylinder bench bleeding kit | Remove air from the replacement cylinder |
| Bench vise with suitable protection | Hold the master cylinder by its mounting flange |
| Brake bleeding equipment | Remove air from hydraulic circuits |
| Booster pushrod depth gauge | Verify clearance when required |
| Drain pan | Collect removed brake fluid |
| Brake line plugs or caps | Protect open hydraulic connections |
| Safety glasses and chemical-resistant gloves | Protect against fluid exposure |
| Shop towels | Protect surrounding surfaces |
| Vehicle-specific service information | Confirm torque, adjustment, and bleeding procedures |
Replacement Parts and Supplies
Depending on the vehicle, you may need:
- Correct replacement brake booster.
- Correct replacement master cylinder.
- Manufacturer-approved brake fluid.
- Required seals and gaskets.
- New brake pedal linkage retainer or clip.
- Replacement vacuum hose or check valve if damaged.
- Any specified one-time-use fasteners.
Do not assume that new parts include every necessary gasket, seal, or retainer.
Why Correct Parts Matter
Brake booster and master cylinder assemblies vary by:
- Vehicle make and model.
- Model year.
- Brake system design.
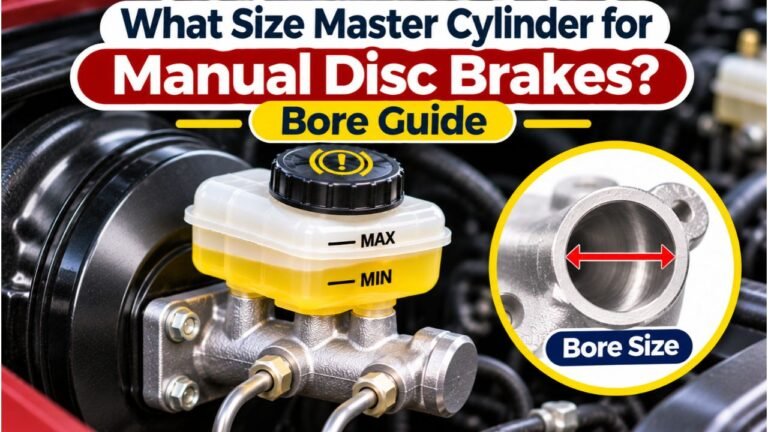
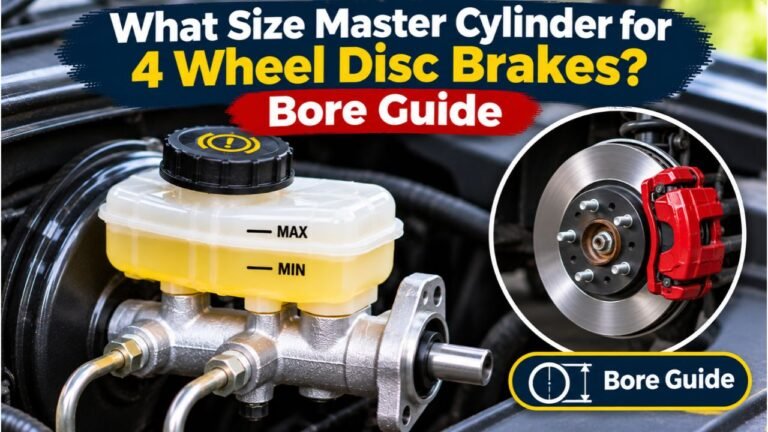
- Master cylinder piston diameter.
- Booster mounting pattern.
- Pushrod length.
- Hydraulic port configuration.
- Brake pedal linkage design.
- ABS and electronic braking equipment.
A replacement component that appears physically similar may still be incompatible.
Key Takeaway: Verify both replacement components against the vehicle’s exact braking system before beginning the installation.
Before Installing a Brake Booster and Master Cylinder
Correct preparation helps prevent damage and contamination.
Identify the Type of Brake Booster
Not every vehicle uses a conventional vacuum booster.
Common types include:
- Vacuum-operated brake boosters.
- Hydraulic power brake boosters, often called Hydro-Boost.
- Electromechanical brake boosters.
- Integrated electrohydraulic braking units.
The procedure in this article primarily describes conventional vacuum-assisted hydraulic brakes.
Hydro-Boost systems require additional hydraulic pressure-release and bleeding procedures.
Electronically controlled systems may require a scan tool, service mode, or other manufacturer-specific precautions.
Confirm the Replacement Parts
Compare the replacement parts with the original components.
Check the mounting configuration, connections, and specified application.
Do not modify safety-critical brake components to make an incompatible assembly fit.
Secure the Vehicle
Before disassembly:
- Park on level, stable ground.
- Switch off the vehicle.
- Secure it against unintended movement.
- Use wheel chocks.
- Follow the manufacturer’s battery-disconnection procedure.
- Allow hot components to cool.
Some electronically controlled brake systems may activate or retain hydraulic pressure with the ignition off. Follow the exact deactivation and pressure-release procedure before opening the system.
Release Stored Booster Vacuum
For many conventional vacuum boosters, pressing the brake pedal several times with the engine off removes stored vacuum assistance.
The pedal generally becomes firmer as assistance is exhausted.
This does not depressurize every type of hydraulic or electronic brake system.
Protect the Surrounding Area
Brake fluid can damage paint and certain other materials.
Protect painted surfaces, wear safety glasses, and keep the hydraulic system clean.
Avoid allowing dirt to enter the reservoir or open brake lines.
Never reuse dirty or collected brake fluid.
Step 1: Locate the Brake Booster and Master Cylinder
On many conventional left-hand-drive vehicles, the assembly is positioned near the driver’s side of the firewall.
The brake fluid reservoir is generally mounted above the master cylinder.
The booster is usually located behind it.
Identifying the Components
Look for:
- Brake fluid reservoir.
- Metal master cylinder body.
- Hydraulic brake lines connected to the cylinder.
- Large round brake booster housing.
- Vacuum hose and check valve.
- Booster mounting studs or bracket.
Inside the passenger compartment, the booster pushrod connects to the brake pedal.
Document the Original Arrangement
Before disconnecting components, record the placement of:
- Brake lines.
- Vacuum hose.
- Electrical connectors.
- Pedal linkage.
- Mounting brackets.
- Gaskets.
- Retaining clips.
Photographs can help identify the original arrangement during reassembly.
Do not rely solely on memory when routing hydraulic connections or replacing hardware.
Step 2: Disconnect the Existing Master Cylinder
If both the booster and master cylinder are being replaced, the old master cylinder generally needs to be removed.
Disconnect Electrical Connections
Many brake fluid reservoirs have a fluid-level sensor.
Disconnect the electrical connector according to the manufacturer’s procedure.
Avoid pulling directly on the wiring.
Prepare for Fluid Removal
The hydraulic system may require controlled fluid removal before disconnecting brake pipes.
Use appropriate equipment and a suitable drain container.
Protect surrounding surfaces from spills.
Disconnect Hydraulic Lines
Brake pipes attach to the master cylinder through threaded hydraulic fittings.
A correctly sized flare-nut wrench can help prevent damage to the fittings.
Keep dirt and debris out of the open connections.
Do not bend, twist, or force rigid brake pipes.
Remove the Master Cylinder Mounting Hardware
The master cylinder is commonly attached to the booster with two retaining nuts.
Remove the hardware according to the vehicle’s service procedure.
Carefully separate the master cylinder from the booster.
Inspect the Booster Interface
Look for brake fluid around the rear of the master cylinder and the booster mounting area.
A leaking rear master cylinder seal may allow fluid to enter the booster housing.
If brake fluid has contaminated the booster, determine whether the booster has also been damaged.
Can the Booster Be Replaced Without Opening Brake Lines?
Sometimes.
If only the brake booster is being replaced, some vehicles allow the master cylinder to be moved aside while the hydraulic lines remain connected.
In that case, hydraulic bleeding may not be necessary if the system remains completely sealed and no air enters.
However, when the master cylinder itself is replaced, the hydraulic lines must generally be disconnected, and proper bleeding is required afterward.
Step 3: Disconnect the Brake Pedal From the Booster
The booster input pushrod connects to the brake pedal inside the vehicle.
The connection often uses a clevis, pin, and retaining clip.
Locate the Pedal Connection
Access is usually underneath the dashboard near the top of the brake pedal arm.
A trim panel may need to be removed to reach the linkage.
Identify the Retaining Hardware
The connection may include:
- Clevis.
- Joint pin.
- Retaining clip.
- Bushing.
- Pedal switch components.
Different manufacturers use different hardware.
Disconnect the Linkage
Follow the service manual to release the correct retaining components and separate the booster pushrod from the pedal.
Avoid bending the pedal arm or damaging the brake light switch.
Inspect the Pedal Connection
Check for:
- Excessive wear.
- Damaged bushings.
- Bent linkage.
- Missing retainers.
- Loose components.
Replace required one-time-use clips or pins.
A missing or improperly installed brake pedal retainer can cause a serious loss of braking control.
Key Takeaway: The brake pedal linkage must be securely connected using the specified hardware and checked for correct movement after installation.
Step 4: Remove the Old Brake Booster
After separating the master cylinder and pedal linkage, the booster can be removed.
Disconnect the Vacuum Hose
On a vacuum-assisted system, disconnect the booster vacuum hose and associated fittings.
Inspect the hose and check valve for damage.
A cracked or leaking hose may cause poor brake assistance.
Remove Firewall Mounting Hardware
Most conventional boosters are secured to the firewall with mounting studs and nuts.
The exact number and location vary.
Some mounting hardware is accessible from inside the passenger compartment.
Remove the Booster Assembly
Carefully separate the booster from the firewall.
Avoid damaging nearby brake lines, wiring, or other components.
Space may be limited, requiring removal or repositioning of unrelated components according to the service manual.
Inspect the Mounting Area
Check the firewall, mounting bracket, seals, and adjacent components for damage.
Compare the original booster with the replacement.
Pay attention to:
- Mounting stud arrangement.
- Pedal pushrod length and shape.
- Master cylinder mounting surface.
- Vacuum connection location.
- Required spacers or brackets.
- Seals and gaskets.
Do not discard parts that the replacement manufacturer’s instructions require you to transfer.
Step 5: Install the New Brake Booster
The booster must be securely mounted and correctly connected to the brake pedal.
Position the Replacement Booster
Use the specified gasket, seal, and mounting hardware.
Position the replacement assembly according to the vehicle’s service manual.
Make sure the mounting studs align correctly.
Do not force the booster into position.
Secure the Booster to the Firewall
Install the mounting hardware and tighten it to the manufacturer-specified torque.
Do not substitute a generic torque value.
Different vehicles may use different mounting arrangements and fastener sizes.
Reconnect the Brake Pedal Linkage
Connect the booster input pushrod to the brake pedal using the correct pin, bushing, and retaining clip.
Check that the linkage moves properly.
Do not reuse a one-time-use retainer when the service procedure calls for replacement.
Check Pedal Position
The brake pedal must have the correct:
- Height.
- Free play.
- Return travel.
- Stop position.
- Brake light switch operation.
The correct values depend on the vehicle.
A pedal that cannot return fully may cause the brakes to remain partially applied.
Reconnect Booster Vacuum Components
Reconnect the vacuum hose and check valve according to the manufacturer instructions.
Inspect their condition and orientation.
An incorrectly installed check valve or leaking vacuum connection can prevent proper booster assistance.
Key Takeaway: The new booster must be securely mounted, correctly connected to the pedal, and compatible with the master cylinder.
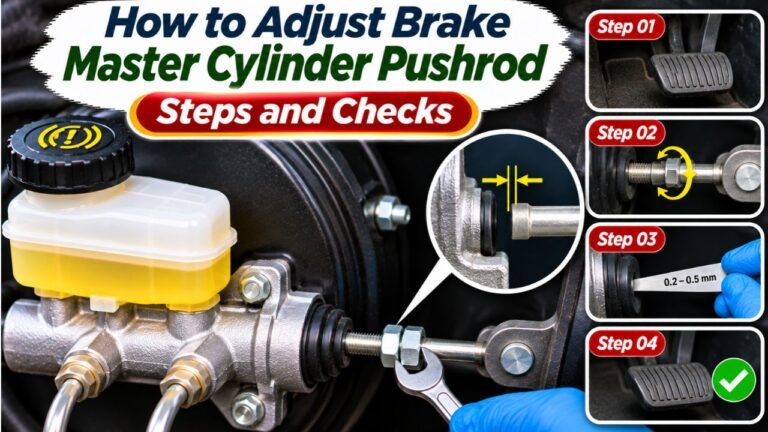
Step 6: Check Brake Booster Pushrod Clearance
Brake booster pushrod clearance is one of the most important installation details.
The booster output pushrod transfers force to the master cylinder piston.
Its effective length and clearance must match the vehicle’s design.
What Is Pushrod Clearance?
Pushrod clearance is the specified relationship between the booster output rod and the master cylinder piston when the brakes are released.
Proper clearance allows the hydraulic system to operate and release correctly.
What Happens if the Pushrod Is Too Long?
An incorrectly long pushrod may hold the master cylinder piston partially applied.
This can prevent the compensating ports from opening correctly.
Possible results include:
- Brake drag.
- Excessive brake heat.
- Reduced fuel efficiency.
- Brakes failing to release.
- Wheels becoming difficult to turn.
- Increasing hydraulic pressure as components heat up.
Severe brake drag can make the vehicle unsafe.
What Happens if the Pushrod Is Too Short?
Excessive clearance may cause:
- Excessive pedal travel.
- Delayed brake application.
- A low brake pedal.
- Inadequate master cylinder stroke under certain conditions.
How Is Clearance Checked?
Some systems require a manufacturer-specific measuring gauge or depth-measurement procedure.
The correct clearance is determined by the vehicle’s service manual.
Other systems use factory-adjusted pushrods that should not be altered.
For example, Mitsubishi’s official master cylinder and brake booster service instructions warn that the booster pushrod is already adjusted and must not be disturbed in that particular application.
Should You Adjust the Pushrod Yourself?
Only when the vehicle’s service procedure specifically requires adjustment and you have the correct measurement method and tools.
Do not adjust it by guessing or by trying to achieve a preferred pedal feel.
Never apply a pushrod clearance specification from one vehicle to another.
Step 7: Bench Bleed the New Master Cylinder
When replacing the master cylinder, trapped air must be removed from its internal chambers.
This is commonly done through bench bleeding before installation.
What Is Master Cylinder Bench Bleeding?
Bench bleeding removes air from the replacement master cylinder before its outlet ports are connected to the vehicle’s hydraulic brake lines.
A replacement cylinder may contain air from manufacturing, storage, or installation preparation.
Leaving this air inside the cylinder can make the final brake bleeding process more difficult and may contribute to a soft pedal.
General Bench Bleeding Process
For a conventional master cylinder that requires bench bleeding, the general procedure is:
- Secure the master cylinder using its mounting flange and appropriate bench equipment.
- Install the manufacturer’s bench bleeding fittings or plugs.
- Fill the reservoir with fresh, correctly specified brake fluid.
- Follow the supplied procedure to move the master cylinder pistons slowly and progressively.
- Allow trapped air to escape through the designated bleeding arrangement.
- Continue until the manufacturer’s air-removal criteria are satisfied.
- Protect the outlet ports against contamination before installation.
If the kit uses recirculating tubes, their ends must remain submerged as specified.
Do not clamp the cylinder body in a vise or force the piston beyond the manufacturer’s permitted travel.
The exact process can vary by master cylinder design.
Why Is Bench Bleeding Important?
The O’Reilly Auto Parts master cylinder replacement guide describes bench bleeding as an essential preparation step when replacing a conventional master cylinder.
It also emphasizes proper hydraulic bleeding after the brake lines have been disconnected.
Can You Skip Bench Bleeding?
Do not skip it when required by the replacement part or vehicle manufacturer.
Some specially designed or prefilled units may have different procedures.
Follow the instructions supplied with the specific replacement assembly.
What Brake Fluid Should You Use?
Use the vehicle manufacturer’s specified brake fluid.
Common classifications include:
- DOT 3.
- DOT 4.
- DOT 5.1.
- DOT 5, only in systems designed for it.
Conventional glycol-based DOT 3, DOT 4, and DOT 5.1 fluids are not interchangeable with silicone-based DOT 5.
Some vehicles also require specialized low-viscosity fluid or another manufacturer-approved hydraulic fluid.
Never use an unapproved substitute.
Key Takeaway: A properly prepared master cylinder helps prevent trapped air and supports correct hydraulic braking after installation.
Step 8: Install the New Master Cylinder on the Booster
Once the booster is mounted and the master cylinder has been prepared, the two components can be assembled.
Inspect the Mounting Surface
Check that the booster mounting surface is clean and undamaged.
Confirm that the required vacuum seal, O-ring, or gasket is present.
Some vehicles require a new seal when installing the master cylinder.
Align the Components
Carefully position the master cylinder onto the booster mounting studs.
Ensure that the output pushrod aligns with the master cylinder piston as specified.
The master cylinder should seat correctly without forcing the components together.
Secure the Master Cylinder
Install the correct mounting hardware.
Use the torque value specified for the vehicle.
Avoid excessive tightening that could damage the housing or mounting components.
Reconnect the Brake Lines
Reconnect the hydraulic pipes to their correct ports.
Start fittings carefully to avoid cross-threading.
Do not bend or force the brake lines to reach an incorrectly positioned master cylinder.
Use proper hydraulic fitting tools and the manufacturer-specified tightening procedure.
Reconnect Electrical Components
Reconnect the fluid-level sensor and other applicable electrical connectors.
Inspect wiring and connector retainers.
Check the Reservoir
Confirm that the reservoir and its seals are installed correctly.
Use only clean brake fluid meeting the required specification.
Key Takeaway: The master cylinder must be correctly aligned, securely mounted, and connected to the correct hydraulic circuits.
Step 9: Bleed the Brake System
Proper brake bleeding is essential after replacing the master cylinder and opening the hydraulic brake lines.
Even if the master cylinder was successfully bench bled, air may remain in the vehicle’s brake lines and related components.
Why Brake Bleeding Is Necessary
Brake fluid transmits hydraulic pressure efficiently.
Air compresses more easily, potentially causing:
- A soft pedal.
- Excessive pedal travel.
- Delayed brake response.
- Reduced braking effectiveness.
A vehicle with trapped air may not stop normally.
What Is Involved in Brake Bleeding?
The hydraulic system is serviced using the manufacturer’s specified bleeding procedure.
Common approaches include:
- Pressure bleeding.
- Vacuum bleeding.
- Manual bleeding.
- Electronic or scan-tool-assisted bleeding for certain systems.
The appropriate method depends on vehicle design.
Does Every Car Use the Same Bleeding Order?
No.
Some vehicles use a particular wheel sequence, while others require a different sequence or procedure based on hydraulic circuit layout.
A universal right-rear, left-rear, right-front, left-front sequence should not be assumed.
What About ABS?
Some ABS hydraulic control units require special procedures to remove trapped air.
Depending on the vehicle, the procedure may involve a diagnostic scan tool capable of activating valves or pumps.
Attempting an ordinary bleeding sequence on a system that requires electronic activation may leave air trapped.
Can the Reservoir Run Dry During Bleeding?
No.
The reservoir must be maintained at the correct level according to the service procedure.
Allowing it to run dry can introduce more air into the hydraulic system.
Is Bleeding Finished When No Bubbles Are Visible?
Not necessarily.
The system must meet the manufacturer’s bleeding and verification requirements.
Correct pedal feel, proper hydraulic operation, and the absence of leaks must also be confirmed.
Key Takeaway: Bench bleeding prepares the master cylinder. Full system bleeding removes air from the vehicle’s hydraulic brake circuits.
Step 10: Check Brake Pedal Height, Free Play, and Booster Operation
After installation, the brake pedal and power assistance system must be checked.
These checks should be performed according to the vehicle’s service manual.
Brake Pedal Height
Pedal height is the specified resting position of the brake pedal.
An incorrectly positioned pedal can affect braking response and control operation.
Brake Pedal Free Play
Free play is the permitted initial movement before the braking mechanism develops resistance.
Too little or too much free play may indicate incorrect linkage adjustment.
The required value is vehicle-specific.
Brake Light Switch
The brake light switch must operate correctly.
Check that the brake lights activate and release as intended.
An incorrectly adjusted switch can leave the lights on continuously or prevent them from operating.
Vacuum Booster Function
A common stationary functional check on conventional vacuum boosters involves exhausting stored vacuum with the engine off, applying pedal pressure, and observing the change when the engine starts.
A slight pedal movement as assistance develops may indicate that the booster is functioning.
However, the exact test and expected results depend on the vehicle.
This check alone does not prove the entire braking system is safe.
Pedal Feel
A properly serviced hydraulic braking system should have pedal response consistent with the manufacturer’s specification.
An excessively soft or sinking pedal requires further diagnosis.
A very hard pedal may indicate a booster or vacuum supply problem.
Brake Release
The brakes must release properly when the pedal is released.
Incorrect pushrod clearance or pedal adjustment can prevent normal release.
Do not drive a vehicle with suspected brake drag or abnormal pedal response.
Step 11: Check for Leaks and Confirm Safe Brake Operation
The final verification stage is as important as the installation itself.
A successful repair requires more than having all components physically mounted.
Hydraulic Leak Inspection
A technician should inspect:
- Master cylinder connections.
- Hydraulic outlet fittings.
- Brake lines.
- Flexible hoses.
- Reservoir seals.
- Calipers.
- Wheel cylinders.
- Other opened hydraulic connections.
The system must maintain hydraulic pressure without fluid escaping.
Booster Vacuum Inspection
On conventional vacuum systems, the booster vacuum hose and check valve should be inspected for proper connection and operation.
A vacuum leak may cause inadequate brake assistance.
Brake Pedal Return
The pedal must return fully to its specified resting position.
A sticking pedal or incorrect linkage adjustment can affect brake release.
Brake Drag Inspection
The brakes should release as designed.
Excessive drag may indicate incorrect pushrod clearance, a hydraulic restriction, or another problem.
Warning Lights
Relevant brake, ABS, and stability-control warnings must be investigated.
Clearing a warning without correcting the underlying fault is not an acceptable repair.
Final Verification
A qualified technician should verify the vehicle’s braking operation according to the manufacturer’s procedures before any controlled road test.
If there is a soft pedal, excessive travel, fluid leak, brake drag, or abnormal warning, the vehicle must remain out of service.
Never drive the vehicle on public roads until the repair has been properly completed and verified.
Do You Need to Replace the Brake Booster and Master Cylinder Together?
Not always.
The booster and master cylinder are separate components.
One can fail while the other remains functional.
When Only the Booster Needs Replacement
Possible indications include:
- Hard brake pedal.
- Excessive pedal effort.
- Faulty vacuum assistance.
- Damaged booster diaphragm.
- Booster-related vacuum leak.
These symptoms require diagnosis because other faults can produce similar behavior.
If the master cylinder remains serviceable, replacing it may not be necessary.
When Only the Master Cylinder Needs Replacement
Possible symptoms include:
- A pedal that sinks under steady pressure.
- Internal hydraulic pressure bypass.
- External master cylinder leakage.
- Failed seals.
However, similar symptoms can result from other hydraulic problems.
When Both May Need Replacement
Replacing both may be appropriate when:
- Both components have confirmed defects.
- Brake fluid has leaked into and damaged the booster.
- The vehicle requires matched replacement components.
- A conversion or repair procedure specifically requires both assemblies.
Does a Leaking Master Cylinder Damage the Booster?
It can.
A failed rear master cylinder seal may allow fluid into the booster housing.
This can damage internal booster components.
The booster should be inspected when rear master cylinder leakage is discovered.
Key Takeaway: Replace both components only when the diagnosis or manufacturer-approved repair procedure justifies it.
Common Problems After Installing a Brake Booster and Master Cylinder
Incorrect installation or incomplete servicing can cause several symptoms.
Brake Pedal Is Hard
Possible causes include:
- Vacuum hose disconnected.
- Faulty check valve.
- Insufficient vacuum supply.
- Incorrect booster installation.
- Defective replacement booster.
- Mechanical pedal linkage problem.
A hard pedal does not automatically mean the replacement master cylinder is defective.
Brake Pedal Is Soft or Spongy
Possible causes include:
- Trapped air.
- Incomplete bleeding.
- Hydraulic leakage.
- Incorrect master cylinder preparation.
- Another hydraulic fault.
Do not drive with an abnormal pedal.
Brake Pedal Sinks Toward the Floor
Possible explanations include:
- Hydraulic leak.
- Internal master cylinder bypass.
- Air in the hydraulic system.
- Incorrectly connected or defective components.
This is a serious warning that requires immediate diagnosis.
Brakes Drag After Installation
Potential causes include:
- Incorrect booster pushrod clearance.
- Improper pedal return.
- Incorrect pedal free play.
- Hydraulic pressure not releasing.
- Other mechanical or hydraulic faults.
Continued brake drag can cause excessive heat and component damage.
Brake Lights Stay On
An incorrectly positioned pedal or brake light switch may keep the lights illuminated.
The switch should be checked using the vehicle’s specified adjustment procedure.
Hissing Noise Near the Pedal
A hissing noise can indicate a vacuum leak around a conventional booster or its connections.
However, noises vary by system.
Professional inspection is necessary to identify the cause.
Brake Warning Light Remains On
Possible causes include:
- Low brake fluid.
- Hydraulic fault.
- ABS system problem.
- Disconnected sensor.
- Incomplete electronic service procedure.
Do not assume the warning will clear automatically.
Troubleshooting Chart
| Problem After Installation | Possible Cause | Recommended Action |
| Hard brake pedal | Booster assistance or vacuum problem | Inspect booster system |
| Soft brake pedal | Air or hydraulic problem | Verify bleeding and hydraulic integrity |
| Pedal sinks | Pressure loss or internal bypass | Stop using vehicle; diagnose |
| Brakes won’t release | Pushrod, pedal, or hydraulic problem | Check manufacturer-specified clearance and release |
| Brake fluid leak | Fitting, seal, or damaged component | Repair before driving |
| Hissing noise | Vacuum leak | Inspect connections and booster |
| Brake lights stay on | Pedal or switch adjustment | Check specified settings |
| ABS warning | Electronic or hydraulic system fault | Perform proper diagnosis |
Key Takeaway: If the brakes do not behave correctly after installation, do not attempt to compensate by guessing at adjustments or repeatedly driving the vehicle.
Brake Booster and Master Cylinder Installation on Vehicles With ABS
Many modern vehicles use ABS, electronic stability control, and electronic brake-force distribution.
These systems can affect hydraulic bleeding and service procedures.
Does ABS Change the Installation Process?
Sometimes.
The basic physical connections may be similar, but hydraulic bleeding and system initialization can be more complex.
Can Air Enter the ABS Hydraulic Unit?
Yes.
Air may enter the hydraulic control unit when the system is opened or fluid is lost.
Depending on the vehicle, ordinary manual bleeding may not remove all trapped air.
Do You Need a Scan Tool?
Some vehicles require a compatible diagnostic scan tool to activate ABS valves or perform an automated bleeding procedure.
Others do not require this step for every hydraulic repair.
The correct procedure depends on the model.
What About Brake-by-Wire Systems?
Brake-by-wire systems may use electronically controlled pressure-generation units rather than a conventional vacuum booster.
They can retain hydraulic pressure or activate independently under certain conditions.
Servicing these systems without the correct shutdown and pressure-release procedure can be dangerous.
Do not apply a conventional vacuum booster replacement guide to an electronically integrated brake system.
What About Hydro-Boost?
Hydro-Boost systems use hydraulic pressure, often from the power steering system, to provide brake assistance.
These require procedures specific to the hydraulic booster, including correct pressure release and bleeding of the assistance circuit.
They should not be treated as conventional vacuum boosters.
Key Takeaway: Identify the actual brake assistance system before starting. The correct procedure may differ substantially between conventional, hydraulic, and electronically controlled systems.
How Long Does It Take to Install a Brake Booster and Master Cylinder?
The amount of labor varies by vehicle.
A conventional system with accessible mounting hardware may require less labor than a vehicle with limited engine compartment space or complex hydraulic controls.
What Affects Installation Time?
Important factors include:
- Engine compartment accessibility.
- Dashboard component removal.
- Booster mounting location.
- Pedal linkage design.
- Brake pipe routing.
- Need for additional seals or brackets.
- Bench bleeding requirements.
- ABS bleeding procedures.
- Electronic system initialization.
- Condition of existing fasteners and fittings.
Is Replacing Both Faster Than Separate Repairs?
Replacing both components during the same repair may reduce some duplicated labor because the master cylinder is often removed to access the booster.
However, it still requires proper component preparation, hydraulic bleeding, and verification.
Replacing a working component solely to save future labor is not automatically necessary.
Should a Beginner Attempt the Repair?
This is not a good first automotive repair project.
Brake booster and master cylinder installation involves the vehicle’s primary safety system.
Incorrect pushrod clearance, missing pedal linkage retainers, improper hydraulic fittings, or trapped air can cause brake failure.
Owners without vehicle-specific service information and the necessary equipment should use a qualified technician.
How Much Does Brake Booster and Master Cylinder Installation Cost?
The total cost depends on the vehicle, replacement components, and labor requirements.
Main Cost Factors
| Cost Factor | Why It Matters |
| Replacement booster | Prices vary by size, design, and manufacturer |
| Replacement master cylinder | Piston size, port arrangement, and vehicle fitment affect cost |
| Labor | Accessibility and disassembly requirements vary |
| Brake fluid | Correct grade and required quantity |
| Additional seals | Certain components require new seals or retainers |
| Hydraulic bleeding | May require specialized equipment |
| ABS or electronic procedures | Some systems need diagnostic tools |
| Related repairs | Leaking lines or other damaged components increase cost |
OEM vs. Aftermarket Parts
Original equipment parts are designed for the vehicle’s intended application.
Aftermarket replacement parts may also be suitable when they meet the appropriate fitment and quality requirements.
Whichever option is chosen, verify:
- Exact vehicle application.
- Master cylinder specifications.
- Booster compatibility.
- Required pushrod arrangement.
- Hydraulic fittings.
- Warranty and installation instructions.
Should You Buy a Preassembled Booster and Master Cylinder?
Some suppliers sell compatible booster and master cylinder assemblies together.
A preassembled kit may simplify certain installation details.
However, it does not eliminate the need to verify mounting compatibility, pushrod requirements, hydraulic bleeding, and safe operation.
Never assume a preassembled unit is automatically adjusted correctly for every vehicle.
Common Mistakes When Installing a Brake Booster and Master Cylinder
1. Installing Incompatible Parts
Similar-looking components may have different piston sizes, pushrod dimensions, mounting patterns, or hydraulic ports.
Always verify fitment.
2. Skipping Master Cylinder Bench Bleeding
A replacement master cylinder may contain trapped air.
Skipping required preparation can complicate hydraulic bleeding.
3. Guessing Pushrod Clearance
Incorrect pushrod clearance can cause excessive pedal travel or brake drag.
Use the correct vehicle-specific specifications.
4. Adjusting a Factory-Set Pushrod
Some booster pushrods are preset and must not be adjusted.
Check the manufacturer’s procedure before making changes.
5. Reusing Damaged or One-Time-Use Retainers
Missing or improperly installed pedal linkage retainers can create a serious braking hazard.
Use the correct hardware.
6. Leaving Hydraulic Fittings Loose
Brake line leaks can cause loss of hydraulic pressure.
Connections must be installed correctly and verified.
7. Cross-Threading Brake Lines
Damaged threads can prevent proper sealing.
Do not force hydraulic fittings into place.
8. Using the Wrong Brake Fluid
Incorrect fluid can damage seals and interfere with hydraulic operation.
Use the specified product.
9. Allowing the Reservoir to Run Dry During Bleeding
This can introduce additional air into the hydraulic circuits.
Follow the bleeding procedure carefully.
10. Assuming Every Vehicle Uses the Same Bleeding Order
Bleeding sequences vary by brake circuit layout and electronic system design.
11. Ignoring ABS Bleeding Requirements
Some systems require diagnostic equipment to remove trapped air.
Ordinary bleeding may not be sufficient.
12. Forgetting the Vacuum Check Valve
An incorrectly connected or faulty check valve can affect booster operation.
13. Ignoring Brake Pedal Free Play
Incorrect pedal adjustment can interfere with brake release or braking response.
14. Failing to Check for Brake Drag
A vehicle may develop dangerous brake heat if pressure does not release properly.
15. Driving Before the System Is Verified
A brake repair is not complete merely because the components are installed.
The system must be checked for proper hydraulic operation, assistance, pedal return, and absence of leaks.
Conclusion
Installing a brake booster and master cylinder involves more than bolting two replacement components together. The process requires correct part selection, secure booster mounting, proper brake pedal linkage, accurate pushrod clearance, master cylinder preparation, hydraulic bleeding, and final safety verification.
In a conventional vacuum-assisted system, the booster is mounted to the firewall and connected to the brake pedal. The replacement master cylinder is then prepared, installed on the booster, and connected to the hydraulic brake lines.
If the master cylinder has been replaced or hydraulic connections opened, the braking system must be bled using the manufacturer’s specified procedure.
Pushrod clearance is especially important because an incorrect setting can cause brake drag, excessive pedal travel, or improper brake release.
Vehicles equipped with ABS, Hydro-Boost, brake-by-wire, or other electronic braking systems may require additional procedures and equipment.
Before the car returns to service, a qualified technician should confirm correct pedal operation, booster assistance, proper hydraulic pressure, normal brake release, and the absence of leaks.
The safest way to install a brake booster and master cylinder is to follow the exact vehicle-specific service manual and verify the complete braking system before driving.
FAQs About How to Install a Brake Booster and Master Cylinder
Can You Install a Brake Booster and Master Cylinder Together?
Yes.
In many conventional vehicles, the master cylinder mounts directly to the brake booster.
The components can be replaced during the same repair when both require replacement.
However, correct fitment, pushrod clearance, hydraulic bleeding, and final testing remain necessary.
Does the Master Cylinder Go on Before or After the Brake Booster?
When replacing both components on a conventional vehicle, the booster is generally installed onto the firewall before the master cylinder is attached.
The replacement master cylinder should be prepared according to its bleeding instructions before final installation.
Do You Have to Bleed the Brakes After Replacing a Brake Booster?
Not always.
If only the booster is replaced and the hydraulic brake system remains completely sealed, bleeding may not be necessary.
However, if the master cylinder or hydraulic brake lines are disconnected, proper bleeding is generally required.
Do You Have to Bleed a New Master Cylinder?
A conventional replacement master cylinder generally requires bench bleeding or another manufacturer-approved preparation procedure.
The purpose is to remove trapped air before or during installation.
Follow the instructions for the specific component.
Can You Install a Master Cylinder Without Bench Bleeding It?
Do not skip bench bleeding when required.
Trapped air can cause a soft pedal and make hydraulic bleeding more difficult.
Some specialized replacement assemblies use different preparation procedures, so follow the manufacturer instructions.
Do You Need to Adjust the Brake Booster Pushrod?
It depends on the vehicle.
Some designs require a precise clearance measurement and adjustment.
Others have factory-set pushrods that should not be changed.
Never guess at the required setting.
What Happens if the Brake Booster Pushrod Is Too Long?
An excessively long pushrod can hold the master cylinder piston partially applied.
This may prevent hydraulic pressure from releasing correctly.
Possible consequences include brake drag, overheating, and brakes that fail to release.
What Happens if the Brake Booster Pushrod Is Too Short?
Excessive clearance can cause additional pedal travel and delayed brake application.
A correct adjustment must follow the vehicle’s specifications.
Why Is My Brake Pedal Hard After Replacing the Booster?
Possible causes include an incorrectly connected vacuum hose, faulty check valve, insufficient vacuum supply, defective booster, or installation problem.
A hard pedal requires diagnosis before driving.
Why Is My Brake Pedal Soft After Replacing the Master Cylinder?
Possible causes include trapped air, incomplete bleeding, hydraulic leakage, or an internal component problem.
Do not assume the softness will disappear through normal driving.
The system must be checked and repaired.
Can You Replace the Master Cylinder Without Replacing the Booster?
Yes.
The master cylinder and brake booster can be replaced separately when only one component has failed.
However, a leaking master cylinder may damage the booster, so the booster should be inspected when leakage is found.
Can You Replace the Booster Without Removing the Brake Lines?
Sometimes.
On certain vehicles, the master cylinder can be moved aside without disconnecting the hydraulic lines.
However, this is only acceptable when the service procedure and available clearance permit it.
Do not bend or damage the brake pipes.
Does a Brake Booster Need Brake Fluid?
A conventional vacuum brake booster does not normally contain brake fluid.
The master cylinder and hydraulic braking system use brake fluid.
Some hydraulic booster designs operate with a separate hydraulic fluid supply.
The correct requirements depend on the system.
Do You Need a Scan Tool to Bleed the Brakes?
Some vehicles do.
Certain ABS and electronically controlled braking systems require a compatible scan tool or special bleeding procedure.
Other conventional systems can be bled using approved mechanical methods.
Check the service manual.
Can You Drive Immediately After Replacing the Master Cylinder?
Not until all required hydraulic bleeding, leak inspections, pedal checks, and system verification have been completed.
A newly installed master cylinder does not guarantee safe braking.
Can You Use Any Brake Fluid After Installation?
No.
Use only the brake fluid specified by the vehicle manufacturer.
Different fluid chemistries and performance classifications are not universally interchangeable.
What Is the Difference Between a Vacuum Booster and Hydro-Boost?
A vacuum booster uses vacuum assistance.
Hydro-Boost uses hydraulic pressure, typically supplied through a power steering-related hydraulic circuit.
Installation and bleeding procedures differ.
How Do You Know if the Brake Booster Is Installed Correctly?
The booster should be securely mounted, correctly connected to the pedal and power source, and provide the expected assistance.
The brake pedal must return correctly, and the hydraulic braking system must operate normally.
Final confirmation requires the manufacturer’s specified testing procedures.
What Happens if the Master Cylinder Is Installed Incorrectly?
Incorrect installation can cause hydraulic leakage, excessive pedal travel, brake drag, inadequate pressure, or brake failure.
The vehicle should not be driven until the problem is corrected.
Is Replacing a Brake Booster and Master Cylinder a DIY Job?
It is a complex, safety-critical repair.
Experienced technicians with the correct service information and tools can perform it.
For beginners or owners without proper hydraulic bleeding and verification equipment, professional installation is strongly recommended.