How to Bleed Brake Fluid: Step-by-Step Guide and Safety Tips
To bleed brake fluid, use the vehicle’s specified fresh fluid and bleeding sequence, keep the master-cylinder reservoir supplied, and release fluid through the appropriate bleeder screws until trapped air is removed. In the traditional two-person method, a helper holds the brake pedal while another person briefly opens a bleeder; the bleeder must be closed before the pedal is released. Improper bleeding can leave the brakes unsafe.
Air can enter the hydraulic system during hose, caliper, or master-cylinder repairs, or after a reservoir runs dry. Because air compresses under pressure, it can cause a soft or spongy brake pedal. Bleeding removes air, while a complete brake fluid exchange also replaces aging fluid. Neither procedure repairs a leak or a failed hydraulic component.
The procedure isn’t identical for every car. Some ABS, hybrid, electric, or electronically controlled brake systems require diagnostic equipment or manufacturer-specific precautions. If you cannot confirm the required method or the pedal remains abnormal, have the vehicle professionally serviced.
In this article, I cover the tools, correct bleeding order, two-person steps, and pressure, vacuum, and gravity alternatives. You’ll also learn how to avoid introducing air, handle ABS requirements, check the results, and diagnose problems after bleeding.
What Does Bleeding Brake Fluid Mean?
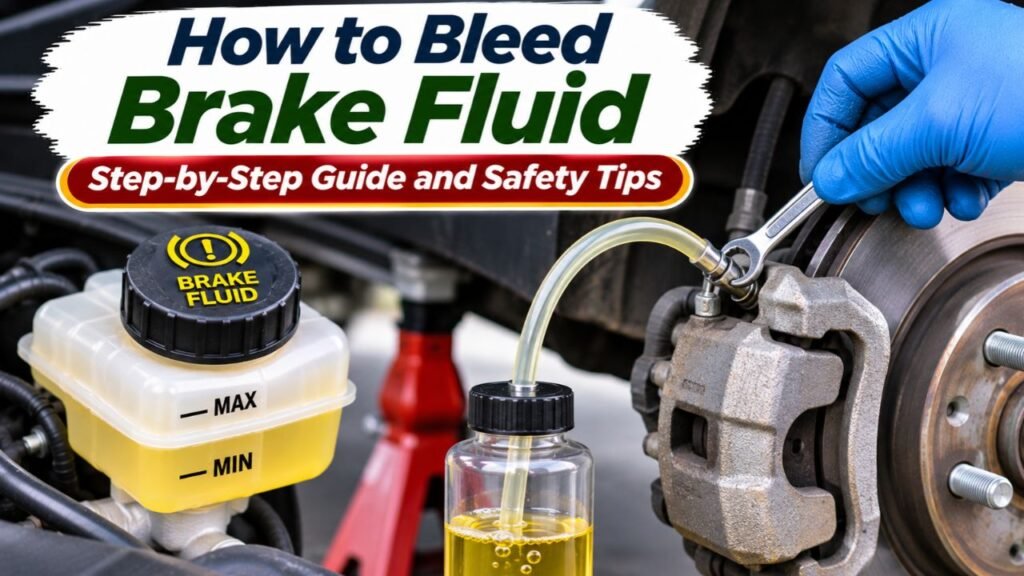
Bleeding the brakes means removing trapped air or gas from the hydraulic braking system so the brake pedal can transmit pressure correctly.
When you press the brake pedal, the master cylinder generates hydraulic pressure.
Brake fluid transfers that pressure through the brake lines to the calipers or wheel cylinders.
The hydraulic components then apply the brake pads or shoes.
Liquid brake fluid is relatively incompressible under normal operating conditions.
Air behaves differently.
Because air compresses under pressure, an air pocket can absorb some brake pedal movement before sufficient hydraulic pressure develops.
This can create a soft or spongy pedal.
What Does Brake Bleeding Remove?
A proper bleeding procedure removes unwanted gas from the hydraulic circuits.
Depending on the service being performed, it may also remove aging fluid.
The process is commonly necessary after opening part of the hydraulic system.
Is Bleeding the Same as Changing Brake Fluid?
Not exactly.
Brake bleeding primarily removes air.
A brake fluid change or flush focuses on replacing old hydraulic fluid.
However, both procedures often involve allowing fluid to leave through the bleeder screws while fresh fluid enters the system.
Brake Bleeding vs. Brake Fluid Flush
| Service | Main Purpose | When Needed |
| Brake bleeding | Removes trapped air | After certain hydraulic repairs or air entry |
| Brake fluid change | Replaces aging brake fluid | Manufacturer maintenance interval |
| Brake fluid flush | Exchanges fluid throughout required circuits | Fluid replacement or contamination service |
| Brake fluid top-up | Adjusts reservoir level after assessment | When the manufacturer permits it |
| Hydraulic repair | Fixes defective or leaking components | Mechanical or hydraulic failure |
Bleeding alone does not repair a leaking hose, defective master cylinder, or damaged brake caliper.
These problems must be corrected separately.
When Do You Need to Bleed Brake Fluid?
Brake bleeding is necessary when air has entered the hydraulic system or when the manufacturer’s service procedure requires it.
After Replacing a Brake Caliper
A caliper replacement normally involves opening a hydraulic connection.
Air can enter the system during the repair.
The affected hydraulic circuit must be bled according to the vehicle’s service procedure.
After Replacing a Brake Hose
Disconnecting a hydraulic brake hose can introduce air.
Bleeding is generally required after installing the replacement hose.
After Replacing Brake Lines
Brake line repairs may allow air into a larger portion of the system.
A more extensive bleeding procedure may be necessary.
After Replacing the Master Cylinder
A new master cylinder may contain trapped air.
Some replacements require a specific bench-bleeding or pre-bleeding procedure before installation.
However, not every master cylinder or electronically controlled braking system uses the same method.
If the Reservoir Runs Dry
An empty master-cylinder reservoir can allow air into the hydraulic circuits.
This may require additional procedures beyond ordinary wheel bleeding.
In some ABS-equipped vehicles, specialized diagnostic equipment is necessary.
If the Pedal Feels Spongy
A spongy pedal may indicate trapped air.
However, it can also result from a hydraulic leak, master-cylinder failure, damaged hose, or vapor formed when brake fluid overheats.
Bleeding is appropriate only after the actual cause has been identified.
Is Bleeding Required After Changing Brake Pads?
Not automatically.
If the hydraulic system remains closed during a normal brake pad replacement, bleeding may not be necessary.
However, fluid replacement could still be due under the manufacturer’s maintenance schedule.
When Brake Bleeding May Be Necessary
| Situation | Is Bleeding Generally Required? |
| Brake pads replaced without opening hydraulics | Usually not |
| Brake rotors replaced | Usually not |
| Brake caliper replaced | Yes |
| Brake hose replaced | Yes |
| Brake line opened | Yes |
| Master cylinder replaced | Usually, using a model-specific procedure |
| Reservoir ran dry | Yes; may need specialized procedures |
| Scheduled brake fluid change | Appropriate fluid exchange and bleeding procedure |
| Brake pedal feels spongy | Diagnosis first |
| Hydraulic leak repaired | Usually |
| ABS hydraulic unit replaced | Often requires specialized bleeding |
Key Takeaway: Bleeding is needed to remove air, not simply because brake pads or rotors are being replaced.
What Tools Do You Need to Bleed Brake Fluid?
The tools depend on the bleeding method.
For a conventional two-person procedure, you generally need a suitable wrench, clear tubing, a fluid collection container, and the correct brake fluid.
Brake Bleeding Tools Checklist
| Tool or Material | Purpose |
| Correct fresh brake fluid | Replenishes fluid during bleeding |
| Box-end or bleeder wrench | Opens and closes bleeder screws |
| Clear flexible tubing | Carries discharged fluid into a container |
| Collection bottle | Collects used brake fluid |
| Safety glasses | Protects eyes |
| Chemical-resistant gloves | Helps prevent skin exposure |
| Clean shop towels | Protects surrounding areas |
| Wheel chocks | Helps prevent vehicle movement |
| Floor jack | Raises the vehicle when necessary |
| Properly rated jack stands | Supports the raised vehicle |
| Wheel lug wrench | Removes and reinstalls wheels |
| Torque wrench | Tightens fasteners to specification |
| Vehicle service manual | Provides correct bleeding sequence and procedure |
| Assistant | Operates the pedal for two-person bleeding |
Depending on the method, optional equipment includes a pressure bleeder, vacuum bleeder, or manufacturer-compatible diagnostic scan tool.
What Size Wrench Do You Need?
Brake bleeder screws vary in size.
Common metric sizes include 8 mm, 10 mm, and 11 mm, but these are not universal.
Use the correct wrench for the vehicle.
An incorrectly sized tool can round the bleeder screw.
What Kind of Tubing Should You Use?
Choose transparent tubing that fits snugly over the bleeder nipple.
A secure fit helps prevent fluid from spilling and allows air bubbles to be observed.
The correct diameter depends on the bleeder.
How Much Brake Fluid Do You Need?
The quantity depends on the vehicle and scope of the work.
A small repair may require relatively little fluid.
A complete brake fluid exchange may require substantially more.
Consult the service manual or service specifications, and have enough fresh fluid available before starting.
Can You Use Old Brake Fluid?
No.
Use fresh, manufacturer-approved fluid from a properly sealed container.
Never return used or drained fluid to the reservoir.
How to Bleed Brake Fluid Step by Step: Two-Person Method
The traditional two-person method uses brake pedal pressure to push fluid and trapped air out through the bleeder screws.
This procedure is a general guide for conventional hydraulic brake systems only. Confirm that the vehicle’s service manual permits manual bleeding before starting. Some ABS, hybrid, electric, and brake-by-wire systems require different procedures.
The PowerStop guide to bleeding vehicle brakes explains the two-person method, including the importance of keeping the reservoir supplied and closing the bleeder before releasing the pedal.
Step 1: Read the Vehicle’s Service Instructions
Before opening the hydraulic system, identify:
- Required brake fluid specification
- Correct wheel bleeding order
- Bleeder screw locations
- Bleeder tightening torque
- Vehicle lifting points
- ABS or electronic brake precautions
- Whether special diagnostic equipment is required
Do not use a generic procedure if it conflicts with the vehicle’s factory service information.
Step 2: Park and Secure the Vehicle
Choose a level, stable work surface.
Set the transmission to Park or the manufacturer-specified safe position.
Use wheel chocks.
For a conventional system, the engine is normally off during manual bleeding unless the service procedure states otherwise.
Some electronically assisted systems have additional activation and depressurization requirements.
Follow those instructions before touching the hydraulic components.
Step 3: Lift the Vehicle Safely if Required
Some bleeder screws can be accessed without removing the wheels.
Other vehicles require wheel removal.
If lifting is necessary, use the manufacturer’s designated lifting points.
Support the vehicle with appropriately rated jack stands.
Never work under a vehicle supported only by a hydraulic floor jack.
Step 4: Locate the Master-Cylinder Reservoir
The reservoir is commonly mounted on or near the brake master cylinder.
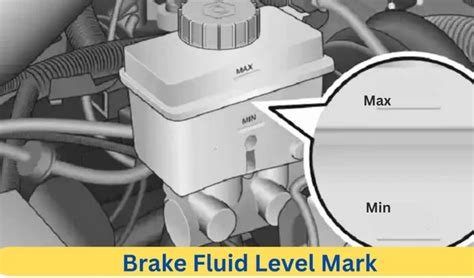
It is often translucent and has MIN and MAX markings.
Confirm the brake fluid specification from the owner’s manual or reservoir cap.
Clean the surrounding area before opening the cap.
Dirt or other contamination must not enter the hydraulic system.
Step 5: Check and Prepare the Brake Fluid Level
Ensure the reservoir contains the amount of correct fresh fluid required by the service procedure.
If performing a complete fluid exchange, a technician may remove some old reservoir fluid first.
However, never allow the reservoir or master cylinder to run dry.
This could introduce additional air and complicate the repair.
Keep the reservoir supplied throughout the entire process.
Step 6: Determine the Correct Bleeding Sequence
Find the specified sequence in the vehicle’s service manual.
Do not assume every vehicle uses the same order.
Many conventional systems start at the wheel hydraulically farthest from the master cylinder.
However, diagonal-split systems, ABS hydraulic units, and other designs may require different sequences.
Step 7: Locate the First Bleeder Screw
At the specified wheel, locate the bleeder screw.
On disc brakes, it is generally on the caliper.
On drum brakes, it is normally on the wheel cylinder.
Some multi-piston calipers have more than one bleeder screw.
Make sure you have identified the actual bleeder screw rather than a hydraulic line fitting.
Step 8: Attach the Clear Tube
Fit the clear tubing securely over the bleeder nipple.
Place the opposite end into a suitable collection container.
A small amount of compatible brake fluid in the container can help keep the hose outlet submerged during manual bleeding.
This arrangement helps you observe fluid flow and air bubbles.
Keep the container stable to prevent spills.
Step 9: Have the Assistant Press and Hold the Pedal
Ask your assistant to press the brake pedal slowly according to the vehicle’s approved procedure.
In many conventional methods, the helper makes several controlled pedal strokes, then maintains pressure.
Agree on clear commands such as Hold and Release.
On some older master cylinders, pushing the pedal farther than its normal operating range can damage seals.
Follow the specific procedure instead of forcing the pedal to the floor.
Step 10: Open the Bleeder Briefly
While the assistant maintains pedal pressure, carefully loosen the bleeder screw as directed.
Fluid should flow through the clear tubing.
If air is present, bubbles may appear.
The assistant must continue holding pedal pressure during this stage.
Do not allow the helper to release the pedal while the bleeder remains open.
Step 11: Close the Bleeder Before Releasing the Pedal
As fluid flow slows, close the bleeder screw according to the service procedure.
Only after the bleeder has been closed should the assistant release the pedal.
This order is important because releasing the pedal with the bleeder open can draw air back into the hydraulic circuit.
Avoid overtightening the screw.
Step 12: Repeat the Bleeding Cycle
Continue the approved press-hold-open-close-release sequence.
Monitor the clear tubing.
The objective is to remove trapped air.
For a complete fluid exchange, continue until the appropriate amount of old fluid has been replaced according to the service instructions.
Check the master-cylinder reservoir frequently.
Add fresh fluid as needed without letting its level fall below the permitted range.
Step 13: Move to the Next Wheel
Once the first circuit has been properly bled, close the bleeder to its specified torque.
Move to the next wheel in the manufacturer’s sequence.
Repeat the procedure.
Do not skip required bleeder screws on calipers that have multiple bleeding points.
Step 14: Finish the Fluid Level and Leak Checks
After the specified circuits have been bled:
- Verify that all bleeder screws are tightened correctly.
- Inspect for fluid leakage.
- Reinstall the bleeder dust caps.
- Adjust the reservoir level according to the manufacturer’s instructions.
- Secure the reservoir cap.
- Clean up any spilled brake fluid.
If the wheels were removed, reinstall them and tighten their fasteners to the specified torque.
Step 15: Verify Brake Operation Before Driving
Check the brake pedal using the manufacturer’s stationary verification procedure.
The pedal should have the expected response for that vehicle.
Brake booster operation may change pedal feel when the engine or vehicle is turned on.
Check for leaks and warning messages.
If pedal travel remains excessive, the pedal is spongy, a warning appears, or any hydraulic leak is suspected, do not drive the vehicle.
Have the braking system inspected and corrected by a qualified technician.
Key Takeaway: The two most important procedural safeguards are keeping the reservoir from running dry and closing each bleeder before the pedal is released.
What Is the Correct Order to Bleed Brakes?
The correct wheel sequence depends on the hydraulic system design.
There is no universal bleeding order for every car.
Common Conventional Bleeding Order
A frequently used sequence on certain conventional systems is:
| Position | Wheel |
| First | Right rear |
| Second | Left rear |
| Third | Right front |
| Fourth | Left front |
This is an example only.
The hydraulic layout of the vehicle may require a different order.
Why Start With the Farthest Wheel?
On many conventional systems, bleeding the longest hydraulic circuit first is an established service method.
However, physical distance from the master cylinder does not always correspond to the required bleeding order.
Do All Cars Follow Rear-to-Front Bleeding?
No.
Some manufacturers specify a different sequence because of the brake circuit arrangement.
For example, a diagonally split hydraulic system may require a particular wheel order.
Does ABS Change the Sequence?
It can.
Some vehicles with ABS follow a conventional wheel sequence for ordinary line bleeding.
Others require additional procedures involving the ABS hydraulic unit.
How Do You Find the Exact Order?
Check the factory service manual or a reliable professional service-information system for the exact year, make, model, and braking configuration.
Do not rely on a generic chart when performing safety-critical brake work.
How to Bleed Brakes by Yourself
A one-person brake bleeding method uses equipment that creates pressure or vacuum without requiring an assistant at the pedal.
However, not every tool or technique is approved for every vehicle.
One-Person Brake Bleeding Methods Compared
| Method | Equipment | Main Advantage | Main Limitation |
| Vacuum bleeding | Vacuum pump | Can draw fluid at a wheel | Air may enter around bleeder threads |
| Pressure bleeding | Pressure bleeder and adapter | Can provide controlled fluid flow | Must follow pressure limits and equipment instructions |
| Gravity bleeding | Clear tubing and collection container | Simple setup | Slow and ineffective for some trapped-air conditions |
| Check-valve bleeding | Suitable one-way bleeding device | May simplify manual operation | Must be compatible and used correctly |
| Scan-tool-assisted bleeding | Compatible diagnostic tool | Can activate certain ABS hydraulic components | Vehicle-specific and often requires professional equipment |
These methods do not eliminate the need to follow the service manual.
Is One-Person Bleeding as Effective?
It can be when the equipment is suitable and the procedure is performed correctly.
However, a one-person setup isn’t automatically simpler on every vehicle.
A complicated ABS system may still require specialized service.
How to Bleed Brake Fluid With a Vacuum Pump
Vacuum bleeding uses a pump to draw brake fluid through the hydraulic system at a bleeder screw.
How Vacuum Bleeding Works
The vacuum tool connects to the bleeder nipple through a suitable hose and adapter.
The pump creates suction.
When the bleeder is opened, fluid flows toward the pump’s collection container.
The process continues according to the service procedure.
Basic Vacuum Bleeding Process
First, confirm that vacuum bleeding is approved for the vehicle.
Then prepare the reservoir and connect the vacuum equipment to the specified bleeder.
Apply vacuum according to the equipment manufacturer’s instructions.
Open the bleeder as directed.
Monitor the collected fluid and maintain the reservoir level.
Close the bleeder before removing the equipment or releasing the setup in a way that could admit air.
Repeat at the required locations.
Why Are There Bubbles During Vacuum Bleeding?
Air bubbles may indicate air being removed from the hydraulic circuit.
However, vacuum can also draw air around bleeder screw threads or hose connections.
Consequently, bubbles in a vacuum tool’s tubing are not always proof that air remains inside the brake lines.
Inspect the equipment’s seal and follow the manufacturer’s troubleshooting guidance.
What Are the Advantages?
Vacuum bleeding can be useful when one person needs to service a conventional hydraulic system.
It may also be convenient for controlled fluid removal.
What Are the Limitations?
Vacuum bleeding may not remove all air from certain hydraulic units.
It may also provide misleading bubble observations if the connections aren’t properly sealed.
A different procedure may be required for some ABS or electronically controlled systems.
How to Bleed Brake Fluid With a Pressure Bleeder
A pressure bleeder connects to the master-cylinder reservoir through a compatible adapter.
It applies controlled pressure to move fresh brake fluid through the hydraulic circuits.
How Pressure Bleeding Works
The bleeder equipment maintains a supply of fluid under controlled pressure.
When a wheel bleeder is opened, the pressure pushes fluid through the hydraulic circuit.
This can remove trapped air and exchange old fluid.
Basic Pressure Bleeding Process
Before starting, confirm that the vehicle manufacturer permits pressure bleeding.
Use the correct reservoir adapter.
Check all connections for leaks.
Set the pressure to the value specified by the vehicle and equipment manufacturers.
Bleed the required circuits in the correct order.
Monitor fluid supply and collected fluid.
Release equipment pressure safely according to the tool instructions before disconnecting it.
Is Pressure Bleeding Better Than Manual Bleeding?
Pressure bleeding can provide controlled and consistent fluid flow.
It may be efficient for a complete fluid exchange.
However, the result still depends on using the correct procedure.
How Much Pressure Should You Use?
There is no single pressure setting suitable for every vehicle.
The approved pressure depends on the hydraulic system and bleeding equipment.
Do not use an arbitrary pressure setting.
Excessive pressure can damage equipment or create leaks.
Does Pressure Bleeding Work With ABS?
It can on some vehicles.
However, pressure bleeding alone may not remove air trapped inside certain ABS hydraulic units.
Additional scan-tool procedures may be required.
How to Bleed Brake Fluid by Gravity
Gravity bleeding allows brake fluid to flow through a hydraulic circuit under the influence of gravity.
It generally doesn’t require pedal pumping or a powered vacuum device.
However, it is not suitable for every bleeding situation.
How Gravity Bleeding Works
When an appropriate bleeder is opened, fluid may flow from the reservoir through the hydraulic circuit and out of the bleeder.
The process is relatively slow.
Its success depends on the hydraulic system and whether gravity can move fluid through the required passages.
General Gravity Bleeding Procedure
After confirming that the vehicle permits gravity bleeding, prepare the reservoir and connect a clear hose to the specified wheel bleeder.
Open the bleeder according to the service instructions.
Allow fluid to flow into a collection container.
Maintain the reservoir level throughout the process.
Close the bleeder before removing the hose.
Repeat at the required wheels if the procedure specifies them.
The AutoZone guide to gravity bleeding brake fluid describes this method and emphasizes maintaining the master-cylinder fluid supply.
What Are the Advantages of Gravity Bleeding?
It uses relatively simple equipment and doesn’t require an assistant to pump the pedal.
What Are the Limitations?
Gravity bleeding may be slow or ineffective for removing air trapped in certain components.
It may not be appropriate after major hydraulic repairs or when the ABS unit contains air.
Can Gravity Bleeding Remove All Air?
Not always.
Air may remain in sections of the system where gravity-driven flow is insufficient.
A different approved procedure may be necessary.
How to Bleed Brake Fluid With ABS
ABS-equipped vehicles may require a special bleeding procedure, particularly if air has entered the ABS hydraulic unit.
The correct method depends on the manufacturer and the type of work performed.
What Is Different About ABS?
An anti-lock braking system can include:
- Hydraulic control valves
- Pumps
- Pressure-control passages
- Electronic control modules
These components can affect how fluid moves through the system during servicing.
Can You Manually Bleed ABS Brakes?
Sometimes.
For certain routine repairs involving only the wheel circuits, conventional bleeding may be permitted.
However, if the ABS hydraulic unit has been opened, replaced, or filled with air, additional procedures may be necessary.
When Is a Scan Tool Required?
Some vehicles require a diagnostic tool capable of activating ABS valves or pumps during bleeding.
This allows fluid and trapped air to move through parts of the hydraulic unit that may not be purged by ordinary pedal bleeding.
The HELLA technical guide to changing and bleeding brake fluid explains that manufacturer-specific instructions apply to ABS and ESP systems because certain valves inside the hydraulic block can be controlled only through diagnostic equipment.
Can You Use a Basic OBD2 Code Reader?
A basic code reader generally cannot perform every manufacturer’s ABS bleeding function.
The tool must support the exact brake system’s service routine.
What About Hybrid and Electric Vehicles?
Some hybrid and electric vehicles use electronically controlled or integrated brake systems.
These may have special pressure-release, activation, or diagnostic requirements.
A generic pedal-bleeding method can be inappropriate.
If the procedure is unknown, do not open the braking system.
How Can You Tell Whether Special Equipment Is Needed?
Check the vehicle-specific service information.
Look for terms such as:
- ABS air bleeding
- Hydraulic control unit bleeding
- Brake actuator bleeding
- Electronic brake service mode
- Scan-tool bleeding procedure
- Brake booster depressurization
Don’t assume that the presence or absence of an ABS warning light determines whether special bleeding is required.
Key Takeaway: Many conventional brake lines can be bled manually, but ABS, hybrid, and electronically controlled systems may require specialized equipment. The factory procedure determines the method.
How to Bleed a Brake Master Cylinder
The master cylinder may need additional bleeding after replacement or after air enters its internal chambers.
However, this is different from routine wheel bleeding.
What Is Bench Bleeding?
Bench bleeding is a procedure used on certain conventional master cylinders before installation.
It removes trapped air from the master-cylinder chambers using the appropriate manufacturer-specified equipment.
Why Is Bench Bleeding Important?
If significant air remains inside the master cylinder, ordinary wheel bleeding may be less effective.
The pedal may remain soft even after fluid appears at the wheel bleeders.
Do All Master Cylinders Need Bench Bleeding?
No.
The correct procedure depends on the master-cylinder design and the vehicle.
Some systems have specific onboard bleeding procedures.
Others involve electronically controlled hydraulic components.
Can You Skip Master Cylinder Bleeding?
Not when the manufacturer requires it.
If air is trapped inside the master cylinder, the correct procedure must be completed before the vehicle is returned to service.
Should You Attempt It Yourself?
Only with appropriate tools, service information, and experience.
Improper installation or bleeding can leave the braking system unsafe.
How Do You Know When All the Air Is Out of the Brake Lines?
A properly completed bleeding procedure should produce normal hydraulic operation without trapped air.
However, the absence of visible bubbles alone is not enough to prove that every part of the brake system is safe.
Clear Fluid Without Air Bubbles
During conventional bleeding, a consistent stream of fluid without bubbles is a useful indication.
However, vacuum equipment can introduce apparent bubbles at its connections.
Normal Pedal Response
The brake pedal should meet the manufacturer’s expected travel and firmness.
Some pedal-feel differences with the engine off versus running are normal because of brake assist.
Use the manufacturer’s verification procedure.
No Hydraulic Leaks
Inspect the serviced fittings, hoses, calipers, and bleeder screws.
There must be no leakage.
Correct Fluid Level
The reservoir must contain the specified amount of fluid.
No Relevant Warning Lights
Brake system warning messages or diagnostic faults must be assessed before the vehicle returns to service.
However, no warning light doesn’t guarantee a properly bled system.
All Required Procedures Completed
The correct wheel sequence, master-cylinder procedure, ABS bleeding process, and final checks must be completed as applicable.
Is a Firm Pedal Enough?
Not by itself.
A firm pedal is an important indicator, but it doesn’t replace proper leak checks, fluid-level verification, and any manufacturer-required testing.
Important: If the pedal remains spongy, sinks, or feels different from its normal response, do not road-test the vehicle. Arrange professional inspection.
Why Are My Brakes Still Spongy After Bleeding?
A spongy pedal after bleeding suggests that the braking system may not have been serviced completely or has another fault.
Possible Causes
| Problem | Possible Explanation |
| Reservoir ran dry | More air entered the hydraulic system |
| Incorrect bleeding sequence | Required circuits weren’t serviced properly |
| Bleeder opened at wrong time | Air may have been drawn back into the system |
| ABS unit contains air | Special bleeding routine may be necessary |
| Master cylinder contains air | Additional master-cylinder procedure may be required |
| Hydraulic leak | Fluid and air can move through a defective connection |
| Damaged brake hose | Hose may expand or leak under pressure |
| Failed master cylinder | Internal seals may not maintain pressure |
| Improper caliper installation | Bleeder position or component arrangement may be incorrect |
| Mechanical brake problem | Excessive movement may affect pedal travel |
Should You Keep Bleeding Until the Pedal Feels Better?
Not indefinitely.
If the pedal remains abnormal after the specified procedure, stop and investigate.
Repeated bleeding won’t repair a hydraulic leak or defective component.
Why Does the Pedal Go to the Floor?
A pedal that travels excessively or sinks can indicate a serious problem.
Possible causes include significant trapped air, hydraulic leakage, or master-cylinder failure.
Do not drive until the problem has been diagnosed and repaired.
Why Does the Pedal Feel Firm With the Engine Off but Soft When Running?
The brake booster changes the force required to apply the brakes.
Some change in pedal feel when brake assist becomes active can be normal.
However, excessive travel, a sinking pedal, or poor braking response is not normal.
A qualified technician should assess the symptom.
Why Do Bubbles Keep Appearing?
Possible causes include:
- Air remaining in the system
- An external leak
- Air entering through a loose hose connection
- Air drawn around bleeder threads during vacuum bleeding
- An incomplete bleeding procedure
Determine the source rather than assuming every bubble comes from inside the brake lines.
What Happens if You Bleed Brakes in the Wrong Order?
The result depends on the vehicle and the procedure used.
An incorrect sequence may leave air in the system or prevent the bleeding process from working as intended.
Can the Pedal Remain Soft?
Yes.
If air remains trapped, the pedal may feel spongy or travel farther than normal.
Can You Correct the Sequence?
A technician may need to repeat the approved bleeding procedure.
However, the necessary work depends on whether air entered the master cylinder or ABS hydraulic unit.
Is Rear Right Always First?
No.
The correct order is vehicle-specific.
A common conventional sequence should never be treated as universal.
Can the Wrong Order Damage ABS?
The more important concern is using an incorrect procedure on a system requiring special precautions.
Certain ABS or electronically assisted brake systems can be adversely affected by improper servicing.
Always use the manufacturer-approved method.
What Happens if the Brake Fluid Reservoir Runs Dry During Bleeding?
This is one of the most important mistakes to avoid.
If the reservoir runs dry, air can enter the master cylinder and possibly other parts of the hydraulic system.
What Problems Can It Cause?
The brake pedal may become softer.
More extensive bleeding may be necessary.
The master cylinder may require its own bleeding procedure.
If air enters an ABS hydraulic unit, diagnostic equipment may be required.
Can You Just Refill the Reservoir?
Refilling restores the fluid supply but does not automatically remove air that has entered the system.
The appropriate bleeding procedure must be completed.
How Can You Prevent It?
Monitor the reservoir frequently.
Keep fresh, correctly specified fluid available.
Stop the bleeding cycle before the level falls below the manufacturer’s required range.
Is the Car Safe After Refilling?
Not necessarily.
The hydraulic system must be properly bled and verified.
Do not drive with an abnormal pedal or incomplete service.
Can You Bleed Brakes Without Removing the Wheels?
Sometimes.
If the bleeder screws can be accessed safely without removing the wheels, a manufacturer-approved bleeding procedure may not require wheel removal.
However, access varies by vehicle.
When Wheel Removal Is Necessary
Removing the wheels may be required when:
- The bleeder is difficult to reach.
- The vehicle’s service procedure specifies removal.
- Access is needed for inspection.
- The brake assembly requires additional work.
Can You Reach Through the Wheel?
Some wheel designs provide access.
However, don’t attempt to reach through a wheel if the access is unsafe or prevents correct use of the tools.
Is Lifting the Vehicle Always Required?
Not necessarily.
Certain vehicles may have accessible bleeders without lifting.
However, most repair procedures require stable access to the wheel brake components.
Follow the vehicle’s service instructions and safe lifting practices.
Can You Bleed Only One Brake Caliper?
Sometimes, depending on the repair and hydraulic circuit.
For example, if a single caliper was replaced without allowing air into the rest of the system, the manufacturer may specify bleeding only the affected circuit.
However, a different procedure may be required when the system has been extensively opened.
When One-Wheel Bleeding May Be Appropriate
A model-specific procedure may permit bleeding the affected wheel or circuit after a limited hydraulic repair.
When All Four Wheels May Need Bleeding
A complete fluid exchange commonly involves servicing all required hydraulic circuits.
More extensive bleeding may also be necessary if air entered the master cylinder or a shared hydraulic component.
What If the Reservoir Ran Dry?
Do not assume one-wheel bleeding is sufficient.
The system may require additional procedures.
What If the Master Cylinder Was Replaced?
The required work is generally more extensive than bleeding only one caliper.
Follow the replacement and bleeding instructions for the exact system.
How Long Does It Take to Bleed Brake Fluid?
The time depends on the bleeding method, vehicle design, and condition of the hydraulic system.
A straightforward conventional bleeding job may take approximately 30–60 minutes for an experienced technician.
However, some jobs take longer.
Factors Affecting the Time
These include:
- Number of circuits being serviced
- Accessibility of bleeder screws
- Corrosion
- Bleeding equipment
- Fluid quantity
- ABS requirements
- Master-cylinder service
- Air trapped in additional components
Which Method Is Fastest?
Pressure bleeding can be efficient for some professional brake fluid exchanges.
However, the fastest method isn’t necessarily the best method for every system.
Is Gravity Bleeding Faster?
Usually not.
Gravity bleeding is typically slower than pressure-assisted bleeding.
It may also be unsuitable for difficult trapped-air situations.
Can Brake Bleeding Take Several Hours?
Yes.
Complex hydraulic repairs, seized bleeder screws, ABS bleeding routines, or repeated diagnostic work can increase service time.
How Much Does It Cost to Bleed Brakes?
Brake bleeding costs vary by location, vehicle, and service requirements.
A straightforward professional bleeding service may cost roughly 80–200 in the United States, although actual quotes may fall outside this range.
More complex ABS or hydraulic repairs can cost substantially more.
This is a general planning estimate, not a verified national average.
What Affects Brake Bleeding Cost?
The price depends on:
- Labor rates
- Vehicle model
- Number of circuits serviced
- Brake fluid specification
- Diagnostic tool requirements
- Bleeder accessibility
- Related repairs
Is Bleeding Included With Brake Repairs?
Often, when bleeding is necessary because the hydraulic system was opened.
However, whether it is included in the quoted price depends on the shop and repair.
Is a Brake Fluid Flush More Expensive?
A complete fluid exchange may cost more than bleeding one affected circuit because it involves additional labor and fluid.
Should You Bleed Brakes Yourself to Save Money?
Only if you have the correct equipment, verified service procedure, and experience.
A mistake in the hydraulic brake system can create a serious safety hazard.
Professional service is appropriate when the procedure is uncertain.
How Often Should Brake Fluid Be Bled?
Brake bleeding is generally performed when air is present or hydraulic service requires it.
It is not automatically a separate recurring maintenance task.
Does Every Car Need Annual Brake Bleeding?
No.
There is no universal requirement to bleed every vehicle once a year.
The correct maintenance schedule depends on the manufacturer.
What About Brake Fluid Replacement?
Many vehicles specify brake fluid replacement approximately every two to three years, although intervals vary.
This is separate from bleeding because of trapped air.
Should You Bleed Brakes After Replacing Pads?
Not automatically if the hydraulic system remains closed.
However, follow any model-specific instructions.
Does Old Brake Fluid Need Bleeding?
Old brake fluid may need replacement according to its service schedule.
A proper exchange generally uses the applicable bleeding procedure, but simply removing a small amount of fluid does not fully renew the system.
Common Mistakes When Bleeding Brake Fluid
Avoiding mistakes is critical because the braking system must operate reliably.
Letting the Reservoir Run Dry
This can introduce additional air.
Monitor fluid level throughout the service.
Using the Wrong Brake Fluid
Use only the specification approved by the vehicle manufacturer.
Silicone-based DOT 5 must not be mixed with glycol-based DOT 3, DOT 4, or DOT 5.1.
Releasing the Pedal With the Bleeder Open
During a conventional two-person procedure, this may draw air back into the hydraulic circuit.
Close the bleeder before releasing the pedal.
Following the Wrong Wheel Sequence
Not every vehicle uses the same bleeding order.
Check the service manual.
Ignoring ABS Requirements
Some systems need a compatible diagnostic tool.
Do not improvise.
Overtightening Bleeder Screws
Excessive torque may damage the bleeder or brake component.
Use the specified torque.
Using a Rounded or Damaged Bleeder
A damaged bleeder may be difficult to seal correctly.
Have damaged components repaired before completing the service.
Pressing an Old Pedal Excessively Far
Certain manual bleeding procedures can push a master-cylinder piston into an area of the bore it does not usually travel through.
On a worn master cylinder, this may create problems.
Follow the approved pedal-travel procedure.
Misreading Vacuum Bleeding Bubbles
Air may enter around the tool’s hose or bleeder threads.
Don’t assume every visible bubble indicates trapped air inside the vehicle.
Using Drained Brake Fluid Again
Used fluid may contain moisture and contamination.
Never reuse it.
Failing to Check for Leaks
A fluid-filled system can still leak under pressure.
Inspect the serviced components carefully.
Driving With a Soft Pedal
A spongy or sinking pedal indicates that the system may be unsafe.
Do not drive until the fault is resolved.
How to Dispose of Used Brake Fluid
Used brake fluid should be handled as automotive chemical waste.
Do not pour it into drains, onto soil, or into household water systems.
Store Used Fluid Safely
Collect the fluid in a suitable, clearly labeled container.
Keep it away from children and pets.
Do Not Mix With Other Automotive Fluids
Avoid mixing brake fluid with gasoline, motor oil, solvents, or other materials.
Mixed waste may be more difficult to process properly.
Find an Approved Collection Facility
Contact a local household hazardous-waste collection program or an auto service facility that specifically accepts used brake fluid.
Not every auto parts store accepts it.
Protect Painted Surfaces
Brake fluid can damage vehicle paint.
Clean spills promptly according to the product and vehicle manufacturer’s instructions.
When Should You Let a Professional Bleed Your Brakes?
Professional servicing is the safer choice when the hydraulic system requires specialized procedures or when a brake fault remains unresolved.
Situations That Need Professional Attention
| Situation | Why Professional Service Is Appropriate |
| ABS hydraulic unit contains air | May require diagnostic activation |
| Hybrid or electronically controlled brakes | May require depressurization and scan-tool routines |
| Reservoir ran completely dry | Additional bleeding procedures may be necessary |
| Master cylinder replaced | Special bleeding requirements may apply |
| Brake pedal remains soft | Further diagnosis required |
| Brake fluid leak | Fault must be located and repaired |
| Bleeder screw seized or damaged | Risk of component damage |
| Wrong fluid introduced | Potential contamination and seal damage |
| Uncertain wheel sequence | Incorrect procedure may leave trapped air |
| Brake warning lights remain active | Fault diagnosis required |
Brake hydraulics are not an appropriate system for trial-and-error repairs.
If the manufacturer-approved method is unavailable, arrange qualified service.
Conclusion
Bleeding brake fluid removes trapped air from the hydraulic braking system so the brakes can transmit pedal pressure correctly.
The traditional two-person method involves maintaining the fluid supply, opening a bleeder while the helper holds pedal pressure, and closing it before the pedal is released.
However, the correct sequence and procedure depend on the vehicle.
Pressure, vacuum, and gravity bleeding are alternatives, but each has limitations and must be approved for the particular hydraulic system.
Some ABS, hybrid, electric, and electronically controlled brakes require specialized diagnostic equipment.
Regardless of method, never allow the reservoir to run dry, use an incompatible brake fluid, or return a vehicle to service with an abnormal pedal.
After bleeding, the fluid level, hydraulic connections, pedal response, and relevant warning systems must be checked.
If the brakes remain spongy or a leak is suspected, the cause must be diagnosed and corrected rather than simply repeating the bleeding procedure.
The safest result comes from following the exact service manual, using the correct fluid, and verifying that the complete braking system is operating properly before driving.
FAQs About How to Bleed Brake Fluid
How Do You Bleed Brake Fluid Step by Step?
On a conventional system that permits manual bleeding, the process involves using the specified fluid, following the manufacturer’s wheel sequence, maintaining reservoir level, connecting a collection hose, and releasing fluid while an assistant holds pedal pressure.
The bleeder must be closed before pedal release.
Check the full service manual before attempting the procedure.
Do You Bleed Brakes With the Engine On or Off?
Many conventional manual bleeding procedures are performed with the engine off.
However, some vehicles have different requirements.
Certain electronically assisted braking systems need specific activation or depressurization procedures.
Follow the factory instructions.
Do You Open or Close the Bleeder When Pumping Brakes?
In a traditional two-person method, the helper applies and holds pedal pressure before the bleeder is opened.
The bleeder is then closed before the helper releases the pedal.
Follow the vehicle-specific procedure.
What Is the Correct Order to Bleed Brake Fluid?
The order varies by vehicle.
A common conventional sequence is right rear, left rear, right front, and left front.
However, some systems require a different order.
Check the manufacturer’s instructions.
Can You Bleed Brake Fluid Alone?
Yes, when the vehicle permits a compatible one-person method.
Options include pressure bleeding, vacuum bleeding, and gravity bleeding.
However, specialized systems may require professional equipment.
Can You Bleed Brakes Without Removing the Wheels?
Sometimes.
If bleeder screws are safely accessible, wheel removal may not be necessary.
However, access and service requirements vary by vehicle.
Can You Bleed Brakes Without a Bleeder Kit?
A conventional two-person procedure can use appropriate clear tubing, a collection container, the correct wrench, and fresh fluid.
However, you must still have the proper service instructions and necessary safety equipment.
How Long Does It Take to Bleed Brake Fluid?
A straightforward conventional bleeding job may take approximately 30–60 minutes for an experienced technician.
More complex systems or repairs can require substantially longer.
How Much Brake Fluid Do You Need for Bleeding?
The quantity depends on the vehicle and the amount of hydraulic fluid being exchanged.
A small repair may require less than a complete system flush.
Use the service manual to estimate the quantity and keep enough fresh fluid available.
Can You Bleed Brakes With ABS?
Yes, but the correct method depends on the vehicle.
Some ABS systems permit conventional wheel bleeding for certain repairs.
Others require diagnostic-tool routines to remove air from the hydraulic unit.
Do You Need a Scan Tool to Bleed ABS Brakes?
Some vehicles require one, particularly when air enters the ABS hydraulic unit.
Other systems may allow conventional bleeding under specified conditions.
Consult the manufacturer-specific service procedure.
Can You Bleed Only One Brake Caliper?
Sometimes.
A limited hydraulic repair may require bleeding only the affected circuit when permitted by the manufacturer.
However, an empty reservoir, master-cylinder repair, or complete fluid replacement may require more extensive bleeding.
Can You Gravity Bleed Brakes?
Yes, on systems that permit it.
Gravity bleeding allows fluid to flow through an opened bleeder without pedal pumping.
However, it may be too slow or ineffective for certain trapped-air conditions.
Why Is My Brake Pedal Still Spongy After Bleeding?
Possible causes include trapped air, incomplete bleeding, an unaddressed leak, damaged hoses, master-cylinder failure, or air in the ABS hydraulic unit.
The underlying problem must be diagnosed.
What Happens if the Reservoir Runs Dry While Bleeding?
Air can enter the master cylinder and hydraulic circuits.
The system may require additional bleeding or specialized procedures.
Simply refilling the reservoir does not remove the trapped air.
Should You Bleed Brakes After Changing Brake Pads?
Not automatically.
If the hydraulic system stays closed during an ordinary pad replacement, bleeding may not be necessary.
Follow the vehicle’s service instructions.
Do You Have to Bleed Brakes After Changing a Caliper?
Generally, yes.
Replacing a caliper usually involves opening the hydraulic circuit.
Air must be removed using the manufacturer-approved method.
Can You Bleed Brakes With a Bad Master Cylinder?
Bleeding will not repair a defective master cylinder.
The failed component must be diagnosed and repaired or replaced, followed by the appropriate hydraulic service.
How Do You Know When Brake Bleeding Is Complete?
The specified procedure must be completed, the fluid level must be correct, and the system must have no leaks.
Pedal response must meet the manufacturer’s expectations, with no unresolved warning messages.
A visible stream without bubbles alone is not sufficient proof.
Is It Safe to Drive With Air in the Brake Lines?
No.
Trapped air can reduce hydraulic braking effectiveness and cause excessive pedal travel.
Do not drive until the system has been properly repaired, bled, and verified.
How Often Should You Bleed Brakes?
Brake bleeding is usually performed when air is present or hydraulic repairs require it.
Brake fluid replacement follows a separate manufacturer-specified maintenance interval.
Is Brake Bleeding the Same as a Brake Fluid Flush?
No.
Bleeding primarily removes air, while a flush replaces aging fluid.
A complete fluid exchange often incorporates bleeding, but the two tasks have different purposes.
Can Bleeding Brakes Fix a Soft Pedal?
Yes, if trapped air is the cause and it is correctly removed.
However, hydraulic leaks, damaged hoses, and master-cylinder faults require separate repairs.
Can You Use Any Brake Fluid When Bleeding?
No.
Use only the brake fluid specified by the vehicle manufacturer.
Incorrect or incompatible fluid can damage components or compromise braking performance.