Do You Need to Bleed Brakes After Replacing Brake Booster? Rules
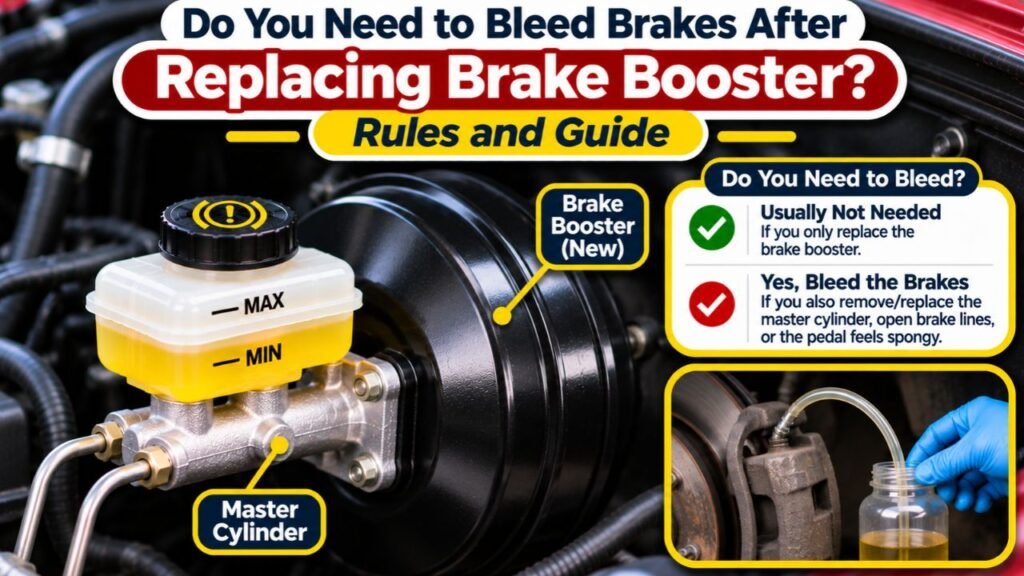
No, you generally do not need to bleed the brakes after replacing a brake booster if the hydraulic brake lines remain connected and no air enters the system. However, if you disconnect the brake lines, open the master cylinder’s hydraulic outlets, or otherwise introduce air, brake bleeding is necessary.
A brake booster and a brake master cylinder perform different functions. The booster increases the force applied to the brake pedal, while the master cylinder generates hydraulic pressure. Replacing the booster alone does not automatically disturb the brake fluid circuit.
During some replacements, the master cylinder can be moved aside without disconnecting its brake lines. Other vehicles require hydraulic connections to be opened for access. That difference determines whether bleeding is needed.
This guide explains when brake bleeding is required, how booster replacement affects the hydraulic system, what to inspect after installation, and how to identify pedal problems that bleeding cannot fix. It also covers vacuum and hydraulic boosters, ABS considerations, and essential checks before driving.
Do You Need to Bleed Brakes After Replacing Brake Booster?
The need for bleeding depends primarily on whether the brake fluid system was opened during the replacement.
If the master cylinder was unbolted from the booster and carefully moved aside while its hydraulic lines remained connected, the braking system normally stays sealed. In that situation, replacing the booster does not introduce air into the brake lines.
However, removing brake lines from the master cylinder creates an opportunity for air to enter. Once air enters the hydraulic circuit, the system must be bled according to the vehicle manufacturer’s procedure.
The following table shows the most common situations.
| Brake Booster Replacement Situation | Is Brake Bleeding Needed? |
| Booster replaced without disconnecting brake lines | Usually no |
| Master cylinder moved aside with lines attached | Usually no |
| Brake lines disconnected from the master cylinder | Yes |
| Master cylinder replaced or emptied | Yes |
| Brake fluid reservoir ran dry | Yes, follow the specified procedure |
| Brake hydraulic circuit opened for another repair | Yes, for the affected circuits |
| Vacuum hose disconnected only | No |
| Hydroboost power steering lines disconnected only | Brake bleeding usually no; hydraulic assist bleeding may be needed |
These rules apply to conventional hydraulic brake circuits. Certain vehicles have additional service requirements, especially those equipped with electronically controlled braking systems.
For example, O’Reilly Auto Parts’ brake booster replacement instructions explain that moving the master cylinder aside without disconnecting the hydraulic lines eliminates the need for routine brake bleeding.
The vehicle’s factory service manual remains the controlling reference for the exact procedure.
Why Replacing a Brake Booster Usually Does Not Require Bleeding
Understanding the relationship between the brake booster and master cylinder explains why bleeding is not always necessary.
The Brake Booster Provides Pedal Assistance
A conventional vacuum brake booster is mounted between the brake pedal mechanism and the master cylinder.
It uses a pressure difference across an internal diaphragm to reduce the amount of physical effort needed to apply the brakes.
When the driver presses the brake pedal, the booster assists the pushrod that operates the master cylinder.
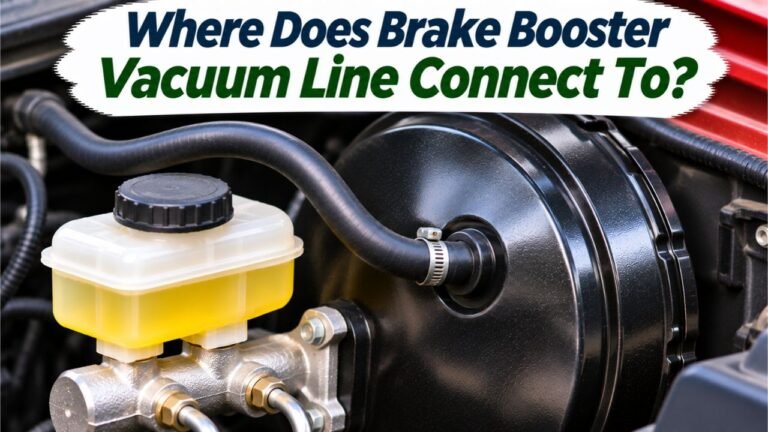
The booster itself is not filled with brake fluid. Its vacuum chamber normally contains air at different pressures, not hydraulic brake fluid.
Consequently, disconnecting the vacuum hose or removing the booster does not open the hydraulic brake circuit.
The Master Cylinder Controls Hydraulic Brake Pressure
The master cylinder uses pistons and seals to pressurize brake fluid when the pedal is applied.
That pressure travels through the brake lines to the calipers or wheel cylinders.
The hydraulic system must remain free of trapped air because air compresses much more readily than brake fluid.
When air enters, some pedal movement compresses the air instead of building effective braking pressure.
This can create excessive pedal travel or a soft, spongy feeling.
Brake bleeding removes trapped air from the hydraulic circuit. It is not a routine requirement simply because a vacuum booster has been replaced.
When Brake Bleeding Is Necessary After Booster Replacement
Several situations make bleeding necessary even though the original repair involved the brake booster.
Brake Lines Were Disconnected From the Master Cylinder
Some engine compartments have limited room around the booster.
The technician may need to disconnect the hydraulic lines and remove the master cylinder completely before accessing the booster mounting hardware.
Opening these connections allows fluid to escape and air to enter the master cylinder outlets or brake lines.
After reassembly, the affected hydraulic circuits must be bled.
The service manual determines whether all wheels, particular circuits, or an additional master cylinder procedure require attention.
The Brake Master Cylinder Was Replaced
Sometimes a leaking master cylinder damages the brake booster, making replacement of both components necessary.
Installing a replacement master cylinder normally requires disconnecting its hydraulic connections.
A new master cylinder can contain air in its internal chambers. Depending on its design, the manufacturer may require bench bleeding, on-vehicle bleeding, or another specified priming procedure.
Bleeding the wheel circuits may also be necessary after the master cylinder is installed.
Do not assume that installing a prefilled master cylinder automatically eliminates all trapped air.
The Brake Fluid Reservoir Became Empty
If the fluid level falls far enough, air can enter the master cylinder’s pressure chambers.
This may happen during repairs if the reservoir is allowed to drain.
Refilling the reservoir alone does not necessarily remove air already trapped inside the system.
The vehicle may require a complete bleeding procedure, particularly if air has traveled into the ABS hydraulic control unit.
The Brake System Was Already Contaminated With Air
A booster replacement may be completed without opening any brake lines, yet the vehicle might already have air in its hydraulic circuit.
For example, a previous brake repair may have been improperly bled.
In this case, bleeding may be necessary, but not because the new booster introduced air.
The underlying cause should be identified before bleeding. Otherwise, a fluid leak or another fault could remain unresolved.
How to Determine Whether Brake Bleeding Is Needed
Before opening the brake system unnecessarily, inspect what happened during the booster replacement.
Step 01: Confirm Whether the Hydraulic Brake Lines Were Opened
Review the replacement procedure and identify whether any brake line fittings were loosened or removed.
If the master cylinder stayed connected to its hydraulic lines, bleeding is usually unnecessary.
If the lines were disconnected, bleeding is required even if the connections were opened only briefly.
Air can enter without an obvious fluid leak or visible bubbles.
If the repair history is uncertain, inspect the system and follow the manufacturer’s verification procedure rather than assuming it remains air-free.
Step 02: Inspect the Master Cylinder and Brake Lines
Check the master cylinder mounting position and the surrounding brake lines.
Make sure the lines were not bent sharply, twisted, stretched, or damaged while the master cylinder was moved.
Inspect the fittings for wetness and confirm that all disturbed connections are correctly tightened to specification.
A damaged brake line can create a leak even when the hydraulic system was never intentionally opened.
If brake fluid appears at a connection, repair the leak before attempting any bleeding or brake testing.
Step 03: Check the Brake Fluid Reservoir Level
Locate the master cylinder reservoir and inspect the fluid level.
The fluid should be within the manufacturer’s specified range.
A low level may indicate worn brake friction components, fluid loss, or another condition requiring investigation.
Do not assume that low fluid means the booster replacement caused a problem.
Likewise, do not overfill the reservoir to compensate for an unexplained decrease.
If the reservoir ran empty during the repair, a proper hydraulic bleeding procedure is necessary.
Step 04: Evaluate Brake Pedal Feel With the Engine Off
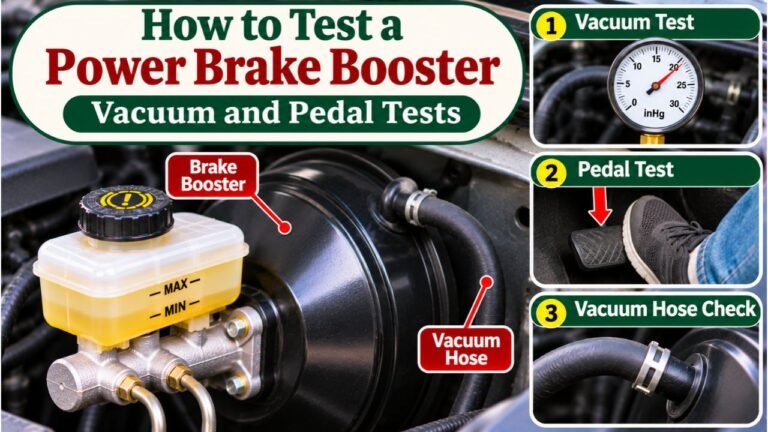
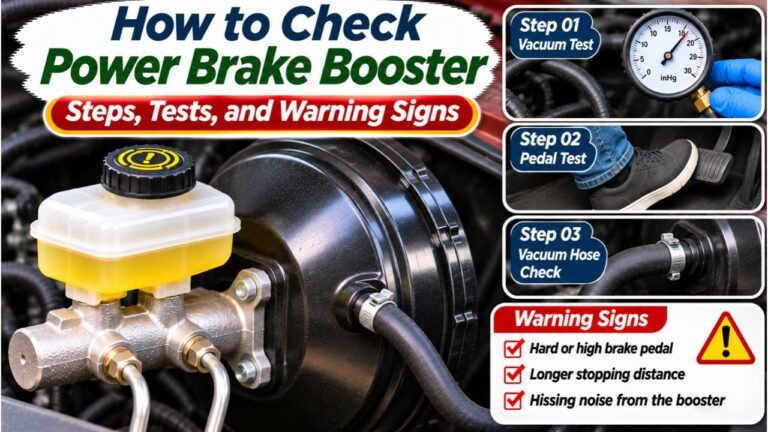
With the vehicle securely parked and the engine off, press the brake pedal several times to exhaust stored vacuum assistance on a conventional vacuum booster.
The pedal should become firmer as vacuum assistance is depleted.
Apply steady pressure and observe whether the pedal maintains a consistent position.
A pedal that slowly sinks may indicate a hydraulic problem requiring diagnosis.
However, pedal feel alone cannot reliably establish whether air is present.
Do not use repeated pedal pumping as a substitute for proper hydraulic inspection.
Step 05: Test Booster Assistance After Starting the Engine
For a conventional vacuum booster, hold moderate brake-pedal pressure with the engine off after depleting stored vacuum.
Start the engine while maintaining pressure.
The pedal should normally move downward slightly as vacuum assistance becomes available.
That movement is a normal indication that the booster is providing assistance.
If the pedal remains unusually hard, investigate the booster, vacuum supply, check valve, and installation.
If the pedal becomes excessively soft or sinks abnormally, inspect the hydraulic system.
A hard pedal does not automatically mean the brakes need bleeding. Booster assistance and hydraulic pressure are separate diagnostic concerns.
How to Bleed Brakes if the Hydraulic System Was Opened
If brake lines were disconnected during booster replacement, use the manufacturer’s approved procedure to remove trapped air.
Prepare the Hydraulic System
Confirm that all brake lines are connected correctly and tightened to their specified torque.
Inspect the master cylinder and fittings for damage or contamination.
Fill the reservoir with the exact brake fluid type required by the vehicle.
Do not mix incompatible brake fluids or use a fluid simply because it is available.
Determine whether the master cylinder needs a separate priming procedure before bleeding the wheel circuits.
Bleed the Required Brake Circuits
Depending on the vehicle, bleeding may involve manual pedal operation, a pressure bleeder, a vacuum bleeder, or diagnostic equipment.
For a conventional manual bleeding procedure, the general sequence involves:
- Connecting a transparent hose to the appropriate bleeder valve.
- Directing the hose into a suitable fluid collection container.
- Applying brake-pedal pressure as instructed.
- Opening the bleeder to discharge fluid and air.
- Closing the bleeder before releasing pedal pressure.
- Maintaining the reservoir above its minimum level.
- Repeating the process according to the required bleeding sequence.
The correct wheel order varies by vehicle. Do not assume that the wheel farthest from the master cylinder must always be bled first.
Some manufacturers also specify limits on pedal travel during manual bleeding to prevent damage to internal components.
Account for ABS Bleeding Requirements
An ABS-equipped vehicle does not automatically require a scan tool every time a brake line is opened.
However, some systems require electronic activation of ABS valves or pumps when air enters particular hydraulic passages.
The procedure may involve a preliminary conventional bleed, scan-tool activation, and another bleed.
Consult the specific repair information before deciding whether ordinary bleeding is sufficient.
If the brake pedal remains soft after following the correct procedure, do not drive the vehicle until the cause has been identified.
Does a Hydroboost Brake Booster Require Bleeding?
Hydroboost systems operate differently from conventional vacuum boosters.
Instead of using engine vacuum for assistance, a traditional Hydroboost unit uses hydraulic pressure, often supplied by the power steering pump.
This creates an important distinction between two hydraulic systems.
The brake-fluid circuit connects the master cylinder to the brakes. The hydraulic-assist circuit supplies power assistance to the Hydroboost unit.
Disconnecting only the hydraulic-assist hoses generally does not introduce air into the brake-fluid circuit.
However, air may enter the power steering or hydraulic-assist system, requiring its own bleeding procedure.
The NAPA guide to replacing a brake booster distinguishes vacuum-operated boosters from hydraulic units and explains that hydraulic-assist lines require attention after replacement.
If the master cylinder’s brake lines were also opened, the brake-fluid circuit must be bled separately.
Never assume that bleeding the power steering system also removes air from the brakes.
The exact fluid, bleeding sequence, and inspection requirements depend on the vehicle and hydraulic-assist configuration.
Brake Pedal Problems After Replacing a Brake Booster
Not every pedal problem after installation is caused by trapped air.
A new booster can reveal existing brake problems or create symptoms when installed incorrectly.
Hard Brake Pedal After Booster Replacement
A hard pedal usually points toward insufficient power assistance rather than air inside the hydraulic lines.
Possible causes include:
- Disconnected or damaged vacuum hose
- Faulty booster check valve
- Insufficient vacuum supply
- Incorrect booster installation
- Defective replacement booster
- Incorrect pedal linkage assembly
Check the booster type and vacuum supply before opening the brake lines.
For a conventional vacuum booster, inspect the hose routing and check valve according to the service manual.
Soft or Spongy Brake Pedal
A soft pedal can indicate air in the hydraulic system, but it may also result from other brake problems.
Potential causes include hydraulic leaks, excessive component movement, or mechanical problems at the wheels.
If the brake lines were disconnected, trapped air becomes an important possibility.
If the hydraulic system remained sealed, investigate the complete braking system before assuming bleeding will solve the problem.
Brake Pedal Travels Too Far
Excessive pedal movement may indicate an issue with master cylinder operation, hydraulic pressure, or booster pushrod adjustment.
The distance between the booster output rod and master cylinder piston must meet the manufacturer’s specifications.
An incorrect adjustment can affect pedal travel even when the hydraulic circuit contains no air.
Brakes Drag After Installation
A booster pushrod adjusted too far outward can prevent the master cylinder piston from fully returning.
This may keep hydraulic pressure applied after the driver releases the pedal.
The result can be dragging brakes and excessive heat.
For a specific example, Ford’s 1993 Mustang workshop manual explains that an excessively long booster pushrod can cause brake drag, while a short pushrod can increase pedal travel.
Those procedures and measurements are model-specific. Do not use one vehicle’s pushrod setting on another.
If pushrod clearance requires checking, use the correct gauge and factory instructions.
Mistakes to Avoid After Brake Booster Replacement
Several installation errors can create braking problems that appear similar to trapped air.
Disconnecting brake lines unnecessarily: Opening the hydraulic circuit creates additional bleeding work and increases the opportunity for contamination.
Bending brake lines to gain clearance: Moving the master cylinder too far can strain or damage rigid hydraulic tubing.
Ignoring a leaking master cylinder: Fluid leaking into the old booster can also damage the replacement unit if the original leak is not repaired.
Incorrectly installing pedal linkage hardware: Missing retaining clips or improperly secured linkage components can affect pedal operation.
Guessing pushrod adjustments: Incorrect clearance can produce excessive travel or prevent full brake release.
Driving before checking the brakes: A correctly installed booster still requires functional inspection before normal use.
The safest approach is to follow the exact service procedure and verify the hydraulic and power-assist functions separately.
How to Verify Safe Braking After Installing a New Booster
Brake booster replacement should end with more than confirming that the engine starts and the pedal moves.
Begin with the vehicle stationary and secured against movement.
Inspect the booster mounting hardware, brake pedal connection, vacuum or hydraulic-assist hoses, and master cylinder mounting.
Check that no tools or loose components interfere with the pedal mechanism.
With the engine off, confirm that the brake pedal operates smoothly and does not bind.
For a vacuum-assisted system, perform the manufacturer’s engine-start assistance test.
Inspect the master cylinder and hydraulic connections for leaks.
Confirm that the pedal returns fully and that the brakes release correctly.
Where applicable, check brake warning indicators and verify that no service-related diagnostic faults remain.
If the manufacturer requires a pushrod clearance measurement, pedal-height adjustment, or electronic calibration, complete those operations before road testing.
Once all stationary inspections pass, conduct the specified low-speed functional test in a controlled area.
Verify smooth braking, proper pedal response, and complete brake release.
If the brakes feel abnormal, stopping performance is inconsistent, or a warning light indicates a problem, stop testing and arrange a professional inspection.
FAQs About Do You Need to Bleed Brakes After Replacing Brake Booster
Can You Replace a Brake Booster Without Bleeding the Brakes?
Yes. On many vehicles, the master cylinder can be moved away from the booster without disconnecting its hydraulic lines. If the system remains sealed and no air has entered, brake bleeding is normally unnecessary.
What Happens if You Don’t Bleed Brakes After Disconnecting the Lines?
Trapped air may cause a soft brake pedal, excessive pedal travel, and reduced braking effectiveness. Proper bleeding is necessary to restore hydraulic operation. Do not drive until the system has been correctly bled and tested.
Does Disconnecting the Brake Booster Vacuum Hose Require Bleeding?
No. The vacuum hose belongs to the power-assist system, not the hydraulic brake-fluid circuit. Disconnecting it alone does not introduce air into the brake lines.
Can You Bleed a Brake Booster Itself?
A conventional vacuum booster does not contain brake fluid and does not require hydraulic brake bleeding. A Hydroboost unit may require bleeding of its separate hydraulic-assist system after service.
Why Is My Brake Pedal Hard After Replacing the Booster?
A hard pedal may indicate missing vacuum assistance, an incorrectly connected hose, a faulty check valve, or an installation problem. Check the power-assist system before assuming the hydraulic brakes contain air.
Should I Bleed All Four Brakes After Replacing a Booster?
Not automatically. If the hydraulic system remained closed, bleeding is generally unnecessary. If lines were opened, the required bleeding extent depends on which circuits were affected and the manufacturer’s instructions.
Does Replacing a Brake Booster Affect the Master Cylinder?
Replacing the booster normally involves separating it from the master cylinder, but the cylinder’s internal hydraulic components do not need to be opened. Incorrect installation, pushrod clearance, or damaged brake lines can still affect braking performance.
When Brake Bleeding Is the Right Final Step After Booster Replacement
Do you need to bleed brakes after replacing brake booster? The answer is usually no when only the booster was replaced and the hydraulic brake system remained sealed. If the brake lines were disconnected, the master cylinder was replaced, or air entered the hydraulic circuit, proper bleeding becomes necessary.
The distinction between hydraulic pressure and power assistance is important. A hard pedal may indicate a booster or vacuum problem, while a soft pedal can point toward a hydraulic issue. Neither symptom should be diagnosed from pedal feel alone without checking the affected components.
Before driving, confirm that the booster, master cylinder, brake lines, and pedal linkage are correctly installed and operating normally. Follow the vehicle’s service instructions, complete any required bleeding, and resolve abnormal braking behavior before returning the vehicle to the road.