How to Test a Power Brake Booster for Vacuum and Pedal Problems
To test a power brake booster, pump the brake pedal several times with the engine off, hold steady pressure, and start the engine. On a working vacuum-assisted system, the pedal should move downward slightly as assistance returns. If it stays hard, check the vacuum supply hose and one-way check valve before deciding the booster itself has failed.
This stationary test is useful when the brake pedal suddenly needs more effort, braking feels different from normal, or a hissing sound appears near the firewall. A failed booster can reduce power assistance, but a leaking hose or inadequate vacuum supply can create much the same symptoms. Replacing the booster without checking these parts may not solve the problem.
The method applies mainly to conventional vacuum brake boosters. Hydraulic assist, electric boosters, and some hybrid braking systems need different procedures. This guide explains the required tools, eleven detailed testing steps, normal and abnormal results, and how to distinguish a booster fault from problems in the master cylinder or brake lines.
How to Test a Power Brake Booster Step by Step
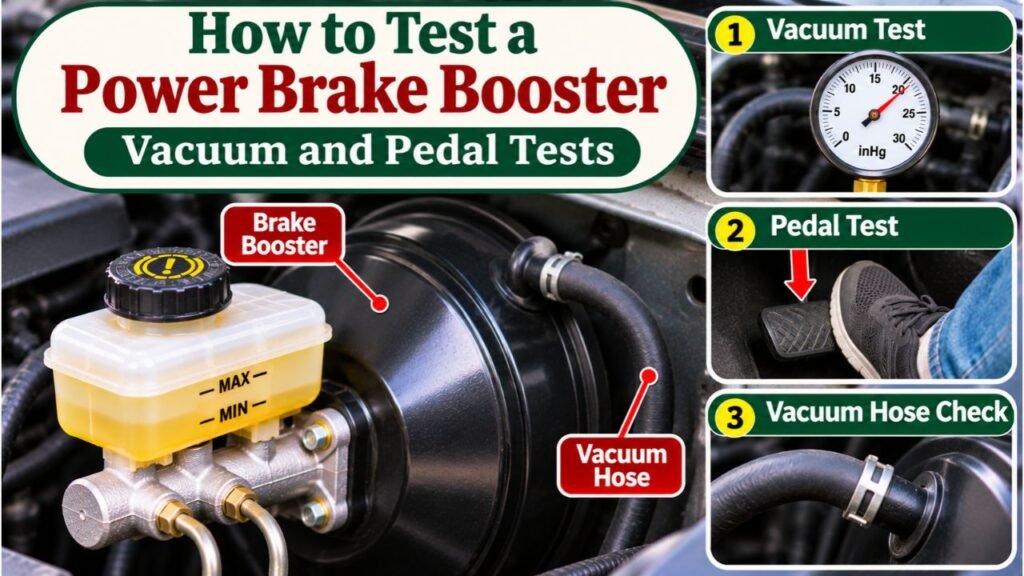
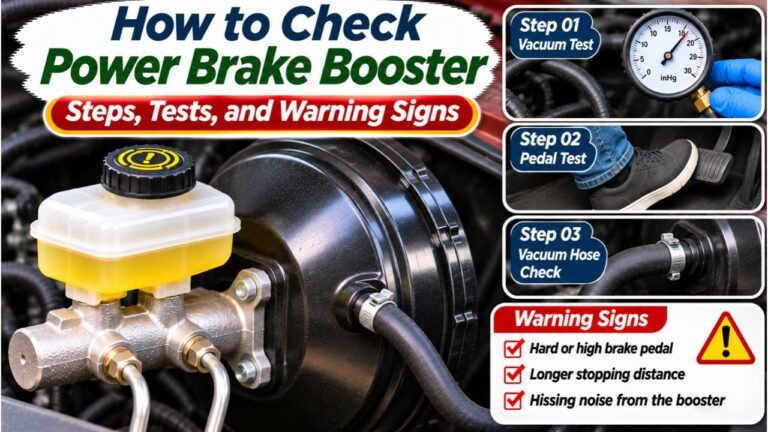
Keep every test stationary, with the vehicle secured against movement. Never use a road test to determine whether a suspected faulty booster is safe. The following procedure moves from simple pedal observations to vacuum checks that require additional tools. Stop if the pedal drops toward the floor, fluid is leaking, or the vehicle’s service instructions call for a different procedure.
Step 01: Confirm That Your Vehicle Uses a Vacuum Brake Booster
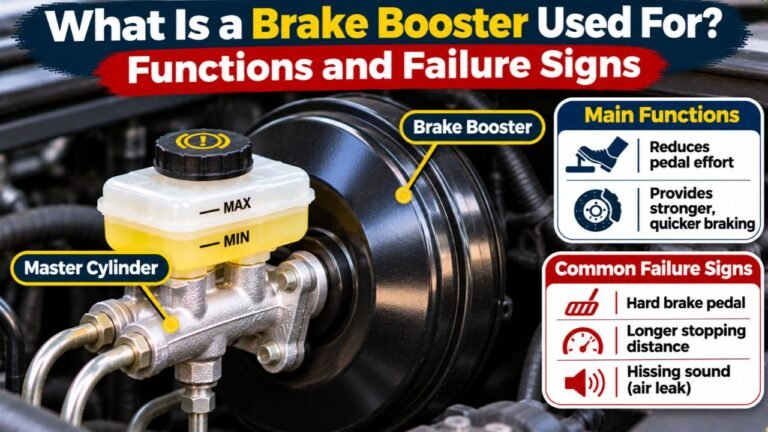
Open the owner’s or service manual and identify the brake assist system. A conventional vacuum booster is often a round metal housing on the firewall, positioned between the brake pedal linkage and master cylinder. A large vacuum hose connects it to the engine intake or a dedicated vacuum pump.
Do not assume that every power brake booster uses engine vacuum. Some trucks use hydraulic pressure from the power steering system, while hybrids and newer vehicles may use electronically controlled assistance. The engine-start pedal test described below cannot reliably diagnose those arrangements. An electric vacuum pump may also run when commanded, even if the engine is not turning. Use the vehicle-specific service process before touching any hoses or connectors.
Step 02: Secure the Vehicle and Gather Testing Tools
Park on level ground, apply the parking brake, shift to Park or the appropriate manual-transmission gear, and chock the wheels. Keep the work area ventilated if the engine will run. Never idle a vehicle in a closed garage, and keep clothing and hands away from belts, fans, and hot exhaust components.
For the basic test, no special equipment is required. A flashlight helps with inspections. For more detailed diagnosis, gather a vacuum gauge, approved tee fitting, suitable hose adapters, and a hand vacuum pump with a gauge. The exact vacuum test arrangement depends on the vehicle, so check its service instructions. If the brake pedal feels unsafe before testing, arrange professional inspection rather than moving the vehicle.
Step 03: Inspect the Pedal and Brake System Before Testing Assist
With the engine off, look at the brake fluid reservoir and visible hydraulic connections. Low fluid, damp fittings, or fluid at the master cylinder can point to a separate hydraulic problem. Do not loosen brake lines or open the hydraulic circuit for a routine booster test.
Press the pedal once and note whether it feels unusually soft, travels close to the floor, or stays firm. A pedal that sinks under steady pressure or shows signs of leaking requires hydraulic-system diagnosis before continuing the booster test. A booster normally changes the effort needed to brake; it does not repair a loss of hydraulic pressure.
Step 04: Use Up the Stored Vacuum With the Engine Off
Switch off the engine and leave the ignition in the state specified by the service manual. Press and release the brake pedal several times using moderate, consistent pressure. On a conventional booster, the first press may feel easier because vacuum remains stored inside. Each later press generally becomes firmer and travels less as that reserve is used up.
Continue until the pedal feel no longer changes noticeably between presses. Avoid stomping on the pedal or forcing it into the floor. This prepares the system for an engine-start check: the next change in pedal travel should come from fresh vacuum assistance rather than vacuum left in the booster from an earlier drive.
Step 05: Hold the Pedal and Start the Engine
With the vacuum reserve depleted, press and hold the brake pedal using steady, moderate pressure. Keep the transmission secured and start the engine without releasing your foot. Watch for a small downward movement of the pedal as vacuum assistance becomes available. It should take less leg effort to maintain a similar braking force.
The official Mitsubishi brake booster operation check describes this slight pedal drop as a normal result on its specified vacuum-assisted system. If the pedal stays high and hard, do not immediately condemn the booster. Insufficient vacuum, a damaged supply hose, or a failed check valve can prevent the same response. If the pedal drops continuously instead of settling, investigate hydraulic trouble rather than assuming the booster passed.
Step 06: Check Whether the Booster Holds Vacuum After Shutdown
With the engine running, apply the brake pedal lightly and hold it in one position. Shut the engine off while maintaining steady pedal pressure, as long as this is permitted by the vehicle’s procedure. On many conventional systems, the pedal should remain at approximately the same height for a short specified interval, often around 30 seconds.
A pedal that rises noticeably may indicate that stored vacuum is escaping. Possible paths include the booster diaphragm, check valve, hose, or connection seals. This observation alone does not identify which component is leaking. If the pedal gradually falls farther toward the floor instead, pay attention to a possible hydraulic leak or master cylinder bypass. Do not confuse those two types of movement.
Step 07: Test the Vacuum Reserve With Repeated Pedal Applications
Run the engine long enough to recharge the booster’s vacuum reserve according to the service instructions, then switch it off. Without restarting, press and release the brake pedal several times at a normal, controlled pace. The first application commonly has more assistance; later applications become progressively harder as the stored vacuum is used.
If the very first press already feels completely unassisted, the booster may not have stored vacuum or may have lost it too quickly. Repeat the observation only after verifying that the vacuum supply is available. A leaking one-way check valve, hardened grommet, or defective diaphragm can all reduce vacuum reserve. The exact number of assisted presses varies, so do not use a universal press count to declare a booster good or bad.
Step 08: Inspect the Vacuum Hose, Connections, and Booster Seal
Turn the engine off before handling the hose. Follow the large line from its vacuum source to the booster. Look for splits, loose connectors, hardened rubber, collapsed sections, missing clamps where specified, and damage near hot engine parts. Check the rubber grommet around the check valve and inspect accessible seams for physical damage.
A continuous hiss while pressing the pedal, especially alongside rough engine idle, can indicate a vacuum leak. A brief air sound during normal pedal operation is not conclusive by itself. Never put fingers near moving parts to search for a leak, and avoid spraying flammable cleaners into the engine bay. If the hose or seal is visibly damaged, replace it with a correctly matched part before retesting the booster.
Step 09: Measure the Vacuum Supply With a Gauge
If the pedal test fails and no obvious hose damage is visible, check whether sufficient vacuum reaches the booster. With the engine off, connect a compatible vacuum gauge using the approved adapter or tee arrangement at the specified test point. Make sure connections are secure, and keep the test hose clear of belts and fans before starting the engine.
The manufacturer technical sheet CARDONE ProTech: Diagnosing a Vacuum Brake Booster describes measuring vacuum in the booster supply line and gives approximately 18–21 inches of mercury as general guidance for conventional engine-vacuum systems. That is not a universal specification. Some vehicles use different thresholds, vacuum pumps, or operating conditions. Compare the actual reading with the service manual.
Low or unstable vacuum points toward the source, a restricted or leaking hose, or a pump problem. Adequate vacuum at the booster inlet combined with failed assist shifts attention toward the valve and booster assembly. Shut down the engine before disconnecting the gauge, then restore every connection correctly.
Step 10: Test the One-Way Brake Booster Check Valve
Locate the check valve at the booster or in its vacuum hose. With the engine off, remove it only if the service procedure allows and the plastic or rubber parts can be handled without damage. Some valves are permanently integrated into the hose and require replacement as an assembly. Note the original orientation before removal.
The AutoZone brake booster check valve guide explains that the valve should allow airflow from the booster toward the engine vacuum source and block reverse airflow. Use a clean hand vacuum pump or suitable test tool to check direction and vacuum retention. If air passes both ways, or cannot pass in the required direction, the valve is defective.
Inspect the grommet as well. Reinstall the valve in the verified direction and ensure every seal is seated. Never use a cracked fitting or leave the vacuum hose disconnected while operating the vehicle.
Step 11: Reassemble, Repeat the Pedal Test, and Decide What Needs Repair
Remove any temporary gauges or adapters with the engine off, and reinstall the vacuum hose exactly as specified. Check that no intake or booster ports are left open. Repeat the engine-off pumping test and the engine-start pedal test to see whether a repaired hose or replaced valve restored normal assistance.
If the supply vacuum is correct, the valve and hose hold vacuum, but the pedal still fails to show assistance, an internal booster fault becomes more likely. A technician may use an approved vacuum decay test to confirm that diagnosis. Do not replace the master cylinder or booster based on a single pedal observation. If braking is abnormal, warning lights remain on, or any connection is uncertain, do not drive the vehicle until the entire brake system has been checked.
How to Interpret Power Brake Booster Test Results
Compare the results together rather than treating one symptom as proof of a failed part.
| Test Result | Likely Direction for Diagnosis |
| Pedal drops slightly at engine startup | Vacuum assistance is operating during that test |
| Pedal stays hard when the engine starts | Check vacuum supply, hose, valve, and booster |
| Assist disappears immediately after shutdown | Check vacuum retention and one-way valve |
| Hissing and rough idle during braking | Investigate a vacuum leak or connection seal |
| Pedal slowly sinks under steady pressure | Investigate the hydraulic system and master cylinder |
| Vacuum reading is below vehicle specification | Diagnose vacuum source, hose, or pump first |
A booster that passes a simple pedal test may still have an intermittent leak or weak reserve. Likewise, an engine that does not make enough vacuum can make a functional booster appear defective. When results conflict, the manufacturer’s diagnostic sequence takes priority over a general checklist.
Brake Booster Problems That Mimic Master Cylinder Failure
A hard brake pedal generally points toward insufficient assistance, although mechanical binding or other brake faults can cause heavy pedal effort. A soft or sinking pedal is more closely associated with hydraulic pressure problems, including air in the lines, external leaks, or internal master cylinder bypass.
A vacuum booster is mounted directly behind the master cylinder, so the two components are easy to confuse. If brake fluid is found inside the booster housing or at the rear of the master cylinder, a leaking master cylinder seal may be involved. Vacuum testing does not establish whether the hydraulic seals are sound.
Do not diagnose by sound alone. A hiss from a damaged hose may resemble an internal diaphragm leak. An idle change when braking can support suspicion of an air leak, but other engine faults can affect idle too. Check pedal behavior, vacuum supply, and the valve together before choosing a replacement part.
When Testing Should Stop and Professional Repair Should Begin
Stop immediately if the pedal sinks toward the floor, brake fluid is leaking, or the vehicle cannot develop predictable braking force. These conditions require diagnosis of the full braking system, not more pedal pumping or an improvised test drive.
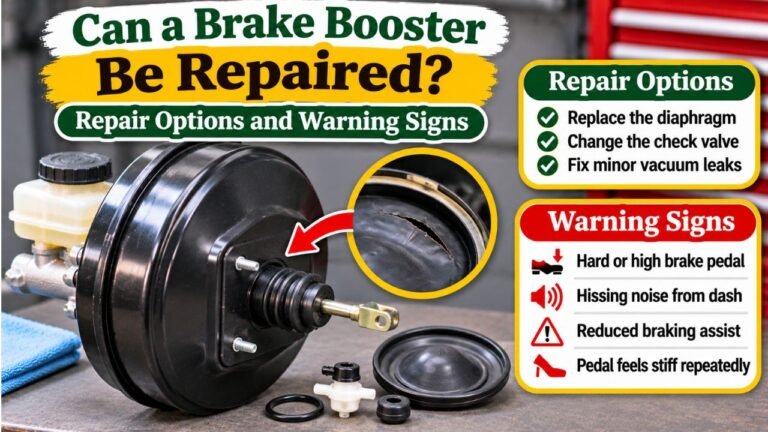
A failed vacuum hose, check valve, or grommet may be repairable without replacing the booster, provided the correct parts are available. An internally leaking booster often requires assembly replacement. After any repair, all vacuum connections must be restored, and braking must be verified while the vehicle is stationary before it returns to service.
FAQs About How to Test a Power Brake Booster
Can I Test a Brake Booster Without a Vacuum Gauge?
Yes. The engine-off pedal pumping test and the engine-start pedal drop test provide useful initial checks on conventional vacuum-assisted brakes. A gauge helps identify whether an abnormal result comes from poor vacuum supply or another component.
How Far Should the Brake Pedal Drop When the Engine Starts?
It should move downward slightly as assistance returns. The exact distance varies by vehicle, pedal force, and operating conditions; use the model-specific service procedure rather than a fixed measurement.
Does a Bad Brake Booster Always Make a Hissing Sound?
No. A leaking booster or hose may hiss, but a failed check valve or insufficient vacuum supply can cause a hard pedal without an obvious noise. Pedal and vacuum tests are more useful than sound alone.
How Many Times Should the Brake Pedal Work With the Engine Off?
Many conventional vacuum boosters retain enough reserve for some assisted applications after shutdown. The number varies with system design and stored vacuum. The main observation is whether assistance fades progressively instead of disappearing immediately.
Can a Bad Power Brake Booster Cause the Pedal to Sink?
A normal small drop when the engine starts is expected on a vacuum-assisted system. A pedal that continues sinking under steady pressure can signal a hydraulic fault and should not be attributed to the booster without further diagnosis.
Confirm Brake Assist Before Returning the Vehicle to Service
Knowing how to test a power brake booster means checking more than whether the pedal feels hard. The engine-start test shows whether assistance appears, the shutdown tests assess stored vacuum, and hose, gauge, and check valve inspections help locate the cause when results are abnormal.
Use those findings to identify the actual fault instead of replacing parts by guesswork. If the booster fails testing, vacuum is missing, or the pedal behaves unpredictably, keep the vehicle parked and have the brake system repaired and verified before driving.