How to Open Brake Master Cylinder: Cap, Reservoir, and Parts
To open a brake master cylinder for a fluid check, clean around its reservoir cap and release the cap using the correct twist, clip, or snap-fit method. To open the metal master cylinder itself, you usually need to remove the assembly and follow a vehicle-specific disassembly procedure. These are different jobs with very different risks.
The brake fluid reservoir is meant to be accessible for inspection and maintenance. The cylinder body contains pistons, seals, and springs that generate hydraulic pressure when the brake pedal moves. Removing the wrong part, allowing dirt inside, or opening a hydraulic connection can lead to leaks or air in the braking system.
A cap that refuses to turn also needs a different approach from a piston assembly held by a retaining ring. The correct method depends on the vehicle and what you actually need to access.
This guide explains how to identify and open common reservoir caps, deal with a stuck lid, separate a reservoir, recognize serviceable internal components, and close everything correctly. It also covers fluid selection, inspections, brake bleeding, and signs that replacement is safer than disassembly.
What Does Opening a Brake Master Cylinder Mean?

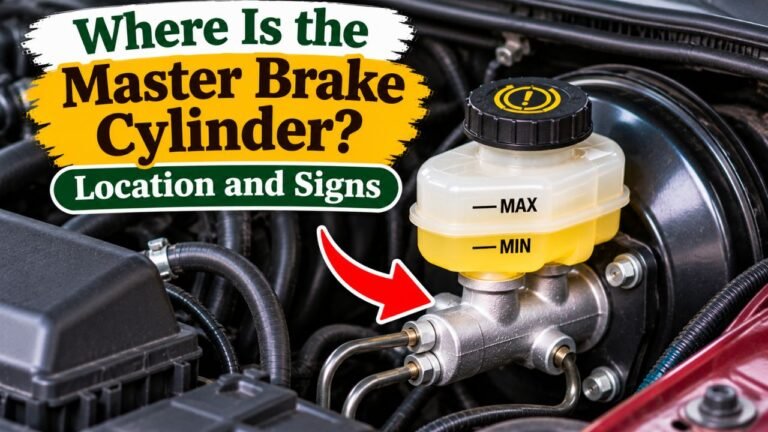
Most passenger vehicles have a master cylinder mounted near the firewall, commonly attached to the brake booster. A plastic fluid reservoir normally sits above it.
People use “open the master cylinder” to describe three different tasks:
| Task | What You Open | Main Concern |
| Check or add fluid | Reservoir cap | Keeping moisture and dirt out |
| Replace a cracked reservoir | Reservoir-to-cylinder connection | Damaging grommets or admitting air |
| Repair internal components | Cylinder body and piston retainer | Seal damage, spring force, and brake failure |
Removing the cap does not normally open the hydraulic lines. Identify the job before reaching for tools.
How to Open Brake Master Cylinder Reservoir Cap
Opening the reservoir for inspection is straightforward if you recognize its fastening style.
Locate the Reservoir and Check the Cap Style
Park on level ground, switch off the engine, and set the parking brake. Find the reservoir near the firewall, often on the driver’s side.
Look for the brake symbol or brake fluid specification on the cap. Common designs include a threaded cap that twists counterclockwise, a short-turn bayonet cap, and a push-on or clipped cover. Older units may use a metal cover with a spring clip.
Never assume every cap unscrews. If unsure, check the owner’s manual.
Open the Cap Without Contaminating the Fluid
- Read the level first. Check the MIN and MAX marks through the reservoir wall. A correct level needs no topping off.
- Protect paint. Cover adjacent painted surfaces and keep clean towels nearby.
- Clean the outside. Wipe dirt from the cap, reservoir neck, and surrounding ledges with a clean, lint-free cloth. Keep loose grit from falling inside.
- Release the cap correctly. Turn a threaded cap counterclockwise, disengage an approved locking clip, or carefully lift a snap-on cover as specified for that design.
- Lift the cap gently. Keep its rubber diaphragm or attached seal from touching dirty surfaces. Set it on a clean, suitable tray, not on the engine.
- Check promptly. Add only specified fluid if needed.
- Reinstall and secure the cover. Seat the seal properly and tighten, clip, or press the cap into place as designed.
Ford’s brake fluid maintenance instructions emphasize cleaning the reservoir area, using the specified fresh brake fluid, and securing the cap after filling. Ford illustrates a snap-fit cover on its example; another vehicle may use a threaded cap.
How to Open a Stuck Brake Master Cylinder Cap
Dried residue, dirty threads, or aging plastic can make a cap stick. Improve grip rather than increasing force.
Wipe the cap perimeter, confirm its locking style, and try again using a clean rubber-grip glove. For a threaded cap, apply steady hand pressure in the correct direction. For a clipped cover, release the clip fully before lifting.
Avoid crushing the reservoir neck with pliers or prying against brittle plastic. A damaged neck can prevent the cap from sealing, and chips can contaminate the fluid. Do not use heat, penetrating oil, or petroleum-based lubricants near the opening.
If the cap is cracked, distorted, or still jammed, have the correct replacement cover or reservoir identified before further work. A sound cap is essential for a proper seal.
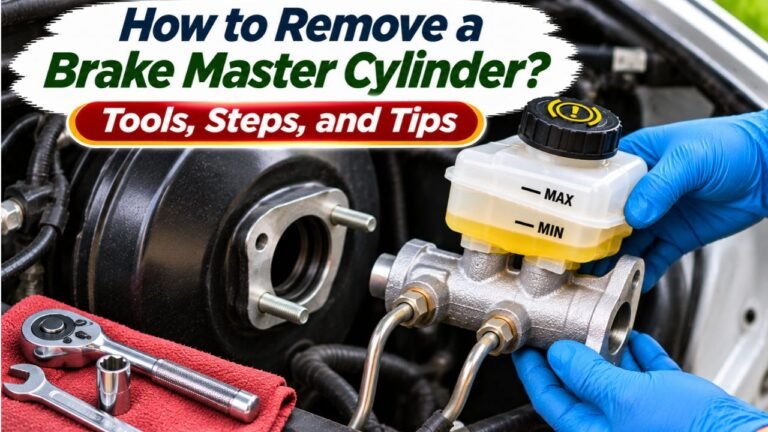
How to Remove the Brake Fluid Reservoir From the Cylinder
Remove the reservoir only to service the reservoir or its connections.
Many reservoirs fit into rubber sealing grommets on the cylinder body and may also have a retaining screw, clip, or molded locking feature. Pulling at the wrong angle can crack the plastic.
For a vehicle with an approved service procedure, the broad sequence is:
- Protect the paint, disconnect any specified fluid-level sensor wiring, and clean the assembly exterior.
- Withdraw the old fluid into a suitable labeled waste container using brake-fluid-compatible equipment.
- Remove reservoir fasteners or locking tabs following the service instructions.
- Separate the reservoir using the specified direction and method without levering against a fragile port.
- Inspect and replace grommets or seals as required before reinstallation.
Some reservoirs require cylinder removal first. Protect exposed feed ports from dirt and prevent air entering the circuits. Bleed the system if required.
How to Open the Internal Brake Master Cylinder Assembly
The housing contains pistons, springs, and hydraulic seals that build brake pressure.
Opening this housing is substantially different from checking fluid. Only designated serviceable cylinders can be rebuilt with approved parts; others need complete replacement.
Understand the Model-Specific Disassembly Sequence
A serviceable cylinder is typically removed, drained, cleaned externally, and secured carefully. A retaining ring may restrain spring-loaded pistons.
A Hyundai Accent master cylinder service procedure describes removing the reservoir, releasing a retaining ring with snap-ring pliers, and withdrawing the primary and secondary pistons. It also instructs technicians not to break down the piston assemblies themselves. That procedure applies to the covered model, not every vehicle.
Important: Springs can eject parts when a retaining ring is removed. Wear eye protection and use the specified restraint. Never aim a piston toward yourself or improvise with compressed air.
Know When to Stop Disassembly
Do not open an internal piston assembly unless the exact service documentation expressly permits it and suitable replacement seals are available. Incorrect seals, springs, or retainers can cause hydraulic failure.
If you cannot identify the master cylinder model, service parts, and reassembly checks, replacing the complete unit through a qualified repairer is the safer choice.
What to Inspect After Opening a Brake Master Cylinder
A cap-off check covers fluid; internal work demands inspection of pistons and seals.
Check Brake Fluid Level and Signs of Contamination
Read the level on level ground. It may fall as pads wear, but a rapid drop or frequent refilling suggests a leak.
Inspect for visible sediment, unusual cloudiness, or an oily layer from an incompatible substance. Color alone does not measure moisture. Follow the service schedule and investigate contamination.
If the reservoir is unexpectedly empty or the pedal feels soft, stop the inspection and arrange a full brake-system diagnosis. Filling the reservoir does not repair an active leak or remove air already drawn into the lines.
Examine Seals, Grommets, and the Cylinder Bore
For approved internal service, inspect rubber seals for cuts, swelling, and incorrect seating. Check the reservoir grommets and the junction between the master cylinder and brake booster for leakage.
The internal bore must be smooth and free from scoring or corrosion. Many automotive master cylinders have a precisely finished bore that should not be honed or sanded. If damage is found, replacement is generally required rather than an improvised polishing repair.
Keep parts clean and ordered. Never use gasoline, oil, or petroleum solvents on seals.
Which Brake Fluid Should You Use After Opening It?
Use the exact brake fluid specified in the manual or on the cap. Common grades include DOT 3 and DOT 4; some vehicles require DOT 4 LV or DOT 5.1.
DOT 5 silicone brake fluid is not interchangeable with DOT 3 or DOT 4. Despite the similar number, DOT 5.1 is a different category from DOT 5. Follow the manufacturer’s stated compatibility rather than selecting fluid by name or color.
Use fresh fluid from a newly opened container. Glycol-based brake fluid absorbs moisture, so minimize air exposure.
Do not reuse extracted fluid, mix in power steering fluid, or pour in an unidentified liquid. If petroleum-based fluid has entered the reservoir, routine topping off is not a safe fix; affected hydraulic components may need extensive professional repair.
How to Close and Reassemble the Master Cylinder Correctly
Check the cap seal for damage and reinstall it squarely. Threaded caps should turn freely; snap-on caps must lock securely.
If fluid was added, bring the level to the specified range without overfilling. Overfilling may cause spills during later pad service. Never top up to hide a leak.
For a removed reservoir or rebuilt cylinder, install only specified seals, retaining parts, and fasteners. The pistons must face the correct direction, the retaining ring must seat fully, and connections must be tightened to the vehicle’s actual torque specification.
Check for leaks. If hydraulics were opened, complete specified bleeding and pedal checks before driving.
Does Opening a Brake Master Cylinder Require Bleeding?
Removing only the reservoir cap does not normally require brake bleeding. That assumes the lines stayed connected and fluid did not drop below the feed ports.
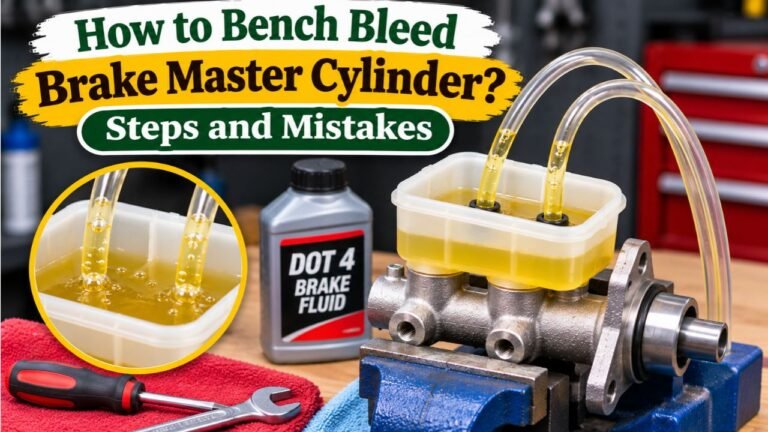
Bleeding becomes necessary when lines are disconnected, a master cylinder is replaced, or a hydraulic circuit draws in air. A newly fitted master cylinder may need bench bleeding before installation, followed by the vehicle’s specified system-bleeding procedure.
Brembo’s master cylinder replacement instructions call for the specified brake fluid, correct line connections, system bleeding, and final leak checks. They also direct installers to follow the vehicle manufacturer’s ABS instructions.
Some ABS systems require a scan tool for bleeding, especially if air entered the control unit.
| What Happened | Is Bleeding Usually Needed? |
| Reservoir cap removed and replaced | No, if no air entered |
| Fluid added without exposing feed ports | Usually no |
| Reservoir emptied or removed | Often, depending on air entry |
| Brake lines disconnected or cylinder replaced | Yes, follow service procedure |
Mistakes to Avoid When Opening a Master Cylinder
Avoid these problems:
- Forcing a cap: Twisting a snap-on lid or prying a threaded cap can break it.
- Letting dirt inside: Grit can damage seals and valves.
- Using incompatible fluid: Seals and braking can be damaged.
- Running dry: Trapped air can cause a soft pedal.
- Reusing bad seals: Cracks and cuts may cause leaks.
- Skipping checks: Leaks or trapped air may go undetected.
If brake fluid lands on paint, rinse the affected area promptly with plenty of water, following the vehicle manufacturer’s care guidance. Wear gloves and eye protection while handling fluid, and keep used brake fluid in a suitable container for disposal through an approved collection program.
When to Replace a Brake Master Cylinder Instead of Opening It
Inspecting fluid is routine; disassembling a leaking cylinder is not.
A sinking pedal may result from internal bypass or an external leak. Diagnose the cause. Corrosion, unavailable seals, and non-serviceable housings often call for complete replacement.
A sound reservoir cap can be replaced on its own if the correct part is available. A cracked reservoir may also be replaceable separately on some models. Neither proves the internal pistons have failed.
Do not drive if the brake pedal sinks, braking is weak, fluid is leaking, or a brake warning indicates a possible hydraulic fault. Arrange inspection and towing when needed; a short test drive is not an acceptable way to prove an uncertain repair.
Conclusion
Knowing how to open brake master cylinder components begins with identifying the part you need to access. For a fluid check, cleaning the area and releasing the correctly designed cap is usually enough. A stuck cap calls for gentle, model-appropriate handling, not leverage that can crack the reservoir.
Removing the reservoir or opening the piston housing involves seals, springs, and hydraulic connections. Those jobs require the correct service documentation, clean parts, proper bleeding when air enters, and dependable final checks. When internal damage or uncertain brake performance is involved, professional replacement is safer than an improvised rebuild.
FAQs About How to Open Brake Master Cylinder
Can I Use Pliers to Open a Tight Brake Fluid Cap?
Pliers can crack or distort a plastic cap and reservoir neck. Clean the area, check for hidden clips, and try a rubber grip by hand. If it remains stuck, use the model-specific service method or have it inspected.
Will Air Enter the Brakes When I Remove the Reservoir Cap?
Normally, no. The fluid reservoir is designed to be opened for service. Air enters the hydraulic circuits if fluid falls below the feed openings or brake lines are opened, which may require bleeding.
Can I Remove the Plastic Reservoir Without Replacing the Master Cylinder?
Sometimes. On serviceable designs, the reservoir and its rubber grommets can be replaced separately. The correct method depends on mounting clips, screws, sensor wiring, and whether the cylinder must first be removed.
Can I Rebuild a Brake Master Cylinder at Home?
Only certain master cylinders are designed for service with approved parts. A rebuild requires exact model instructions, inspection of the bore, correct seal orientation, and proper hydraulic bleeding. Without those, complete replacement by a qualified technician is safer.
Why Is My Brake Pedal Soft After Master Cylinder Work?
Trapped air, a leak, incorrect assembly, or another hydraulic fault may be responsible. Do not drive until the system is diagnosed, the specified bleeding procedure is completed, and braking performance has been verified.