How to Put Brake Pads in a Caliper: Correct Fit, Clips, Setup
Brake pads must sit with their friction material facing the rotor, with the inner pad positioned on the piston side and the outer pad on the opposite side. On many floating-caliper systems, the pads actually slide into the caliper bracket first, then the caliper fits over them. Fixed calipers may hold the pads directly inside the caliper body.
Installing a pad backward, forcing it into the wrong position, or leaving an anti-rattle clip partly seated can cause dragging, uneven wear, noise, or poor pedal feel. A pad should move correctly in its guides without being loose enough to rattle.
New pads are also thicker than worn pads, so the caliper piston normally has to be retracted before the caliper will fit over them. Front pistons commonly press straight back, while some rear calipers require a wind-back procedure or electronic parking-brake service mode.
Brake dust deserves attention during the job. OSHA’s U.S. workplace rules set an asbestos permissible exposure limit of 0.1 fiber per cubic centimeter of air as an 8-hour time-weighted average, and its brake-service guidance warns that some brake friction materials may contain asbestos. Avoid blowing old brake dust around with compressed air.
During my research on how to put brake pads in a caliper, one point showed up repeatedly in manufacturer instructions: pad orientation is not universal. Some pads have wear indicators, retaining springs, adhesive sections, arrows, or different inner and outer backing plates, so the old pad arrangement and vehicle-specific service information should be checked before assembly. Brembo also specifies that friction material must face the disc and directional arrows, when present, must follow disc rotation.
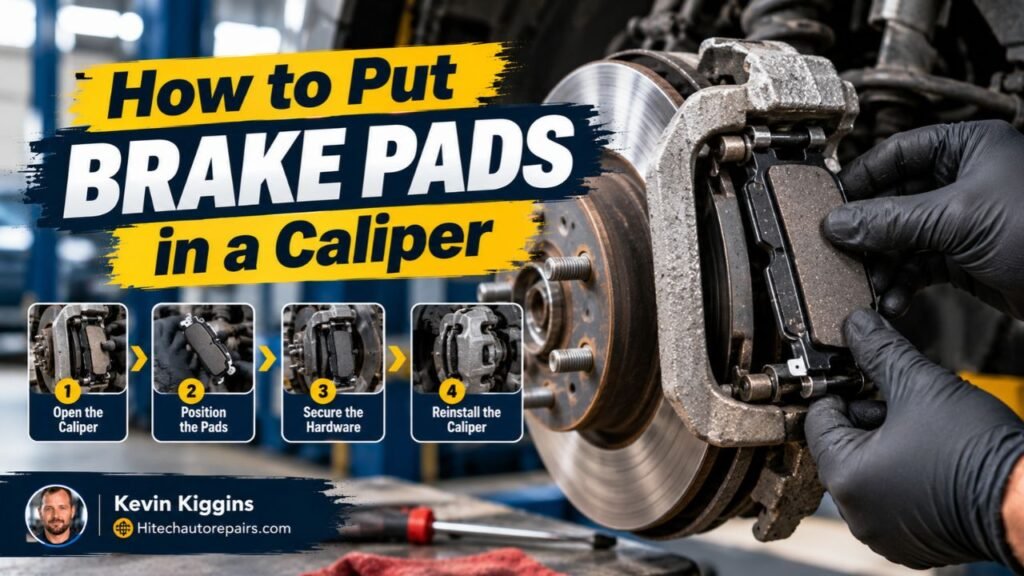
The process below covers the common floating-caliper arrangement first, then fixed calipers, pad hardware, piston retraction, lubrication, and the checks that should happen before the vehicle moves.
Before Putting Brake Pads Into the Caliper
Start with the vehicle on a firm, level surface. Loosen the wheel fasteners before raising the vehicle, use the correct jacking point, and support the vehicle with jack stands.
Never work under or beside a raised vehicle that is supported only by a hydraulic jack. PowerStop’s brake-service instructions also call for jack stands and recommend supporting the removed caliper instead of allowing it to hang from the flexible brake hose.
Once the wheel and caliper are removed, hang the caliper from a suspension component with a proper hanger or sturdy wire. Do not twist, stretch, or kink the brake hose.
Before taking the old pads out, look closely at their positions. A quick photo gives you a reference for:
- Inner versus outer pad
- Wear-indicator position
- Anti-rattle springs
- Abutment clips
- Pad-retaining springs
- Directional markings
- Sensor wires
- Shims
Some pad sets use two identical-looking pieces. Others have obvious differences between the piston-side and outer pads.
Check the Caliper Bracket and Hardware
On most floating-caliper systems, the pads slide in stainless-steel abutment clips attached to the caliper bracket.
Remove old clips if replacement hardware is supplied. Clean corrosion from the bracket surfaces beneath the clips so the new hardware can sit flat.
Do not grind away bracket material just to make a pad fit. Heavy corrosion, damaged pad lands, or distorted hardware may need further repair or replacement.
Wagner notes that rust beneath pad hardware can restrict pad movement and contribute to uneven wear.
Inspect the Slide Pins
Floating calipers rely on slide pins so the caliper can move as the brakes are applied and released.
Pull each pin if the service procedure calls for inspection. Check for:
- Rust
- Pitting
- Torn boots
- Hardened lubricant
- Binding
- Bent pins
Use only a brake lubricant compatible with the pin boots and seals. Petroleum grease may damage some rubber brake components.
Key Takeaway: Before installing the new pads, support the vehicle and caliper safely, record the original pad orientation, clean the bracket contact points, and inspect the hardware and slide pins.
How to Put Brake Pads in a Caliper Step by Step
The following method applies to a common single-piston floating caliper, which is widely used on passenger vehicles. Your vehicle may use a different layout, so service information for the exact year, make, model, and brake package takes priority.
1. Remove the Old Brake Pads
With the caliper supported, slide the old inner and outer pads out of the bracket.
Some pads pull straight outward. Others have spring tabs that snap into the caliper piston or caliper housing.
Do not force a pad past retaining hardware without first checking how that hardware releases. Bent clips may prevent the replacement pads from sitting correctly.
2. Compare the Old and New Pads
Place the replacement pads beside the removed pads.
Check:
- Overall shape
- Pad thickness
- Tab position
- Wear-indicator location
- Sensor connection
- Backing-plate shape
- Retaining springs
- Direction arrows
- Chamfers and slots
Do not assume the two new pads are interchangeable simply because their friction surfaces look alike.
Some applications have a clearly different inboard pad and outboard pad. Wagner documents applications where incorrect inner/outer placement can offset the caliper and cause binding or pedal problems.
3. Install the New Abutment Clips
If the pad kit contains new stainless hardware, fit it in the same positions as the original clips.
Push each clip fully against the caliper bracket. A clip sitting over rust or partly outside its groove can reduce the opening enough for the pad to bind.
Run a pad gently through its guide after the hardware is installed. It should fit correctly without needing heavy force.
A pad that must be hammered into the bracket is a warning sign. Stop and check for rust, incorrect hardware, paint buildup, or the wrong pad.
4. Retract the Caliper Piston
The piston must move far enough back into the caliper to create room for the thicker new pads.
For many conventional front floating calipers, a caliper piston tool or suitable compressor pushes the piston straight inward.
Place the old pad across the piston face when appropriate so pressure is spread evenly.
Push slowly rather than forcing the piston. Watch the brake-fluid reservoir because retracting pistons sends fluid back toward the master cylinder. PowerStop specifically advises monitoring reservoir level during piston compression.
If the piston will not retract with normal tool pressure, stop. A seized caliper, restricted hose, parking-brake mechanism, or incorrect retraction method may be involved.
5. Check Rear Caliper Piston Type Before Applying Force
Rear brake calipers deserve extra attention.
Some mechanical parking-brake calipers have a piston that must rotate while being pushed inward with a wind-back tool.
Many electronic parking brake systems require the EPB to enter a service or maintenance mode before the piston is retracted. The method may involve a scan tool, a vehicle control sequence, or another manufacturer-specified process.
Do not assume every notched rear piston turns the same direction. Do not force an EPB piston inward with a clamp unless the service procedure specifically permits straight compression.
I would verify this step before touching a rear piston. It takes far less time than replacing a damaged caliper actuator.
6. Position the Inner Brake Pad
The inner pad normally sits on the piston side of the rotor.
On some floating calipers, the inner pad slides into the bracket just like the outer pad. On others, spring fingers on the pad snap into the hollow caliper piston.
If the pad has a wear indicator, sensor, or special backing plate, compare its intended position with the removed pad and current service information.
The friction material must face inward toward the rotor. The metal backing plate faces the piston or caliper.
7. Position the Outer Brake Pad
The outer pad sits on the opposite side of the rotor.
Slide its mounting ears into the bracket hardware. Confirm that the pad is fully seated in both upper and lower guides.
The pad should remain flat and parallel to the rotor surface. A tab sitting above a clip rather than inside it can prevent the caliper from seating.
8. Apply Brake Lubricant Only Where Specified
Use a small amount of brake-specific lubricant at approved sliding contact points.
Common locations may include:
- Pad ears where they contact abutment clips
- Caliper slide pins
- Certain metal backing-plate contact points
- Selected caliper-to-pad contact surfaces
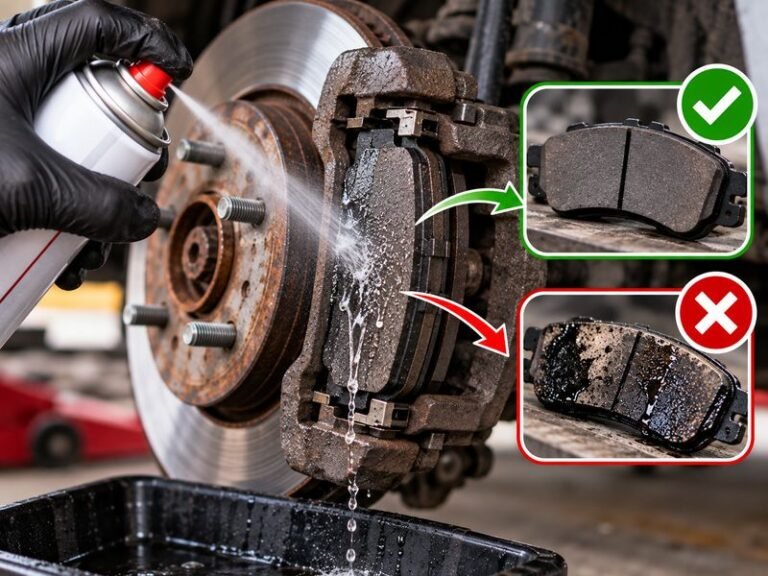
Never put grease on:
- Pad friction material
- Rotor braking surfaces
PowerStop advises using only a thin layer at pad contact points and keeping lubricant completely off the friction side of the pads. It also notes that lubricant on the back of some shimmed pads may not be required.
Check the pad maker’s instructions before coating the entire backing plate. Some pads have factory noise-control shims that should not receive extra compounds.
9. Swing or Slide the Caliper Over the Pads
Once both pads are installed and the piston is retracted, move the caliper into position over the rotor and pads.
It should fit without being forced.
If the caliper will not slide over the pads, check:
- Is the piston fully retracted?
- Are the pads sitting completely inside their clips?
- Is one pad backward?
- Is the pad set correct for the vehicle?
- Does the rear piston require further wind-back or EPB service mode?
- Is hardware incorrectly installed?
Do not use the caliper bolts to pull a badly fitting caliper into place.
10. Install the Caliper Bolts
Start the caliper bolts by hand to reduce the chance of cross-threading.
Tighten them to the vehicle manufacturer’s torque specification. Caliper fastener torque varies by vehicle and bolt location, so a universal torque value should not be used.
Check that slide-pin boots are not pinched or twisted after tightening.
11. Check Hose, Sensor, and Hardware Position
Before the wheel goes back on, inspect the assembly from several angles.
Confirm that:
- The brake hose is not twisted.
- Sensor wiring follows its original route.
- Pad springs are seated.
- Clips are fully installed.
- The rotor and friction surfaces are grease-free.
- The caliper can move correctly on its slides.
- No tool or loose hardware remains near the brake assembly.
Key Takeaway: Put the inner pad on the piston side and the outer pad opposite it, keep friction material facing the rotor, retract the piston using the method specified for that caliper, and never force the caliper over badly seated pads.
Do Brake Pads Go in the Caliper or the Caliper Bracket?
On many modern floating-caliper disc brakes, the pads technically sit in the caliper bracket, not loose inside the moving caliper body.
The bracket stays fixed around the rotor. The brake-pad ears slide in abutment clips mounted to that bracket.
The caliper body then fits over the installed pads.
Floating Caliper Layout
A floating caliper normally contains one or more pistons on the inner side. Hydraulic pressure pushes the inner pad toward the rotor, while movement of the caliper on its slide pins draws the outer pad against the opposite rotor face.
Typical placement looks like this:
| Component | Typical position |
| Inner pad | Piston side |
| Outer pad | Outside of rotor |
| Pad ears | Caliper bracket clips |
| Piston | Behind inner pad |
| Slide pins | Between caliper and bracket |
| Friction surfaces | Facing rotor |
Fixed Caliper Layout
A fixed caliper does not slide on guide pins in the same way.
It normally has pistons on both sides of the rotor, and the pads may slide directly into openings in the caliper body.
Retaining pins, springs, bolts, or clips may pass through the pads to hold them in place.
Brembo’s current fitting instructions describe calipers that use pad-retaining pins and springs, which is one reason a single installation sequence cannot cover every disc-brake design.
Key Takeaway: Floating-caliper pads commonly sit in the bracket, while many fixed calipers hold pads directly in the caliper body with pins or springs.
Which Brake Pad Goes on the Inside?
The inboard pad goes on the piston side of a floating caliper. The outboard pad goes on the opposite side.
That sounds simple, but some pad sets contain features that make side identification matter.
Look for a Wear Indicator
A mechanical wear indicator is a small metal tab that contacts the rotor and creates a warning sound as pad material becomes thin.
Its correct location varies by application.
Do not use a universal rule such as “the wear indicator always goes on the inner pad” or “always goes at the bottom.” Check the old pad position or service information.
Look for Piston Retaining Clips
Some inner pads have a spring clip on the rear that snaps into the hollow piston.
If one new pad has this style of clip and the other does not, the clipped pad is usually the piston-side pad for that design.
Check Direction Arrows
Some pads are directional.
An arrow may show the required direction of rotor rotation. Some sets instead use markings such as left/right or specific chamfer orientation.
Brembo instructs installers to position directional arrows in the disc’s rotation direction when such arrows are present.
Compare Backing Plates
The inboard and outboard pad may have different backing-plate shapes even if the friction blocks appear nearly identical.
Do not swap them just because both physically fit into the bracket.
Key Takeaway: Inner and outer pads are not always interchangeable. Use retaining clips, wear indicators, backing-plate shape, arrows, sensors, and the old assembly to identify each position.
Why New Brake Pads Will Not Fit Over the Rotor
A new pad set should fit once the correct hardware is installed and the piston has been retracted.
If it does not, forcing the parts together may hide the real problem.
The Piston Is Not Fully Retracted
This is the most common reason the caliper will not go back over thick new pads.
Compare the piston position with the caliper housing. If it still projects farther than expected, recheck the required retraction method.
A piston that stops abruptly under moderate tool pressure may be seized or may use a screw-type parking-brake mechanism.
Rust Is Trapped Under the Pad Clips
Corrosion can build beneath stainless abutment clips and push them inward.
That reduces the space available for the pad ears.
Remove the clips and clean the bracket surfaces correctly rather than grinding the brake-pad backing plate to compensate.
The Hardware Is in the Wrong Position
Pad clips can look nearly symmetrical while having a specific upper, lower, left, or right position.
Compare them with the old hardware before installation.
The Pads Are Reversed
A piston-side pad installed outside, or an outboard pad installed against the piston, may cause clearance trouble on applications with different backing plates.
The Part Number Is Wrong
Vehicles from the same model year may use different brake packages based on trim, engine, wheel size, production date, axle rating, or factory option.
Place the new pad directly beside the removed pad and compare every major dimension before assembly.
Key Takeaway: If the new pads do not fit, check piston position, bracket rust, clip placement, inner/outer orientation, and part number instead of forcing the caliper into place.
What to Do After the Brake Pads Are Installed
Brake assembly is not finished the moment the caliper bolts are tight.
A few final checks are needed before driving.
Pump the Brake Pedal
Retracting the piston leaves extra clearance between the piston, pads, and rotor.
Press the brake pedal several times until it becomes firm. This moves the pistons outward and seats the pads against the rotors.
Wagner also advises pumping the pedal after brake service until it feels firm.
Do this before attempting to move the vehicle.
Check Brake Fluid Level
Inspect the master-cylinder reservoir after the pedal is firm.
The fluid level may rise when caliper pistons are pushed inward.
Use the fluid type and level range stated by the vehicle manufacturer. Clean spilled brake fluid promptly because it can damage painted surfaces.
Confirm the Wheel Rotates Correctly
Before lowering the vehicle, rotate the wheel or hub if the design permits.
A slight pad-to-rotor contact sound may occur, but severe resistance may point to:
- A binding pad
- Seized slide pin
- Incorrect hardware
- Mispositioned spring
- Parking brake not released
- Caliper fault
Torque the Wheel Fasteners
Reinstall the wheel and tighten its fasteners to the vehicle manufacturer’s specification using the required tightening sequence.
Do not substitute an estimated torque value.
Follow the Pad Break-In Procedure
New pads may require a manufacturer-specified bedding or burnishing process.
The procedure transfers friction material to the rotor and prepares the new pad/rotor surfaces.
Use the procedure supplied with the brake pads rather than assuming every pad compound uses the same series of stops.
Key Takeaway: Before driving, establish a firm brake pedal, check fluid level, inspect the assembly, torque wheel fasteners correctly, and follow the brake-pad maker’s break-in procedure.
Brake Pad Installation Mistakes to Avoid
Brake components are simple to recognize, but several assembly mistakes can create serious problems.
Putting the Friction Material Away From the Rotor
The pad’s friction material must face the rotor.
The steel backing plate faces the piston, caliper, or outer caliper fingers.
A backward pad should be obvious during assembly, but never assume a pad that physically fits is positioned correctly.
Greasing the Pad Face
Brake lubricant must never be applied to the friction surface.
Grease on a pad or rotor reduces friction and contaminates the braking surfaces.
If friction material becomes contaminated, follow the pad manufacturer’s replacement guidance rather than trying random solvents.
Letting the Caliper Hang From the Hose
A brake hose is not a support strap.
Hang the caliper from a solid suspension point while the pads and bracket are being serviced.
Forcing a Rear Piston Back
This mistake can damage calipers with integrated mechanical or electronic parking-brake mechanisms.
Identify the piston type first.
Installing Tight Pads
Pads should not need hammering into clean, correctly assembled guides.
Binding at the bracket can prevent the pad from releasing properly after braking.
Forgetting to Pump the Pedal
The first pedal application after piston retraction may travel much farther than normal.
Build a firm pedal before moving the car.
Key Takeaway: Keep pad faces clean, support the caliper, use the correct piston-reset method, make sure pads slide correctly, and restore a firm pedal before the vehicle moves.
Conclusion
The safest way to approach how to put brake pads in a caliper is to identify the caliper design first. On a common floating setup, the inner and outer pads usually slide into the bracket with their friction surfaces facing the rotor, then the retracted caliper fits over them.
Check inner and outer pad differences, install the correct clips, clean bracket contact areas, use brake lubricant only where specified, and reset the piston using the method required for that vehicle. Rear parking-brake calipers deserve extra attention because they may use wind-back pistons or an EPB service procedure.
My recommendation is to stop whenever a pad, piston, or caliper requires unusual force. Brake parts that fit correctly normally go together in a controlled way. Rechecking orientation, hardware, piston position, and vehicle service information is safer than forcing the assembly.
Before driving, pump the brake pedal until firm, inspect the brake-fluid level, confirm that all fasteners and hardware are secure, and complete the pad maker’s break-in procedure.
FAQs About Putting Brake Pads in a Caliper
Which way do brake pads face in a caliper?
The friction material faces the brake rotor. The metal backing plate faces the caliper piston on the inner side and the caliper body or outer support on the opposite side.
If the pad has arrows, retaining clips, wear indicators, or sensors, use those features and the vehicle service information to confirm its exact orientation.
Does the brake pad with the clip go on the inside?
Often, a pad with a spring clip designed to snap into the piston is the inner pad. A small wear-indicator tab by itself does not always identify the inner pad because indicator placement varies by vehicle.
Compare the new pads with the originals and check manufacturer instructions before installation.
Should brake pads slide freely in the caliper bracket?
They should move in their guides without heavy force while still being retained securely by the hardware.
If a pad is tight, check for corrosion beneath the abutment clips, damaged hardware, excess coating on contact points, or the wrong pad. Do not grind large amounts from a new pad simply to make it fit.
Do I need to compress the caliper piston before installing new pads?
Yes, in most disc-brake pad replacements. New pads contain more friction material than worn pads, so additional clearance is required.
Many front pistons push straight inward. Some rear pistons must rotate during retraction, and some electronic parking brake systems require service mode first.
Can I use a C-clamp to push every caliper piston back?
No. A C-clamp or piston compressor may work on many conventional straight-push pistons, but some rear calipers use screw-in pistons or electronic parking-brake mechanisms.
Confirm the correct reset method before applying force. Using the wrong method can damage the piston, seals, parking-brake mechanism, or actuator.
Where should brake grease go when installing pads?
Use a thin amount of compatible brake lubricant only at approved contact or sliding points, such as certain pad ears, abutment clips, and slide pins.
Keep all lubricant away from the rotor and pad friction surfaces. Some brake-pad designs also specify little or no lubricant on factory-installed backing shims.
Why will my caliper not fit over the new brake pads?
The piston may not be fully retracted, the pads may be sitting incorrectly in their clips, the bracket may have rust buildup, or the pad set may be wrong for the vehicle.
Rear calipers may also require a special piston wind-back or EPB service procedure. Stop and identify the cause instead of pulling the caliper into place with its bolts.