How to Check Brake Pads Without Removing Wheel: Easy Inspection
You can inspect many disc-brake pads without taking the wheel off by shining a bright flashlight through the wheel spokes and looking at the friction material beside the rotor. This gives you a useful estimate of remaining pad thickness, though the inner pad may be hidden and a full inspection is still needed when wear looks low or uneven.
The biggest mistake is looking at the wrong layer. A brake pad has a steel backing plate plus the actual friction material. Counting the backing plate as usable pad thickness can make a worn pad look much healthier than it really is.
A quick visual check lets you spot very thin friction material, a disappearing wear groove, heavy rotor scoring, or an obvious difference between wheels before the brakes reach metal-to-metal contact. It also takes only a flashlight on vehicles with open-spoke wheels.
Brake inspection matters even more as U.S. vehicles stay on the road longer. S&P Global Mobility reported that the average U.S. light vehicle reached 12.8 years old in 2025, with about 289 million light vehicles in operation. Older vehicles create more opportunities for wear items such as pads, rotors, calipers, and brake hardware to need attention.
The basic method for how to check brake pads without removing wheel is to locate the rotor and caliper through a spoke opening, identify the friction layer, and judge how much material remains. Wagner Brake also states that brake pads are visible through the wheel openings on many vehicles and recommends using a flashlight when the view is difficult.
What stood out to me during the research is the limitation of this shortcut: the pad you can see most clearly is usually the outer pad, while the inner pad may be wearing faster. A through-the-wheel check is a good screening method, but it cannot always confirm that both pads are wearing evenly.
The steps below show how to position the vehicle, identify the pad correctly, estimate its thickness, use wear slots and warning signs, inspect the front and rear brakes, and recognize the point where wheel removal becomes the better next step.
How to Check Brake Pads Without Removing Wheel Step by Step
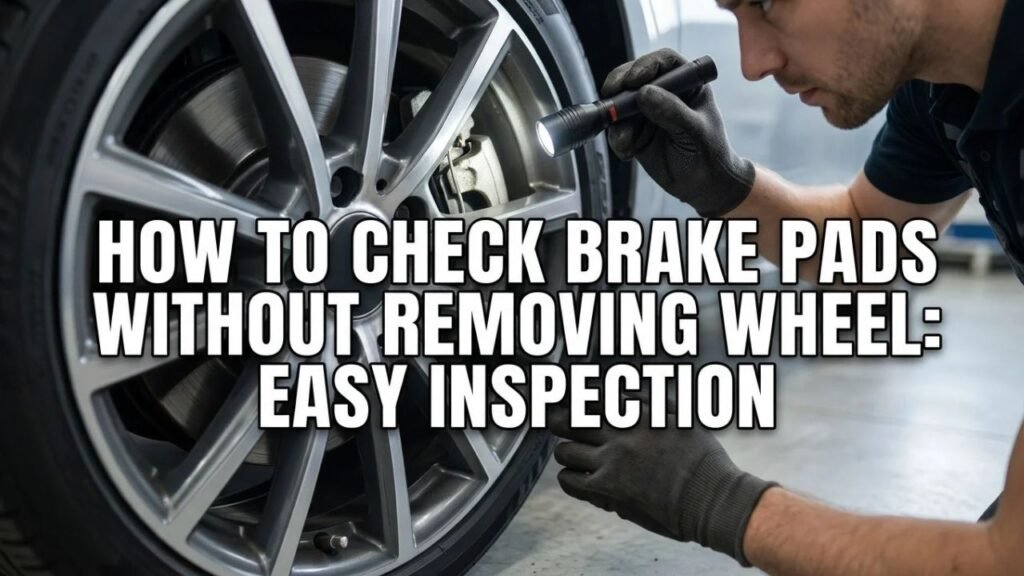
Most cars with disc brakes and open-spoke wheels give you at least a partial view of the brake assembly.
You usually need only a bright flashlight. A small inspection mirror or phone camera can improve the viewing angle on some vehicles.
1. Park the Vehicle on a Flat Surface
Park on firm, level ground.
Put an automatic transmission in Park. For a manual transmission, use the appropriate gear according to the owner’s manual. Secure the vehicle so it cannot roll.
Switch off the engine.
Do not crawl underneath the vehicle for this inspection. There is no reason to jack up the car if the wheel is staying installed.
If you have just driven, give the brakes time to cool. Rotors and calipers can remain hot enough to burn skin after braking.
2. Find the Brake Rotor Through the Wheel
Look between the wheel spokes.
The brake rotor is the large round metal disc directly behind the wheel. It turns with the wheel.
You may see a smooth silver or gray braking surface with a slightly rust-colored area around the hub or outer edge.
Once you find the rotor, look for the brake caliper wrapped around one section of it.
3. Locate the Brake Caliper
The caliper is the large metal housing that straddles the rotor.
On many cars, it sits toward the front or rear side of the rotor rather than at the very top.
Shine your flashlight through the spoke opening and look where the caliper meets the rotor.
The brake pads sit inside the caliper on both sides of the rotor.
4. Identify the Friction Material
This is the part that often causes confusion.
A disc brake pad normally has:
- A steel backing plate
- Friction material attached to the backing plate
- Sometimes a shim on the back
- Hardware or clips around the pad
You want to judge only the friction material between the backing plate and rotor.
The friction layer usually looks darker and more block-like than the steel backing plate.
Do not measure the total thickness from the back of the steel plate to the rotor.
5. Shine the Light Directly at the Pad Edge
Position the flashlight so the light reaches the narrow edge of the visible pad.
Sometimes looking straight through the wheel does not give a clear view. Move your head slightly higher, lower, left, or right until you can see the separation between the rotor, friction material, and backing plate.
A phone camera can work well where your face cannot line up with the opening. Turn on the camera light or flash, position the phone through the spoke opening without touching the brake assembly, and take several pictures.
Zooming in on a sharp photo may reveal the friction layer more clearly than looking through the wheel by eye.
6. Estimate the Remaining Pad Thickness
Look at the visible friction material and judge how much remains.
A pad with a thick, clearly visible friction layer is less concerning than one where only a thin strip remains between the rotor and backing plate.
Do not rely on a universal replacement number. Vehicle manufacturers use different service limits.
Bosch has published a disc-brake inspection checklist using 4 mm of friction material, measured without the backing plate, as its wear-limit reference in that service guidance. The specification for your exact vehicle should still control the replacement decision.
If the visible material is down to only a few millimeters, schedule a more accurate inspection rather than trying to judge fractions of a millimeter through the wheel.
7. Look for a Wear Indicator Groove
Some pads have a groove or slot cut into the friction material.
The groove becomes shallower as the pad wears.
If the slot is nearly gone, the pad may be approaching its service limit. Wagner also lists a barely visible or missing wear slot as a sign that replacement may be due.
Not every brake pad uses this type of groove, so the absence of a slot does not prove the pad is worn.
8. Turn the Steering Wheel for a Better Front-Brake View
Front wheels are usually easier to inspect if you turn the steering wheel.
For example, turning the steering toward full lock may rotate the wheel enough to expose the caliper through a larger opening or give you a view from behind the wheel.
Try both steering directions if needed.
Keep the vehicle stationary while inspecting it.
9. Check Both Front Wheels
Do not inspect one side and assume the other matches.
Look at the left-front and right-front pads separately.
If one visible pad looks much thinner than the opposite side, a caliper, slide pin, pad fitment, or hydraulic problem may be causing uneven wear.
A side-to-side difference deserves a fuller brake inspection.
10. Inspect the Rear Brakes Too
If the rear axle uses disc brakes and the wheels provide enough visibility, repeat the process at both rear wheels.
Rear calipers can be harder to see because you cannot turn the rear wheels for a better angle.
An inspection mirror or phone camera may be useful.
Some vehicles use drum brakes at the rear. In that case, there is no disc brake pad to view through the wheel.
Key Takeaway: Use a flashlight through the wheel spokes, identify the friction layer beside the rotor, compare all visible pads, and treat the result as an estimate rather than a complete measurement.
What Can You Actually See Without Removing the Wheel?
A through-the-wheel inspection has real limits.
The wheel design, caliper shape, suspension layout, and pad position determine how much useful information you can collect.
The Outer Pad Is Usually Easier to See
The outer pad sits between the outside face of the rotor and the outer portion of the caliper.
On many vehicles, this pad is visible through a spoke opening.
That is useful, but the outer pad does not always represent the condition of the inner pad.
The Inner Pad May Be Hidden
The inner pad sits behind the rotor, closer to the suspension.
The caliper body, dust shield, steering knuckle, or wheel may block the view.
This matters because inner and outer pads do not always wear at the same rate.
A sticking caliper piston or restricted slide mechanism can make one pad wear much faster than its partner.
If you can see only the outer pad, do not assume the inner pad has exactly the same thickness.
Open-Spoke Wheels Give the Best View
Large alloy-wheel openings usually provide the easiest access.
Dense multi-spoke wheels, steel wheels, wheel covers, and some aerodynamic wheel designs may leave almost no direct line of sight to the pad.
Moving the car a few inches can rotate the wheel so a different opening lines up with the caliper.
If the wheel blocks the pad completely, forcing tools into a narrow gap is not worth the risk. Remove the wheel using the correct lifting procedure or have the brakes inspected.
Drum Brakes Cannot Be Checked the Same Way
A drum brake hides its friction shoes inside a metal drum.
You cannot judge brake-shoe thickness simply by looking through the wheel spokes.
Some drum systems have an inspection opening in the backing plate, but access and inspection procedures vary.
Do not confuse disc-brake pads with drum-brake shoes.
Key Takeaway: The no-removal method works best on open-spoke wheels with disc brakes, and it often shows only the outer pad rather than the entire brake assembly.
How to Tell If the Brake Pads Look Too Thin
You do not need to identify an exact millimeter value to recognize an obviously worn pad.
A visual inspection is most useful for separating pads with substantial material from pads that are clearly approaching the backing plate.
Compare Friction Material With the Backing Plate
The metal backing plate gives you a useful visual reference.
If the friction layer is still thick and easy to distinguish, the pad may have substantial life left.
If the friction layer looks extremely thin compared with the steel plate, it is time for a more accurate measurement.
Do not count the backing plate itself as remaining pad material.
Look for an Almost-Disappeared Wear Slot
A wear groove offers another quick reference.
If a groove that was originally cut into the friction material has almost disappeared, the pad has lost a large amount of material.
Confirm the meaning of the groove for your pad design because slots can also be used for noise, dust, and heat control.
Look at All Visible Pads Rather Than One
Brake wear can differ between:
- Front and rear axles
- Left and right wheels
- Inner and outer pads
- Leading and trailing ends of a single pad
Checking several wheels gives you a much better picture than looking through one spoke on one wheel.
If one corner looks very different, the wear pattern itself is useful diagnostic information.
Key Takeaway: Focus on the friction material alone, look for a very thin layer or disappearing wear groove, and compare the visible condition at every wheel you can inspect.
Signs the Pads Need a Full Inspection Even If They Look Okay
Visible thickness is only part of brake condition.
Pads can appear acceptable from outside while another symptom points to a problem hidden behind the wheel.
Squealing That Persists
Some pads use a metal wear indicator that contacts the rotor as the friction material becomes thin.
This can produce a high-pitched squeal.
Brake squeal has many other causes, including pad compound, rotor condition, vibration, glazing, or hardware problems, so sound alone does not confirm pad thickness.
Persistent new noise is still a reason to inspect more closely.
Grinding or Growling
Grinding is more concerning.
It can occur when friction material has worn through and metal begins contacting the rotor. Wagner warns that grinding or growling can indicate metal-to-metal contact after the braking material has been depleted.
Do not rely on a through-the-wheel glance if the brakes are grinding.
The brake system needs prompt inspection.
A Brake Pad Warning Light
Some vehicles use an electronic brake-pad wear sensor.
When the pad reaches a certain point, the sensor triggers a dashboard message or warning lamp.
A warning light should not be ignored simply because the visible outer pad looks thick.
The sensor may be located on an inner pad that you cannot see clearly.
Vehicle Pulling During Braking
If the vehicle pulls strongly left or right while braking, one side may not be applying or releasing correctly.
Possible causes include a caliper problem, hydraulic issue, friction-material contamination, tire condition, or suspension fault.
Pad thickness alone cannot diagnose the cause.
One Wheel Produces Much More Heat
A dragging brake can make one wheel noticeably hotter than the others.
You may also notice a burning smell or unusually heavy brake dust.
Do not touch the rotor or caliper to test temperature. Brake parts can become extremely hot.
A large temperature difference deserves a mechanical inspection.
Pedal Feel Has Changed
A soft, sinking, unusually hard, or strongly pulsating brake pedal points beyond a simple visual pad check.
Brake fluid, rotors, hydraulic components, ABS hardware, calipers, and other parts may need inspection.
Key Takeaway: Grinding, warning lights, pulling, abnormal heat, burning smells, or major pedal changes call for a fuller brake inspection even when the visible outer pad looks acceptable.
Can You Measure Brake Pads Accurately Through the Wheel?
Sometimes you can obtain a rough measurement, but access usually limits accuracy.
A thin ruler, inspection gauge, mirror, or camera may provide more information through an open wheel.
A Flashlight Gives the Fastest Estimate
For a routine home check, a flashlight is often enough.
Your goal is not to certify an exact service measurement. Your goal is to identify:
- Plenty of visible friction material
- A pad that looks close to its limit
- A large difference between wheels
- A missing wear groove
- Rotor damage that calls for more inspection
Once the material looks low, wheel removal becomes more useful than trying to refine the estimate through a spoke.
A Small Mirror Can Reveal the Inner Area
An inspection mirror may give a partial view behind the rotor.
This works better on some vehicles than others.
Depth and angle can make a reflected image difficult to judge, so do not treat a mirror estimate as a precise measurement.
A Phone Camera Can Show Hidden Details
A phone with a good camera is a simple inspection aid.
Place it at different angles through the wheel opening, take several focused photos, and enlarge the best image.
This may show the boundary between the backing plate and friction material more clearly.
Keep the phone away from sharp hardware and do not push it into a position where it can become stuck.
A True Thickness Measurement Is Better With the Wheel Off
Accurate measurement requires clear access to the friction material.
Removing the wheel gives you a better view of both pads, the caliper, rotor, brake hose, hardware, and wear pattern.
A technician may also remove or reposition the caliper when needed to inspect the complete pad surface.
If your estimate suggests the pad is nearing its limit, a full measurement is the next logical step.
Key Takeaway: Through-the-wheel measurements are best treated as screening estimates; precise thickness and inner-pad condition usually require better access.
Common Mistakes During a No-Wheel-Removal Brake Check
A quick inspection seems simple, but several errors can produce a misleading result.
Mistaking the Backing Plate for Pad Material
This is probably the most common visual error.
The thick metal plate behind the friction layer is part of the pad assembly, but it is not usable friction material.
Identify the rotor first, then trace outward toward the friction material and backing plate.
Checking Only One Front Wheel
Brake wear is not always symmetrical.
A restricted slide pin, sticking piston, or pad binding in the bracket can cause one wheel to wear much faster.
Inspect both sides.
Assuming the Inner Pad Matches the Outer Pad
The inner pad can be thinner even when the visible outer pad looks fine.
If visibility is poor or the car has a history of uneven brake wear, remove the wheel for a complete check.
Inspecting Hot Brakes
A visual inspection does not require touching brake parts.
Still, working close to a recently used rotor creates unnecessary burn risk.
Let the brakes cool before putting your hands or phone near the assembly.
Treating One Thickness Number as Universal
Brake-pad service limits vary.
A generic chart is useful for context, but the vehicle manufacturer’s service specification is the better reference for replacement.
The same rule applies to rotor minimum thickness.
Ignoring the Rotor
You are already looking directly at the rotor during a pad inspection.
Check for deep scoring, heavy rust on the braking surface, cracks, or obvious damage.
A pad may still have material while the rotor needs attention for another reason.
Key Takeaway: Do not confuse the backing plate with friction material, assume the hidden inner pad matches the outer pad, or use one generic thickness limit for every vehicle.
When You Should Remove the Wheel for a Full Brake Inspection
The quick visual method is useful because it requires almost no setup.
It stops being enough when the view is poor or the symptoms suggest something more than normal pad wear.
Remove the wheel or arrange a professional inspection when:
- You cannot clearly see the friction material
- The pad looks close to its service limit
- One side appears thinner than the other
- You cannot inspect the inner pad
- The brakes grind or scrape
- The vehicle pulls during braking
- A wheel appears to be overheating
- Rotor damage is visible
- A brake warning appears
- Pad wear has been unusually fast
- You need an exact thickness measurement
Once the wheel is off, you can inspect much more than pad thickness.
You can see the brake hose, caliper boots, slide-pin area, pad hardware, rotor surfaces, and both visible pad edges.
If the pad wear is uneven, the cause should be corrected before simply installing new pads.
Conclusion
How to check brake pads without removing wheel is fairly simple on a vehicle with disc brakes and open wheel spokes: let the brakes cool, locate the rotor and caliper, shine a flashlight at the pad edge, and judge the remaining friction material without counting the steel backing plate.
This method is best for a quick condition check. Wear slots, pad thickness, side-to-side differences, brake noises, warning lights, and rotor appearance can tell you when a more detailed inspection is due.
The main limitation is hidden wear. The outer pad may look healthy while the inner pad is much thinner, so a visible pad should never be treated as proof that the entire brake assembly is in the same condition.
I would use the through-the-wheel method for routine checks and switch to a full inspection as soon as the friction material looks low, the inner pad cannot be assessed, or the vehicle develops grinding, pulling, overheating, or abnormal pedal behavior.
FAQs About Checking Brake Pads Without Removing the Wheel
Can you really see brake pads through the wheel?
Yes, on many vehicles with open-spoke wheels and disc brakes. Look through the spoke opening for the rotor and caliper, then locate the friction material between the rotor and metal pad backing plate. Some wheel and caliper designs block the view completely, so this method is not possible on every vehicle.
How can I tell the brake pad from the backing plate?
Start at the rotor surface and look outward. The friction material sits directly against the rotor and is bonded to a metal backing plate. The friction layer usually looks darker and more block-like. Only that friction material counts when judging remaining pad thickness.
How thick should brake pads be before replacement?
The exact service limit depends on the vehicle and brake-pad design. Bosch has published 4 mm as the wear-limit reference in one disc-brake service checklist, while other vehicle specifications may differ. If the pad looks down to only a few millimeters, obtain an accurate measurement and compare it with the manufacturer’s specification.
Can I see the inner brake pad without removing the wheel?
Sometimes, but it is often difficult. The rotor, caliper, dust shield, and suspension can block the inner pad. A small mirror or phone camera may improve the view. If the inner pad cannot be inspected clearly, wheel removal gives a much more reliable assessment.
Can I check rear brake pads without taking the wheel off?
Yes, if the rear axle has disc brakes and the wheel openings provide a clear view. Rear pads can be harder to inspect because the wheels do not turn for a better angle. Vehicles with rear drum brakes use brake shoes inside a drum, so the same visual method does not apply.
Does a squealing brake mean the pads are worn out?
Not always. Some pads use a metal wear indicator that squeals as the friction material becomes thin, but squealing can also come from vibration, pad compound, glazing, rotor condition, or brake hardware. Check pad thickness rather than diagnosing wear from sound alone.
Should I remove the wheel if the visible pad looks thin?
Yes, a full inspection is sensible once the visible friction material looks close to its service limit. Wheel removal provides a better view of the inner and outer pads, rotor, caliper, hardware, and wear pattern. It also makes an accurate thickness measurement much easier.