How to Clean Brake Fluid Reservoir: Inside and Outside Guide
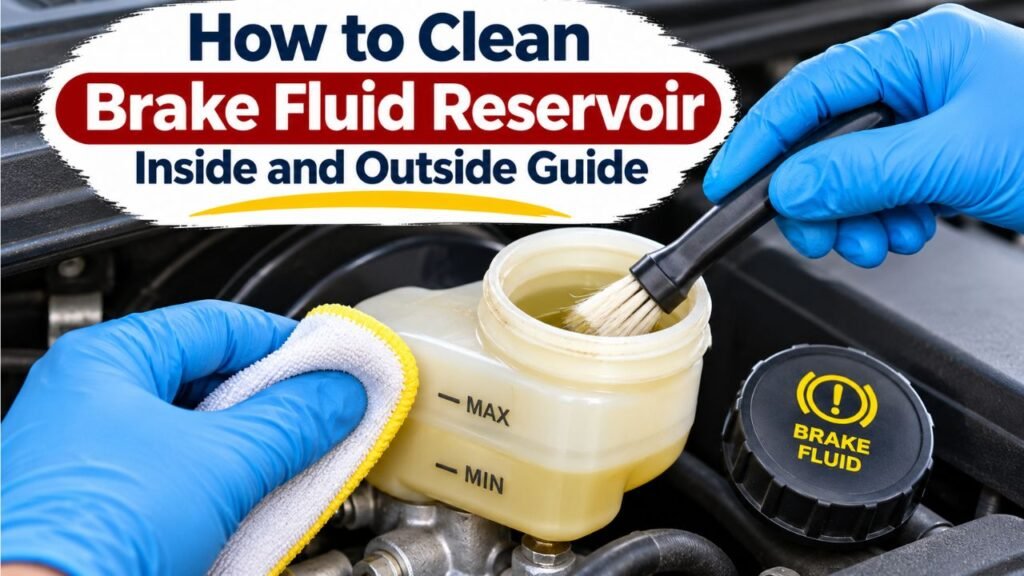
To clean a brake fluid reservoir safely, keep the cap closed and wipe dirt, dust, and old fluid residue from the outside using a clean, lint-free cloth. If the reservoir contains sludge, floating particles, or other contamination inside, cleaning the exterior is not enough. The brake hydraulic system may need professional inspection, a fluid exchange, or reservoir replacement.
The brake fluid reservoir is a small container connected to the brake master cylinder. It stores hydraulic fluid that helps transfer braking force to the wheels. Because the braking system relies on clean, compatible fluid, even small amounts of dirt, water, or petroleum-based products can create serious problems.
Cleaning the reservoir’s outside is relatively simple. Cleaning its interior requires greater care because the container connects directly to sensitive hydraulic components. Using the wrong cleaning product or accidentally allowing the reservoir to run dry can compromise braking performance.
A stained reservoir also does not necessarily mean the brake fluid is contaminated. The plastic may have yellowed with age, or the fluid may simply be due for replacement.
In this article, I explain how to clean a brake fluid reservoir safely, including exterior cleaning, reservoir-cap care, and evaluating contamination inside. I also cover suitable materials, brake fluid flushing, common mistakes, and when replacement or professional service is the better option.
How to Clean a Brake Fluid Reservoir: Quick Answer
The correct cleaning method depends on whether the dirt is outside the reservoir, inside the fluid, or embedded in the plastic.
These situations require different approaches.
Brake Fluid Reservoir Cleaning Methods
| Reservoir Condition | Recommended Action | DIY Suitability |
| Dust on the outside | Wipe with a clean, lint-free cloth | Generally safe |
| Greasy exterior buildup | Carefully clean the closed reservoir’s exterior | Generally safe |
| Dirt around the cap | Remove dirt before opening the cap | Generally safe |
| Residue on the underside of the cap | Follow the manufacturer’s cleaning instructions | Limited, careful cleaning |
| Dark but otherwise normal-looking fluid | Check service history and fluid condition | Inspection only |
| Floating particles inside | Arrange hydraulic system inspection | Professional service recommended |
| Thick sludge inside | Diagnose contamination and consider reservoir replacement | Professional service recommended |
| Yellowed or cloudy reservoir plastic | Clean the outside; replace if visibility remains poor | Replacement may require professional service |
| Water or incorrect fluid added | Stop using the vehicle and seek immediate assessment | Professional service required |
| Brake warning light or low fluid | Diagnose the cause before adding fluid | Professional inspection recommended |
The distinction between cleaning the reservoir and changing brake fluid is particularly important.
Cleaning the outside removes dirt from the container’s surface. Changing brake fluid replaces old fluid in the hydraulic system.
One procedure does not automatically accomplish the other.
Key Takeaway: Clean exterior dirt without opening the system. Interior sludge, contamination, or hydraulic problems require more than wiping the reservoir.
What Does a Brake Fluid Reservoir Do?
The brake fluid reservoir holds fluid for the hydraulic braking system.
On most cars, it is mounted directly above the brake master cylinder.
It helps maintain the appropriate fluid supply as brake components operate and wear.
How the System Works
A simplified hydraulic braking system includes:
- Brake pedal
- Brake booster, where equipped
- Master cylinder
- Brake fluid reservoir
- Brake hydraulic lines
- ABS hydraulic components, where equipped
- Brake calipers or wheel cylinders
When the driver presses the brake pedal, hydraulic pressure is generated to operate the wheel brakes.
The reservoir supplies fluid to the master cylinder as needed.
Where Is the Reservoir Located?
In many vehicles, the reservoir is near the rear of the engine compartment on the driver’s side.
It is often a translucent plastic container with a cap labeled for brake fluid.
However, location varies by vehicle.
Some modern cars have remote reservoirs or additional hydraulic systems.
What Are the MIN and MAX Marks?
Many reservoirs have two fluid-level markings:
- MIN: The lower reference mark
- MAX: The upper reference mark
The level should be checked according to the vehicle manufacturer’s instructions.
A lower reading may occur as brake pads wear, but a significant or sudden drop can indicate a leak.
The fluid level should not be adjusted blindly without considering the condition of the braking system.
Why Does Cleanliness Matter?
Dirt entering the reservoir can travel into hydraulic components.
Moisture contamination can reduce the boiling-point performance of many conventional brake fluids.
Petroleum-based contamination can damage certain brake seals.
For these reasons, keeping the reservoir and its cap clean is an important part of brake maintenance.
Key Takeaway: The reservoir is part of a safety-critical hydraulic system. Cleaning it should never introduce moisture, chemicals, or debris into the brake fluid.
What Do You Need to Clean a Brake Fluid Reservoir?
For basic exterior cleaning, only a few materials are necessary.
Recommended Supplies
| Item | Purpose |
| Clean lint-free microfiber cloth | Wiping exterior dirt |
| Second clean, dry lint-free cloth | Final drying |
| Soft detailing brush | Removing exterior dust from difficult areas |
| Mild soap solution on a damp cloth | Cleaning stubborn exterior dirt |
| Nitrile gloves | Reducing skin contact with brake fluid |
| Safety glasses | Protecting eyes |
| Protective fender cover | Protecting nearby painted surfaces |
| Vehicle owner’s manual | Checking fluid and reservoir requirements |
You do not need to purchase a chemical brake-system cleaner simply to remove dust from the exterior.
What Should You Avoid?
Do not introduce any of the following into the open reservoir:
- Water
- Dish soap
- Engine degreaser
- Brake cleaner spray
- Gasoline
- Mineral spirits
- Engine oil
- Power steering fluid
- Unapproved alcohol or solvents
- Dirty shop rags
- Cotton fibers or loose paper towel fragments
These materials may contaminate the brake fluid or damage components.
Although mild soap and water can be used carefully on some exterior surfaces, they must never be allowed to enter the hydraulic system.
Can You Use Brake Cleaner on the Reservoir?
I do not recommend spraying aerosol brake cleaner into a reservoir or directly onto its cap and rubber seals.
Brake cleaner is designed for specific brake-component cleaning applications.
It is not a substitute for compatible hydraulic brake fluid.
Some formulations can also affect certain plastics or rubber materials.
Key Takeaway: Use clean, lint-free materials for exterior cleaning and keep all water, soap, and chemical cleaners out of the hydraulic fluid.
How to Clean the Outside of a Brake Fluid Reservoir
Cleaning the reservoir’s exterior is the safest maintenance task for most vehicle owners.
The goal is to remove dirt without opening or contaminating the hydraulic system.
Step 1: Park the Vehicle Safely
Park on level ground.
Switch off the engine and secure the vehicle.
For hybrids and electric vehicles, follow the manufacturer’s shutdown instructions because certain systems may operate automatically.
Allow nearby hot components to cool.
Step 2: Locate the Brake Fluid Reservoir
Open the hood and identify the brake fluid reservoir.
Check the owner’s manual if necessary.
Do not confuse it with:
- Engine coolant reservoir
- Windshield washer reservoir
- Power steering reservoir
- Clutch fluid reservoir
Some manual-transmission vehicles share brake fluid between the brake and clutch hydraulic systems, while others have separate reservoirs.
Step 3: Inspect the Reservoir Before Cleaning
Check for:
- Visible cracks
- Wetness around the cap
- Brake fluid leaks
- Damaged hoses
- Broken mounting points
- Missing or damaged cap components
If you discover leakage or damage, have the system inspected rather than merely cleaning away the evidence.
Step 4: Keep the Reservoir Cap Closed
Before cleaning the exterior, make sure the cap is securely installed.
Do not remove it to clean the outside.
Keeping the cap closed helps prevent dust, water, and other materials from entering the fluid.
Step 5: Remove Loose Dust
Use a clean, dry microfiber cloth.
Gently wipe the reservoir body and surrounding area.
If dirt is trapped in exterior corners, use a soft detailing brush.
Work carefully around electrical connectors, hoses, and the fluid-level sensor.
Step 6: Remove Stubborn Exterior Dirt
If the outside is greasy or stained, use a microfiber cloth lightly dampened with a mild soap solution.
Wipe only the exterior.
Avoid excessive moisture near the cap, seams, connectors, and reservoir openings.
Do not spray water directly onto the reservoir.
Step 7: Dry the Reservoir Completely
Use a separate clean, dry cloth.
Remove all remaining moisture from the exterior, particularly around the cap.
This step is especially important if you intend to open the reservoir afterward for authorized brake-fluid service.
Step 8: Inspect the Fluid Level
Look through the translucent plastic.
Identify the MIN and MAX marks.
If the plastic is dirty, cleaning the exterior may make the level easier to read.
If the reservoir remains opaque because the plastic itself has aged, exterior cleaning may not restore clarity.
Step 9: Check for Leaks Again
After removing surface dirt, inspect the reservoir and surrounding connections.
Cleaning may reveal cracks or wet areas previously hidden by grime.
If fluid leakage is visible, do not ignore it.
The Ford manufacturer’s brake fluid maintenance guide specifically recommends cleaning the reservoir and cap before opening the hydraulic system so dirt and moisture cannot enter.
Key Takeaway: Keep the cap closed, clean the exterior gently, dry the area thoroughly, and inspect for damage or leakage.
How to Clean a Brake Fluid Reservoir Cap
The reservoir cap is particularly important because it helps protect the hydraulic fluid from external contamination.
Many caps also include a rubber diaphragm or seal.
Step 1: Clean Around the Cap First
Before opening the reservoir, wipe the surrounding area.
Remove dust and debris from:
- The cap surface
- The reservoir neck
- Nearby engine-compartment surfaces
- Areas where loose dirt could fall into the opening
Do not loosen the cap while the surrounding area is dirty.
Step 2: Decide Whether Opening Is Necessary
If you are only cleaning the reservoir’s outside, leave the cap installed.
Open it only when required for an appropriate maintenance procedure.
Brake fluid should not be exposed to humid air unnecessarily.
Step 3: Follow the Vehicle’s Cap-Cleaning Instructions
Ford’s maintenance guidance permits gently wiping the inside of certain reservoir caps with a completely clean, lint-free cloth.
However, this does not mean every cap and diaphragm should be disassembled or washed.
Some assemblies have specific handling requirements.
Step 4: Protect the Rubber Diaphragm
If the cap has a rubber diaphragm:
- Do not pull or stretch it unnecessarily.
- Do not apply petroleum-based cleaners.
- Do not scrub it with abrasive tools.
- Do not reinstall a torn or deteriorated seal.
- Follow the vehicle-specific instructions for positioning it.
A damaged seal may require replacement.
Step 5: Refit the Cap Correctly
Make sure the cap is securely seated.
Do not cross-thread it or force a damaged cap into place.
Inspect for visible leakage afterward.
Can You Wash the Brake Fluid Reservoir Cap With Water?
Do not rinse an open reservoir cap or its diaphragm with tap water and immediately reinstall it.
Residual moisture can contaminate the brake fluid.
For the most reliable result, follow the manufacturer’s cap-cleaning procedure or replace a contaminated or damaged cap.
Key Takeaway: Clean dirt around the cap before opening it. Use the manufacturer-approved method for the inside of the cap and avoid introducing moisture into the reservoir.
How to Clean Inside a Brake Fluid Reservoir
Cleaning the inside of a brake fluid reservoir requires greater caution than exterior cleaning because its contents connect directly to the braking system.
If you can see sludge, particles, or oily contamination inside, assume the problem may extend beyond the reservoir until it has been inspected.
Can You Simply Wipe the Inside?
Generally, it is not advisable to insert an ordinary rag, brush, or paper towel into an installed reservoir.
This can introduce:
- Loose fibers
- Dirt
- Cleaning chemicals
- Moisture
- Other contaminants
Scrubbing may also move deposits toward the master cylinder’s fluid ports.
Can You Remove Old Fluid With a Syringe?
A dedicated clean fluid extractor may be used by trained technicians during certain brake-fluid service procedures.
However, removing fluid from the reservoir alone does not replace all the fluid in the braking system.
It also does not necessarily remove sludge attached to internal surfaces.
Never allow the master cylinder reservoir to run dry during a brake-fluid exchange.
Air entering the hydraulic system can require a more involved bleeding procedure.
What Is the Proper Professional Cleaning Process?
Depending on the vehicle and contamination, a qualified technician may:
- Identify the correct brake fluid specification.
- Inspect the reservoir and cap.
- Evaluate the fluid for contamination.
- Check the master cylinder and surrounding components.
- Remove old fluid using appropriate equipment.
- Remove or replace the reservoir if necessary.
- Replace damaged seals and components.
- Perform the specified brake-fluid exchange or repair.
- Bleed the hydraulic system according to the service procedure.
- Check for leaks, warnings, and correct brake-pedal response.
Some ABS and electronically controlled braking systems require specialized diagnostic equipment during fluid service.
Should You Remove the Reservoir From the Master Cylinder?
Not solely to improve its appearance.
Reservoir removal may involve seals, retaining components, fluid-level sensors, and connections to the master cylinder.
Improper removal or reinstallation can introduce leaks or air.
If the reservoir is internally contaminated or severely damaged, professional replacement is often more appropriate than improvised cleaning.
What About Old Brown Residue Inside?
Brown residue can result from several conditions, including aged fluid, deposits, or deterioration of components.
Its appearance alone does not identify the cause.
If the material is thick, floating, oily, or persistent, have it inspected.
Do not attempt to dissolve it by pouring chemicals into the hydraulic system.
Key Takeaway: Interior contamination should be diagnosed, not merely scrubbed away. A professional fluid exchange or reservoir replacement may be necessary.
Can You Clean a Brake Fluid Reservoir Without Removing It?
Yes, the outside can be cleaned without removing the reservoir.
In fact, that is the preferred approach for ordinary maintenance.
However, internal cleaning is more complicated.
Exterior Cleaning Without Removal
Use a clean cloth to remove surface dirt while keeping the cap closed.
This avoids disturbing hydraulic connections.
Interior Cleaning Without Removal
During a proper brake-fluid service, technicians may remove old fluid and replace it with new fluid through approved procedures.
However, this does not guarantee that stubborn sediment or residue will disappear.
Some reservoirs contain internal partitions that make mechanical cleaning difficult.
When Is Reservoir Removal Necessary?
Removal may be considered when:
- The reservoir is cracked.
- The plastic is severely degraded.
- Internal deposits cannot be safely removed.
- The reservoir seals are damaged.
- Incorrect fluid has entered the system.
- The vehicle manufacturer’s procedure requires replacement.
The decision depends on the exact reservoir design and the contamination involved.
Is Replacing the Reservoir Better Than Cleaning It?
Sometimes.
A new reservoir may be preferable when the original has:
- Persistent internal sludge
- Unrepairable cracks
- Damaged mounting points
- Cloudy, unreadable plastic
- Deteriorated seals
However, replacing only the reservoir does not solve contamination already present elsewhere in the hydraulic system.
Key Takeaway: Clean the outside in place. Internal cleaning or replacement should follow the vehicle’s service procedure and account for the condition of the entire braking system.
How to Remove Dirty Brake Fluid From the Reservoir
Dirty or deteriorated brake fluid needs a different approach from ordinary surface cleaning.
Does Dark Brake Fluid Always Need to Be Removed?
Not based on color alone.
Brake fluid may darken as it ages, but its appearance does not establish its exact moisture content or boiling point.
A technician may evaluate fluid condition and review the maintenance history.
If the specified replacement interval has been reached, the fluid should be changed according to the manufacturer’s service schedule.
Why Isn’t Removing Reservoir Fluid Enough?
The reservoir holds only part of the hydraulic system’s total fluid.
Additional fluid remains in:
- Master cylinder passages
- Brake lines
- ABS hydraulic components
- Calipers
- Wheel cylinders, where equipped
Removing fluid from the reservoir and adding fresh fluid does not replace all the old fluid in these areas.
What Is a Brake Fluid Flush?
A brake fluid flush or exchange involves replacing old fluid throughout the appropriate hydraulic circuits.
It may require specialized pressure or vacuum equipment.
The manufacturer specifies the correct service procedure and bleeding sequence.
According to Bosch Car Service’s brake fluid change guide, proper service includes replacing fluid with the correct specification, removing trapped air, checking fluid level, and inspecting the system for leaks.
Is a Brake Flush Always Necessary When the Reservoir Looks Dirty?
No.
If the dirt is only on the outside, a brake fluid flush is unnecessary for that reason alone.
If the plastic is yellowed but the fluid is in acceptable condition, replacement may not be due.
However, actual fluid contamination, overdue maintenance, or hydraulic repairs may justify service.
Can You Drive Immediately After a Brake Fluid Flush?
Only after the braking system has been correctly serviced, verified to be leak-free, and confirmed to have proper pedal operation.
If the pedal feels soft, sinks unusually far, or warning lights remain on, do not drive until the problem is resolved.
Key Takeaway: Replacing fluid only in the reservoir is not a complete flush. Proper brake-fluid replacement addresses the hydraulic circuits as required by the vehicle.
Can You Use Brake Cleaner to Clean the Inside of the Reservoir?
No. Do not spray brake cleaner into an installed brake fluid reservoir.
Brake cleaner products may contain solvents that are incompatible with hydraulic brake-system components.
Residue remaining inside could contaminate the brake fluid.
What About Rubbing Alcohol?
Do not introduce ordinary rubbing alcohol into a connected brake reservoir.
It commonly contains water and may include other ingredients not approved for hydraulic systems.
What About Soap and Water?
Soap and water should not be poured into an installed reservoir.
Water contamination reduces the suitability of many conventional brake fluids.
Detergent residue may create additional problems.
Can You Use Engine Degreaser?
No.
Engine degreasers are not intended for internal hydraulic brake-system cleaning.
Some contain petroleum-based ingredients that can damage brake seals.
What About Fresh Brake Fluid?
Manufacturer-approved procedures sometimes use fresh, correct-specification brake fluid for servicing compatible internal hydraulic components.
However, that does not authorize arbitrary flushing, scrubbing, or pouring fluid through an assembled system.
Use the vehicle’s exact service procedure.
Cleaning Products Comparison
| Product | Safe for Reservoir Exterior? | Suitable Inside Connected Reservoir? |
| Clean dry microfiber cloth | Yes | Do not insert into reservoir |
| Mild soap on a damp cloth | Carefully, with cap closed | No |
| Plain water | Only for appropriate exterior cleanup | No |
| Aerosol brake cleaner | Not recommended on reservoir plastics and seals | No |
| Rubbing alcohol | Not recommended | No |
| Engine degreaser | Avoid around reservoir openings | No |
| Gasoline or mineral spirits | No | No |
| Correct fresh brake fluid | Used during approved brake service | Only according to service instructions |
Key Takeaway: Do not use household or automotive cleaners inside a connected brake fluid reservoir. Follow manufacturer-approved service procedures.
How to Tell Whether the Reservoir Is Dirty or the Fluid Is Contaminated
A reservoir may look dirty for several different reasons.
Correctly identifying the condition helps avoid unnecessary repairs.
Reservoir Condition Comparison
| What You See | Possible Explanation | Recommended Response |
| Dust on the outer plastic | Normal engine-bay dirt | Wipe the exterior |
| Brown residue outside the cap | Previous spill or accumulated grime | Clean and inspect for leakage |
| Yellowed reservoir plastic | Age, heat, or material discoloration | Clean exterior; replace if necessary |
| Light amber fluid | May be normal for some brake fluids | Check specification and service history |
| Dark brown fluid | Aging or possible contamination | Inspect condition and maintenance history |
| Cloudy or milky fluid | Possible contamination | Professional inspection |
| Floating particles | Debris or deteriorating components | Professional inspection |
| Oily layer or unusual separation | Possible incorrect-fluid contamination | Do not drive; arrange assessment |
| Persistent wetness at the reservoir | Possible leak | Repair and verify the system |
| Level below MIN | Brake wear, leak, or another issue | Diagnose cause |
Does Brake Fluid Naturally Change Color?
Yes, some brake fluids darken over time.
However, color alone is not a precise test of boiling point, moisture content, or fluid safety.
Very dark or cloudy fluid should prompt inspection, particularly when the service history is unknown.
Can Plastic Turn Yellow Permanently?
Yes.
Translucent reservoirs may discolor because of age and environmental exposure.
If the discoloration is within the plastic, wiping or washing the exterior may not restore its original appearance.
Avoid abrasive polishing or harsh chemical treatment that could damage the container.
How Can You Check Fluid Level Through Cloudy Plastic?
Use the manufacturer’s recommended inspection method.
A flashlight directed through the side may help in some cases.
If the reservoir is too opaque to read reliably, replacement may be appropriate.
Avoid opening the reservoir unnecessarily just to inspect the level.
Key Takeaway: A dirty-looking reservoir does not always mean dirty brake fluid. Distinguish exterior grime, aged plastic, and actual hydraulic contamination.
What Causes Sludge Inside a Brake Fluid Reservoir?
Sludge or unusual deposits can have several causes.
1. Moisture Contamination
Many conventional brake fluids absorb moisture over time.
Moisture can contribute to corrosion and reduced fluid performance.
However, moisture contamination does not always produce visible sludge.
2. Deteriorating Rubber Components
Damaged or incompatible hydraulic seals may release material into the system.
This can contribute to dark particles or deposits.
3. Incorrect Fluid Added
Introducing engine oil, power steering fluid, or other incompatible products can seriously damage brake-system components.
Certain petroleum products may cause rubber seals to swell or deteriorate.
4. Corrosion Inside the Hydraulic System
Moisture and aging can contribute to corrosion in some metal components.
Corrosion products may become part of the contamination found during service.
5. Excessive Service Interval
Old brake fluid may accumulate contamination over time.
However, fluid age alone does not confirm the source of visible sludge.
6. Dirt Introduced During Maintenance
Opening a dirty reservoir can allow debris to enter.
Using contaminated tools or fluid containers can have a similar effect.
What if the Sludge Returns After Cleaning?
Recurring deposits suggest that the underlying problem has not been corrected.
A technician should investigate:
- Fluid compatibility
- Master cylinder condition
- Reservoir seals
- Hydraulic component deterioration
- Prior service practices
- Possible contamination elsewhere in the system
Key Takeaway: Sludge is a warning sign that deserves investigation. The correct repair depends on identifying its cause.
What Happens if Water or the Wrong Fluid Enters the Reservoir?
If water, engine oil, power steering fluid, or another unapproved substance enters the brake reservoir, stop using the vehicle and arrange professional assessment.
Do not assume the problem can be corrected by removing a little fluid from the top.
Why Is Water a Problem?
Many brake systems use glycol-based fluid.
Water contamination can lower the fluid’s boiling point and contribute to internal corrosion.
Under severe braking conditions, excessive moisture may reduce braking performance.
Why Is Petroleum-Based Fluid Dangerous?
Many conventional brake hydraulic seals are not designed to contact petroleum-based oils.
Contamination can cause seals to swell or deteriorate, potentially compromising the master cylinder, calipers, or other components.
What Should You Do Immediately?
- Do not drive the vehicle.
- Do not pump the brake pedal unnecessarily.
- Do not add additional fluid or cleaning chemicals.
- Identify the substance that was introduced.
- Contact a qualified brake-system technician.
- Follow the appropriate manufacturer repair procedure.
The required repair can be extensive if petroleum contamination has reached multiple hydraulic components.
Can You Just Flush the Wrong Fluid Out?
Not necessarily.
If an incompatible substance has damaged rubber seals, a fluid flush alone may not restore the system.
Some components may require replacement.
The 2026 Hyundai owner’s manual brake-fluid instructions specifically warn that even small amounts of mineral-based oil can damage brake-system parts.
Key Takeaway: Incorrect fluid contamination is a safety-critical problem. Do not attempt to solve it with an ordinary reservoir cleaning.
Which Brake Fluid Should You Use After Cleaning?
Always use the brake fluid specified by the vehicle manufacturer.
The correct specification is commonly printed on the reservoir cap or listed in the owner’s manual.
Common Brake Fluid Types
| Fluid Type | General Composition | Important Consideration |
| DOT 3 | Glycol-based | Use where specified |
| DOT 4 | Glycol-based | Different performance specifications and formulations |
| DOT 4 LV and similar variants | Specialized glycol-based formulations | Must meet vehicle-specific requirements |
| DOT 5 | Silicone-based | Not interchangeable with conventional glycol-based systems |
| DOT 5.1 | Glycol-based | Different from silicone DOT 5 |
Can You Use DOT 4 Instead of DOT 3?
Do not make substitutions based only on the fluid’s DOT number.
Some vehicles may permit alternatives, while others specify particular chemical and performance requirements.
Follow the owner’s manual.
Is DOT 5.1 the Same as DOT 5?
No.
DOT 5 is silicone-based.
DOT 5.1 is a glycol-based specification.
The similar names do not mean the products are interchangeable.
Should You Mix Brake Fluids?
Use only approved fluid combinations.
Avoid mixing products without confirmation that they meet the vehicle’s requirements.
Why Must Brake Fluid Be Fresh?
Glycol-based brake fluid can absorb moisture from the surrounding air.
Use new fluid from a clean, properly sealed container when carrying out approved service.
Do not use fluid that has been exposed to air for an extended period.
Key Takeaway: Correct fluid specification is more important than brand, color, or a higher DOT number.
How Often Should You Clean a Brake Fluid Reservoir?
There is generally no fixed schedule requiring the inside of the reservoir to be scrubbed.
Exterior cleaning can be performed whenever dirt accumulates or before opening the cap for legitimate service.
Exterior Cleaning
Clean the exterior as needed during routine maintenance.
This helps keep the fluid-level markings visible and reduces the risk of debris entering during future service.
Interior Cleaning
Interior cleaning is not ordinarily a separate scheduled maintenance operation.
If the reservoir contains significant deposits or damage, it should be assessed along with the rest of the hydraulic system.
Brake Fluid Replacement
The brake-fluid replacement schedule depends on the vehicle.
Some manufacturers specify time-based intervals, while others use different maintenance requirements.
There is no universal schedule that applies to every model.
Check the owner’s manual and service history.
Should You Flush the Brakes Every Time the Reservoir Looks Dirty?
No.
Exterior dirt or yellowed plastic does not automatically justify flushing the hydraulic system.
A flush should be based on the manufacturer’s maintenance schedule, fluid condition, or repair requirements.
Key Takeaway: Clean the reservoir exterior when needed. Follow vehicle-specific intervals for brake fluid replacement rather than scheduling routine interior scrubbing.
How Much Does Brake Fluid Reservoir Cleaning Cost?
Costs vary depending on what actually needs to be done.
Basic exterior cleaning requires little equipment.
However, internal contamination may result in a much more involved repair.
Different Service Scenarios
| Service | Main Work Involved | Relative Cost |
| Exterior wipe-down | Cleaning accessible surfaces | Low |
| Reservoir-cap service | Inspection and possible cap replacement | Usually low |
| Routine brake-fluid exchange | Replacing fluid and bleeding required circuits | Moderate |
| Reservoir replacement | Removing and replacing reservoir and seals | Variable |
| Master-cylinder repair or replacement | Hydraulic component work | Higher |
| Severe incorrect-fluid contamination | Multiple component inspections and replacements | Potentially very high |
Why Do Costs Vary?
Important factors include:
- Vehicle make and model
- Reservoir design
- ABS configuration
- Labor rates
- Brake fluid specification
- Availability of replacement parts
- Whether additional hydraulic components are affected
A small exterior cleaning should not be confused with a complete hydraulic-system repair.
Is Professional Service Worth It?
For exterior dirt, professional cleaning may be unnecessary.
For interior sludge, low fluid levels, leaks, or uncertain brake performance, professional diagnosis is worth prioritizing.
The brake system is too important to risk damage for cosmetic improvement.
Key Takeaway: Exterior cleaning is inexpensive, but contaminated fluid or damaged hydraulic components can require significant service.
Common Mistakes When Cleaning a Brake Fluid Reservoir
1. Spraying Brake Cleaner Into the Reservoir
Aerosol brake cleaner is not intended to clean the inside of the hydraulic reservoir.
It may introduce incompatible substances.
2. Washing the Inside With Soap and Water
Residual moisture or detergent can contaminate the brake fluid.
Do not rinse an installed reservoir.
3. Using a Dirty Shop Rag
Loose fibers and dirt can enter the hydraulic system.
Use clean, lint-free materials for approved cap cleaning.
4. Removing the Cap Before Cleaning Around It
Dust may fall directly into the fluid.
Always clean the surrounding area first.
5. Using the Wrong Brake Fluid
An incompatible product can damage seals and compromise braking performance.
Check the exact specification.
6. Letting the Reservoir Run Dry
During hydraulic service, running the master cylinder dry may allow air into the system.
This can require additional bleeding and diagnostic work.
7. Assuming Dark Fluid Means the Reservoir Must Be Replaced
Fluid discoloration does not automatically indicate reservoir damage.
Evaluate the fluid and container separately.
8. Scrubbing Yellowed Plastic Aggressively
Abrasive tools and harsh solvents can damage the reservoir.
Aged plastic may need replacement rather than polishing.
9. Ignoring Low Fluid Levels
The level can drop as brake pads wear, but a significant decrease may also indicate a leak.
Investigate the cause.
10. Overfilling the Reservoir
Excess fluid can spill, particularly during brake service.
Follow the vehicle’s correct filling procedure and reference markings.
11. Spilling Brake Fluid on Paint
Many brake fluids can damage painted finishes.
Use protective coverings and clean accidental spills promptly according to the manufacturer’s instructions.
12. Treating Reservoir Fluid Removal as a Complete Flush
The reservoir contains only part of the braking system’s fluid.
A proper fluid exchange follows the vehicle-specific hydraulic service procedure.
13. Ignoring a Soft Brake Pedal
A soft or sinking pedal may indicate air, leakage, or another hydraulic problem.
Do not drive until the issue has been resolved.
14. Attempting ABS Bleeding Without Proper Instructions
Some systems require diagnostic activation and specialized service procedures.
Improper bleeding can leave trapped air in the hydraulic system.
Key Takeaway: Most serious cleaning mistakes involve introducing contaminants, using the wrong fluid, or disturbing the hydraulic system without following the correct procedure.
How to Keep Your Brake Fluid Reservoir Clean
A few preventive practices can reduce dirt accumulation and contamination risks.
Keep the Cap Closed
Do not open the reservoir unnecessarily.
A secure cap helps limit contamination.
Wipe the Area Before Service
Always clean dirt around the cap before removing it.
Use clean tools and materials.
Use the Correct Fluid
Follow the manufacturer’s specification.
Use new fluid from a properly sealed container.
Avoid Contaminated Tools
Do not use funnels or extractors previously exposed to engine oil, power steering fluid, or other automotive liquids.
If specialized tools are required, they should be appropriate and dedicated to the brake-fluid task.
Check for Fluid Leaks
Inspect the reservoir and nearby hydraulic connections.
Wetness may indicate a leak or a previous spill.
Persistent wetness should be evaluated.
Follow the Service Schedule
Brake fluid may deteriorate even when the reservoir looks clean.
Replace it according to the manufacturer’s maintenance recommendations.
Protect the Reservoir During Engine Cleaning
Avoid directing strong water sprays or chemical degreasers toward the cap and electrical connections.
If the engine bay needs cleaning, protect sensitive components and follow the vehicle manufacturer’s guidance.
Replace Damaged Components
A cracked reservoir or damaged cap cannot be made reliable merely by wiping it clean.
Use suitable replacement parts when necessary.
Key Takeaway: The best prevention is to keep the reservoir sealed, use clean service practices, maintain the correct fluid, and repair leaks promptly.
When Should You Replace the Brake Fluid Reservoir?
Reservoir replacement may be appropriate when cleaning cannot correct the problem or the container is physically damaged.
Common Reasons for Replacement
- Cracked plastic
- Fluid leakage
- Damaged mounting points
- Deteriorated seals
- Persistent internal contamination
- Severe discoloration that prevents accurate level checks
- Manufacturer-directed replacement following contamination
Can You Replace Only the Plastic Reservoir?
On some vehicles, the reservoir is separately replaceable.
On others, its connection to the master cylinder or surrounding components makes replacement more involved.
The correct approach depends on the design.
Does Replacing the Reservoir Require Brake Bleeding?
It may.
Reservoir removal can introduce air or disturb hydraulic connections.
Follow the model-specific repair procedure.
Do not assume the braking system is safe immediately after reassembly.
What if the Master Cylinder Is Also Damaged?
A damaged master cylinder may require replacement.
In cases of incompatible-fluid contamination, other rubber-containing brake components may also be affected.
Have the entire hydraulic system evaluated.
Key Takeaway: Replace a leaking, cracked, or severely contaminated reservoir when necessary, but investigate related hydraulic components before assuming the reservoir is the only problem.
When Should You Stop and Get Professional Brake Service?
Some conditions require more than basic cleaning.
Warning Signs That Need Attention
- Brake fluid level suddenly drops
- Fluid repeatedly needs topping up
- Brake warning light remains illuminated
- Brake pedal feels soft or spongy
- Brake pedal sinks unusually far
- Visible fluid leaks appear
- Fluid contains unusual particles or oily contamination
- Wrong fluid has been added
- ABS problems appear after servicing
- Brake performance changes
Can You Drive With a Brake Fluid Leak?
No, not safely.
A hydraulic leak can reduce the system’s ability to generate braking pressure.
Arrange appropriate assistance rather than continuing to drive.
What if the Pedal Feels Normal?
A normal-feeling pedal does not guarantee that contaminated fluid or a hidden hydraulic problem is harmless.
If incorrect fluid has been introduced or visible contamination is present, the system still requires inspection.
Should You Flush the Brakes Yourself?
A brake-fluid exchange can be performed by properly equipped and trained technicians following the relevant service procedure.
However, on a modern vehicle with ABS, electronic braking functions, or special hydraulic requirements, it may involve diagnostic equipment and precise bleeding steps.
If you cannot verify the correct procedure, use a qualified brake-service professional.
Key Takeaway: Low fluid, leaks, unusual pedal feel, and visible internal contamination are safety issues—not cosmetic cleaning problems.
Conclusion
The safest way to clean a brake fluid reservoir is to remove exterior dirt with the cap closed, using a clean, lint-free cloth and avoiding any contamination of the hydraulic fluid.
For ordinary dust and grime, this simple procedure is usually sufficient.
If the reservoir cap requires attention, clean the surrounding area first and follow the vehicle manufacturer’s instructions for the cap and diaphragm.
However, visible sludge, floating particles, oily contamination, or deteriorated fluid inside the reservoir requires further investigation.
Do not pour soap, water, brake cleaner, alcohol, or other unapproved products into the reservoir.
Removing a small amount of old fluid also does not replace a complete brake-fluid exchange.
When significant contamination is present, professional service may involve fluid replacement, reservoir replacement, bleeding, and inspection of other hydraulic components.
If the plastic has merely yellowed with age, aggressive scrubbing may not restore its appearance. Replacement may be more practical if the fluid level can no longer be read reliably.
I recommend treating exterior cleaning as routine maintenance while leaving internal hydraulic cleaning and contamination repair to the proper manufacturer-approved service procedure.
Keeping the reservoir sealed, using the correct brake fluid, and addressing leaks or unusual brake-pedal behavior are far more important than making the container look new.
FAQs About How to Clean Brake Fluid Reservoir
Can you clean a brake fluid reservoir without removing it?
Yes, you can clean the exterior without removing the reservoir. Keep the cap closed and wipe the outside with a clean, lint-free cloth. However, internal sludge or contamination may require a professional fluid exchange, reservoir removal, or replacement. Exterior cleaning does not remove contaminants already circulating through the hydraulic system.
What can I use to clean a brake fluid reservoir?
For exterior cleaning, use a clean microfiber cloth and, when necessary, a lightly dampened cloth with mild soap. Dry the area thoroughly before opening the cap for any approved service. Do not use water, soap, brake cleaner, engine degreaser, or other unapproved chemicals inside the connected reservoir.
Can I use brake cleaner inside the brake fluid reservoir?
No. Aerosol brake cleaner should not be introduced into the connected brake fluid reservoir because it may contaminate the hydraulic system or affect seals and other components. If internal deposits are present, follow the vehicle’s service procedure or have a qualified technician inspect and clean or replace the reservoir.
How do you remove sludge from a brake fluid reservoir?
Sludge should first be evaluated to identify whether it comes from aged fluid, component deterioration, corrosion, or incorrect-fluid contamination. A technician may need to remove or replace the reservoir and service the hydraulic system. Simply wiping sludge out or adding fresh fluid does not guarantee the rest of the system is clean.
Can you wash a brake fluid reservoir with soap and water?
Do not wash the inside of an installed reservoir with soap and water. Residual moisture and detergent can contaminate the brake fluid. A removed component may have a specific manufacturer-approved cleaning procedure, but it must not be reinstalled with incompatible residues or moisture. Replacement may be safer for heavily contaminated components.
Why is my brake fluid reservoir brown or yellow?
The reservoir may appear brown or yellow because the plastic has aged, the fluid has darkened, or deposits have accumulated inside. Exterior cleaning may improve visibility, but it cannot necessarily reverse permanent plastic discoloration. If the fluid contains particles, sludge, or unusual contamination, arrange an inspection.
Do I need to bleed the brakes after cleaning the reservoir?
Not when you only clean the outside with the cap closed. However, if the reservoir is removed, hydraulic connections are opened, or air enters the system, bleeding may be required according to the vehicle’s service procedure. Some ABS-equipped vehicles need specialized equipment. Do not drive if the brake pedal feels abnormal after service.