How to Measure Brake Pads: Thickness, Tools, and Wear Limits
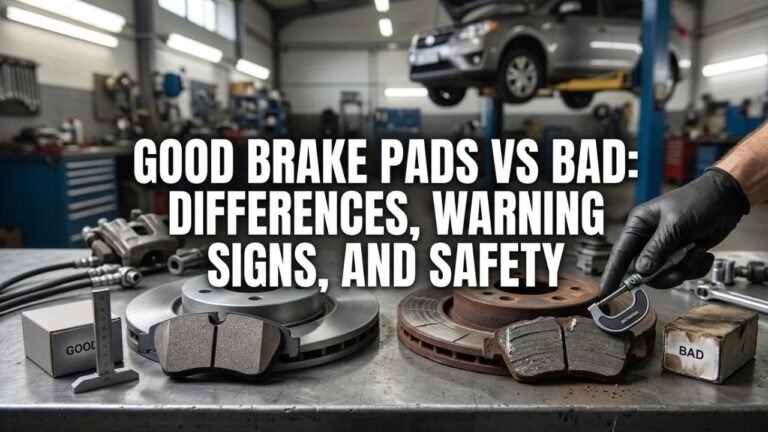
To measure brake-pad thickness, check only the friction material between the rotor and the metal backing plate. Use a brake-pad gauge, ruler, or caliper, measure both the inner and outer pads, and record the thinnest point. Compare that number with the minimum thickness specified for your exact vehicle.
A quick visual check can miss a worn inner pad or tapered wear. That matters because one pad may have several millimeters more material than the other when a caliper slide, piston, or pad hardware is not moving correctly.
An accurate measurement tells you how much friction material remains and gives you time to plan a brake job before the backing plate reaches the rotor. It can also reveal uneven wear that deserves diagnosis rather than another set of pads alone.
Brake inspections find real defects on vehicles in service. During the Commercial Vehicle Safety Alliance’s 2024 Brake Safety Week, U.S. inspectors checked 14,692 commercial motor vehicles and placed 1,900 out of service for brake-related violations. They also found lining or pad violations on 310 power units and 172 towed units. Those figures concern commercial vehicles rather than passenger cars, but they show why checking friction material matters.
For anyone searching how to measure brake pads, the detail that matters most is separating the friction material from the steel backing plate. Including the backing plate in your reading can make a badly worn pad appear much thicker than it really is.
From the service information I reviewed, another pattern stood out: there is no universal minimum thickness for every brake system. Toyota instructs technicians to measure pad lining thickness and compare it with the model-specific standard and minimum figures, which is a good rule for any vehicle.
The steps below cover wheel-on and wheel-off checks, brake-pad gauges, digital calipers, common thickness ranges, uneven wear, measurement mistakes, and the point at which a low reading should lead to replacement.
How to Measure Brake Pads Step by Step
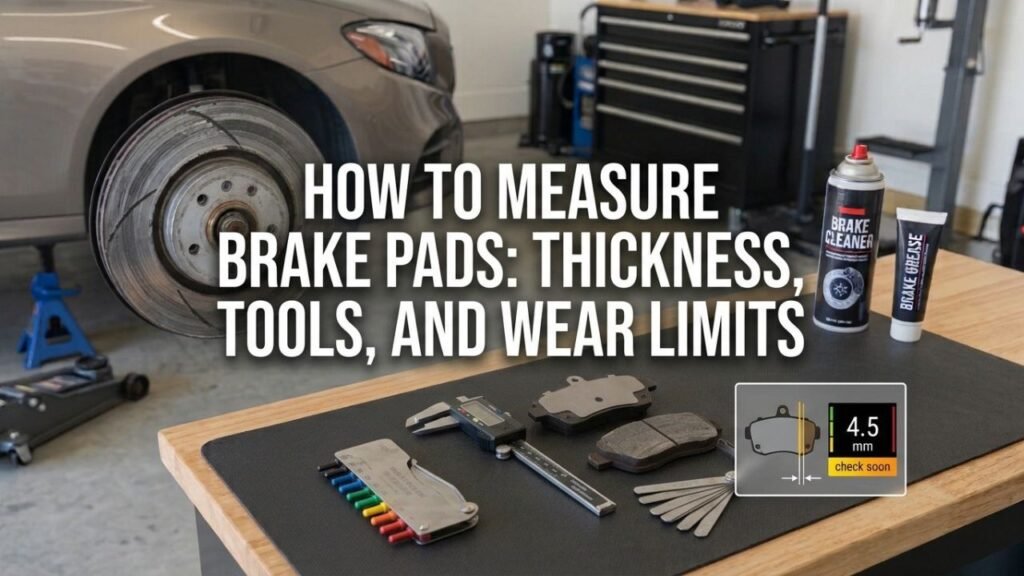
A wheel-off inspection gives you the clearest access to both pads and is the method I prefer when you need an actual thickness reading rather than a rough visual estimate.
1. Park the Vehicle and Let the Brakes Cool
Park on firm, level ground. Put the transmission in Park or in gear as appropriate, secure the vehicle against movement, and let the brakes cool before working around the rotor and caliper.
If the wheel needs to come off, loosen the lug nuts according to the vehicle procedure, lift at the specified jacking point, and support the vehicle with rated jack stands.
Never put your hands around a brake assembly while relying on a hydraulic jack alone.
2. Remove the Wheel for Better Access
Many wheels let you see part of the outer brake pad through the spokes. That view is useful for a quick check but does not always expose the inner pad well enough for a reliable measurement.
Removing the wheel exposes the caliper, rotor, and visible ends of both pads.
Use a flashlight if the caliper opening is dark.
3. Identify the Friction Material
A disc brake pad has two main sections:
- Friction material: the block that presses against the rotor
- Backing plate: the steel plate supporting the friction material
Measure the friction material only when checking remaining pad life.
Do not include the backing plate, shim, clip, or other hardware in the wear measurement.
This is one of the easiest places to make an error. A steel backing plate may be several millimeters thick, so including it can make a nearly worn-out pad look healthy.
4. Place the Gauge Against the Pad
A dedicated brake-pad gauge is the simplest tool when the pads remain installed.
Slide the proper gauge blade between the rotor face and the pad backing plate so the tool represents the thickness of the friction material.
Some brake gauges use individual blades marked by millimeter thickness. Others use a sliding probe or scale.
If you can access a removed pad directly, a digital or vernier caliper can measure the friction layer more precisely. Position the jaws on the friction material without including the backing plate.
5. Check More Than One Point
Do not take a single reading and stop.
Measure near the leading end, center, and trailing end when access permits. Pads can wear at an angle, so one end may be thinner than the other.
Use the lowest measurement as the figure that matters.
A pad measuring 6 mm at one end and 3 mm at the other should not be treated as a 6 mm pad.
6. Measure the Inner and Outer Pads
Check both pads on the caliper.
The outer pad is often easier to see, but the inner pad may wear faster if a piston, slide pin, or pad hardware problem exists.
Record the inner and outer readings separately.
Then repeat the process at the opposite wheel on the same axle. Brake pads are replaced in axle sets, so the lowest reading across that axle is especially useful when planning service.
Key Takeaway: Measure friction material only, check both inner and outer pads, take readings at several points, and base your decision on the thinnest measurement.
Brake Pad Thickness Chart: What the Numbers Mean
New brake-pad thickness varies by vehicle and pad design. Many passenger-car pads begin somewhere around 8–12 mm of friction material, but some start thinner or thicker.
The replacement point also varies, so the owner’s manual, service information, or brake-pad manufacturer’s specification should control the decision.
| Remaining Friction Material | General Condition | Suggested Action |
| 8 mm or more | Usually plenty of material | Continue normal inspections |
| 6–7 mm | Moderate wear | Record the measurement |
| 4–5 mm | Getting lower | Inspect more often and plan ahead |
| Around 3 mm | Near a common replacement range | Check the vehicle specification and plan service |
| Around 2 mm or less | Very little material remains | Replacement is commonly required; verify the service limit |
These ranges are general reference points, not universal service specifications.
Haynes notes that many pads begin near 12 mm and commonly reach the replacement range near 3 mm, while manufacturer limits can differ by application.
Some heavy-duty brake systems use a 2 mm friction-material limit. For example, Bendix service information for specific air-disc brakes calls for pad replacement below 2 mm of friction material. That number should not be copied to unrelated passenger vehicles.
Best Tools for Measuring Brake Pad Thickness
Several tools work, but they offer different levels of access and accuracy.
Brake Pad Thickness Gauge
A dedicated brake-pad gauge is the tool I would choose for routine inspection with the pads still installed.
Color-coded blade sets commonly have several thicknesses. You insert the largest blade that fits between the rotor and backing plate, then read the marked thickness.
This method is quick and reduces the chance of accidentally measuring the steel backing plate.
A specialty probe-style gauge may also reach pads through the wheel without removing it, depending on caliper and wheel design.
Digital or Vernier Caliper
A digital caliper works well when the pad has been removed.
Place one jaw against the friction surface and the other at the point where the friction material meets the backing plate.
Do not simply measure the entire pad assembly and assume the result is remaining friction thickness.
If you measure total pad thickness, you would also need an accurate backing-plate thickness to subtract from it.
Millimeter Ruler
A small ruler can give a useful approximate reading when access is clear.
Position it so you can see the distance from the rotor-side friction surface to the backing plate.
The method is less precise than a gauge because the caliper casting and viewing angle can make a 1–2 mm difference difficult to judge.
I would use a ruler for screening and a proper gauge when the pad looks close to its service limit.
Key Takeaway: A brake-pad gauge works best with pads installed, a caliper works well on removed pads, and a ruler is better for approximation than a final low-thickness decision.
How to Measure Brake Pads Without Removing the Wheel
You can sometimes check pad thickness through an open-spoke wheel.
Park the vehicle where there is good light and allow the brakes to cool. Turn the front steering wheel if that gives you a clearer view of the caliper.
Shine a flashlight through the wheel and find the brake rotor. The pad friction material sits immediately beside the rotor inside the caliper.
If you have a thin brake-pad gauge designed for wheel-on inspection, place it according to the tool instructions and read the remaining material.
Without a gauge, you may be able to estimate the outer pad thickness visually with a millimeter ruler.
The limitation is access. The outer pad may look fine while the inner pad is much thinner.
If the visible pad looks low, the wear appears uneven, or you cannot see the inner pad, remove the wheel for a full inspection.
How to Read Uneven Brake Pad Measurements
Brake pads on the same caliper should not show a large unexplained difference in wear.
A small variation can occur, but major differences can point to a mechanical problem.
Inner Pad Is Much Thinner
An inner pad that has worn much faster than the outer pad may be associated with a caliper piston that is not releasing normally, restricted pad movement, or another caliper fault.
Inspect the piston, pad fit, bracket condition, and hydraulic system rather than fitting new pads and ignoring the pattern.
Outer Pad Is Much Thinner
On a floating caliper, a heavily worn outer pad can point toward slide pins or caliper movement problems.
If the caliper cannot slide freely, clamping and release may become uneven.
Inspect slide pins for corrosion, damaged boots, dried lubricant, or binding.
One End of the Pad Is Thinner
A pad may also show tapered wear, where the leading edge and trailing edge have different thicknesses.
Possible causes include pad binding, worn caliper hardware, slide issues, or misalignment.
Measure both ends rather than averaging them. The thinnest portion is the more useful service figure.
Key Takeaway: Large inner-to-outer or end-to-end differences are diagnostic clues; replace the pads only after checking why the wear became uneven.
When Is Brake Pad Thickness Too Low?
There is no single millimeter number that applies to every passenger vehicle.
Around 3 mm is commonly treated as a replacement-planning point, but the actual minimum in the service manual takes priority. Some brake systems specify a lower service limit, while others call for replacement sooner.
Do not wait for the pad to reach zero friction material.
Once the friction layer is gone, the steel backing plate can contact the rotor. That can score the rotor deeply, generate substantial heat, create grinding noise, and increase repair cost.
Thickness is also not the only reason to replace a pad.
Replacement or further inspection may be needed when a pad has:
- Cracks in the friction material
- Material separating from the backing plate
- Heavy glazing
- Oil or brake-fluid contamination
- Severe taper
- Broken friction material
- Uneven wear caused by a brake fault
A pad with 5 mm remaining can still be unfit for service if the material is damaged or contaminated.
Common Brake Pad Measurement Mistakes
Small measurement errors matter most once the pads are close to their service limit.
Including the Metal Backing Plate
This is the biggest mistake.
The number you need is the friction material thickness, not the total thickness of the steel plate plus friction layer.
Look for the boundary line between the two materials before placing the tool.
Checking Only the Outer Pad
A wheel-on inspection usually makes the outer pad easiest to see.
Do not assume the hidden inner pad has the same thickness.
If you cannot inspect both sides and the outer pad already looks low, remove the wheel.
Looking at Only One Wheel
Pad wear can differ from left to right.
A dragging caliper on one side may reduce that pad much faster than its partner on the other wheel.
Check both wheels on the axle.
Measuring at Only One End
Tapered wear can hide a thin area.
Take more than one measurement along the pad when possible and record the smallest reading.
Treating a Wear Indicator as a Measuring Tool
A mechanical wear indicator is designed to make noise near a certain point in pad life. An electronic sensor may trigger a dashboard warning.
Neither gives you a precise millimeter reading.
A pad can also wear unevenly in a location the sensor does not monitor.
Assuming All New Pads Start at the Same Thickness
They do not.
Pad thickness varies with caliper design, vehicle weight, axle, friction material, and application.
If you are estimating percentage worn, compare with the original specification for that exact pad rather than assuming every new pad starts at 10 or 12 mm.
Key Takeaway: Exclude the backing plate, inspect every pad on the axle, measure several points, and use a real thickness reading instead of relying only on a wear sensor.
Should You Remove the Brake Pad to Measure It?
Usually, no.
A brake-pad gauge can measure remaining friction material while the pad is installed, and that is enough for many inspections.
Pad removal makes sense when access is poor, readings are inconsistent, wear looks tapered, or you need to inspect the entire friction surface for cracks, glazing, contamination, or separation.
Removing pads also gives you a chance to inspect the bracket and slide hardware.
If you take the caliper apart, follow the vehicle’s service procedure. Do not let the caliper hang by the brake hose, and use the specified fastener torque during reassembly.
Conclusion
The correct way to approach how to measure brake pads is to measure only the remaining friction material, not the steel backing plate. A brake-pad thickness gauge gives a quick reading, while a digital caliper works well if the pads are removed.
Check the inner and outer pads, measure more than one point, and compare both sides of the axle. Around 3 mm is a common point for planning replacement, but the exact vehicle service specification always takes priority over a general chart.
I would pay as much attention to the wear pattern as the number itself. A thin pad needs replacement, but a large difference between pads may also signal a sticking piston, seized slide, or pad-binding problem that should be corrected before the new set goes in.
FAQs About Measuring Brake Pad Thickness
Do you measure the brake pad with the backing plate?
No. When checking remaining pad life, measure the friction material only. The steel backing plate stays in place after the friction material is worn down and should not be counted as usable pad thickness.
Including it can add several millimeters to your reading and hide a badly worn pad.
How thick are new brake pads?
Many passenger-vehicle disc pads start with roughly 8–12 mm of friction material, with about 10–12 mm being common on many applications. Some pads start outside that range.
Use the specification for your exact vehicle or pad part number if you need the original thickness.
Is 5 mm of brake pad thickness still good?
Five millimeters usually means usable friction material remains on many passenger vehicles, but it is no longer close to new thickness.
Check the manufacturer’s minimum figure, monitor the wear rate, and inspect for uneven wear. A 5 mm pad may also need replacement if it is cracked, contaminated, or badly tapered.
Is 3 mm brake pad thickness too low?
Three millimeters is commonly near the replacement range for passenger-car brake pads. It is a sensible point to plan service rather than trying to extract every last millimeter.
The model-specific minimum specification still controls the decision because brake designs differ.
Can I measure brake pads through the wheel?
Yes, on some vehicles. Open wheel spokes may provide enough access to inspect or gauge the outer pad.
This method has a major limitation: the inner pad may be difficult or impossible to see. Remove the wheel if you cannot verify both pads or if the visible pad is already thin.
Why is my inner brake pad thinner than the outer pad?
A small difference may occur during normal service, but a large difference can point to a sticking caliper piston, restricted slide movement, rust in the bracket, or pad binding.
Measure both pads and inspect the caliper system before installing replacements.
What is the most accurate tool for measuring brake pads?
A dedicated brake-pad thickness gauge is very practical while the pads remain on the vehicle. A digital or vernier caliper can provide a precise reading when the pad is removed and the friction layer is directly accessible.
For low-thickness readings close to the service limit, either is better than relying on a visual estimate.
How often should brake pad thickness be checked?
There is no single interval that suits every vehicle. Inspect pads according to the maintenance schedule and more often if the vehicle sees frequent city traffic, towing, mountain driving, or known caliper problems.
Tire rotations and other wheel-off service are convenient times to record pad thickness and compare wear across the axle.