How to Stop Brake Fluid Leaking When Removing a Caliper Safely
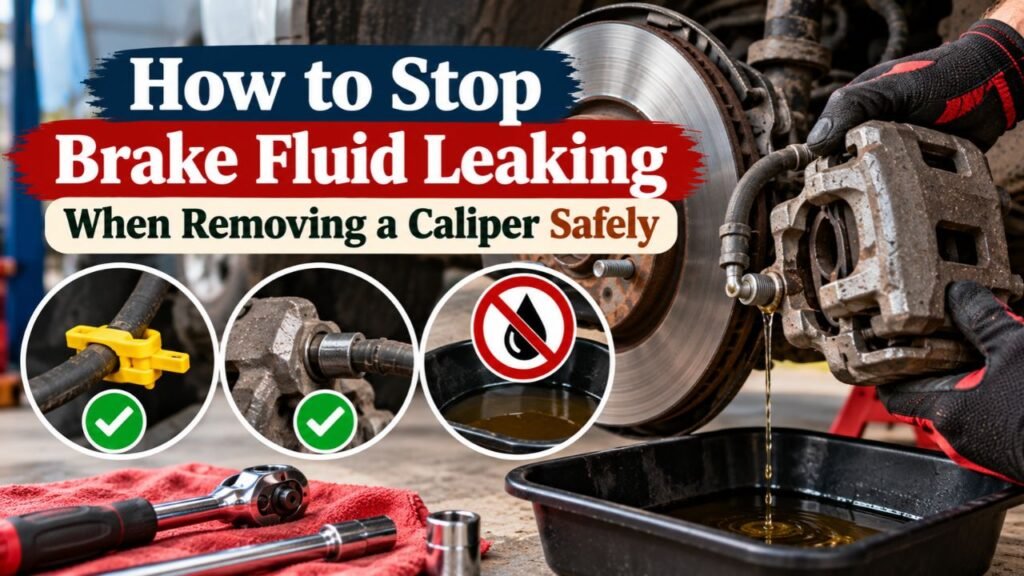
If you are removing a brake caliper only for pads or rotors, leave the brake hose connected and hang the caliper securely—no brake fluid should leak. If the caliper itself is being replaced, disconnect the hose and immediately cap or plug the open fitting with a brake-system-safe plug to limit fluid loss and air entry.
Brake fluid begins draining when the hydraulic connection between the hose and caliper is opened. The amount lost depends on the brake-system layout, reservoir height, and how quickly the open line is sealed.
For how to stop brake fluid leaking when removing caliper, the safest general method is not to disconnect the hose unless the repair actually requires it. A caliper can normally be moved away from the rotor while still connected to its flexible brake hose.
Caliper replacement is different. The hydraulic hose must usually be disconnected, commonly at a banjo-bolt fitting or threaded hose connection. Once opened, use a proper plug or cap and keep the master-cylinder reservoir from falling below its minimum level. OEM service procedures commonly call for capping open brake connections specifically to reduce fluid loss and contamination.
Avoid squeezing a brake hose with locking pliers, vise-grips, or other sharp clamps. Some vehicle procedures permit a purpose-built hose pincher in particular circumstances, while others specifically warn against pinching or kinking the flexible hose. Follow the vehicle’s service procedure before restricting a hose.
Once a hydraulic line has been opened, expect to bleed the repaired brake circuit before driving. The pedal must be firm, fluid level correct, and every connection completely dry under brake pressure.
If You Are Only Removing the Caliper for Pads or Rotors
You normally do not need to open the hydraulic system at all.
This is the easiest way to prevent brake-fluid loss.
Leave the Brake Hose Connected
For a normal brake-pad or rotor replacement:
- Remove the caliper mounting or guide-pin bolts.
- Lift the caliper from the bracket and rotor.
- Leave the flexible brake hose attached.
- Support the caliper with a hanger or strong mechanic’s wire.
With the hydraulic fitting untouched, brake fluid remains inside the system.
Never Let the Caliper Hang From the Hose
The flexible brake hose is designed to carry hydraulic pressure, not support the full weight of a suspended caliper.
Use a:
- Caliper hanger
- Suitable wire hook
- Purpose-made support hook
Hang the caliper from a strong suspension or chassis point without twisting the hose.
Current brake installation instructions also warn against letting a removed caliper hang from its brake hose because this can damage the hose.
Watch the Hose Position
Make sure the hose is not:
- Stretched
- Twisted
- Folded
- Kinked
- Trapped behind the caliper
The caliper should rest securely while still allowing the hose to sit in a natural position.
Key Takeaway: For pad and rotor work, the best way to prevent brake-fluid leakage is to leave the hydraulic hose connected and support the caliper with a hanger.
How to Stop Brake Fluid Leaking When Replacing a Caliper
Replacing the caliper requires opening the brake hydraulic circuit.
A small amount of fluid loss is normal, but you can keep it under control.
1. Get the New Caliper Ready First
Before opening the brake line, have the replacement caliper ready to install.
Check that you have:
- Correct left- or right-side caliper
- Correct mounting bracket if needed
- New copper crush washers if a banjo fitting uses them
- Correct brake fluid
- Brake-line plug or cap
- Bleeding hose
- Container for used fluid
- Correct wrenches
- Torque specifications
The less time the hose remains open, the less fluid usually escapes.
2. Protect Painted Surfaces
Brake fluid can damage automotive paint.
Place absorbent material around the working area and keep clean water available for accidental spills.
Do not let brake fluid sit on:
- Painted caliper surfaces not designed for exposure
- Body panels
- Wheels
- Suspension paint
Clean accidental spills promptly according to the vehicle and brake-fluid manufacturer’s instructions.
3. Check the Reservoir
Locate the brake-fluid reservoir before opening the line.
Note the current level.
During the repair, do not let it drain below the minimum level.
If the master cylinder empties, air can enter farther upstream in the system. On some ABS-equipped vehicles, that can make bleeding more involved and may require a scan-tool procedure.
4. Position a Drain Pan
Place a suitable container beneath the caliper connection.
A little fluid normally escapes when the banjo bolt or hose fitting is opened.
Brake fluid removed from the system should not be poured back into the reservoir.
Use fresh fluid from a sealed container for topping off and bleeding.
5. Disconnect the Brake Hose
The connection may use:
- Banjo bolt
- Threaded hose fitting
- Flare connection
- Vehicle-specific adapter
Use the proper wrench and support the hose so it does not twist.
With a banjo connection, note the location of the sealing washers before disassembly.
6. Cap or Plug the Open Hose Immediately
As soon as the hose separates from the old caliper, install a suitable brake-line cap or plug.
OEM brake repair procedures use rubber caps or suitable plugs specifically to reduce brake-fluid leakage while hydraulic lines are disconnected.
The plug should be:
- Clean
- Compatible with brake fluid
- Correctly sized
- Secure enough to remain in place
Do not insert dirty screws, wood plugs, shop towels, or improvised objects into the hydraulic opening.
7. Install the New Caliper Promptly
Remove the temporary cap only when you are ready to connect the replacement caliper.
Attach the brake hose using the vehicle’s specified fitting procedure.
If a banjo bolt uses copper or other sealing washers, install new washers when required.
Do not accidentally leave an old washer stuck to the hose fitting or caliper and then stack a new washer on top of it. Manufacturer installation guidance warns that stacked sealing washers can cause leaks.
8. Torque the Hose Connection Correctly
Use the vehicle manufacturer’s torque specification.
Too little torque can leak.
Too much torque can damage:
- Banjo bolt
- Caliper threads
- Hose fitting
- Sealing washers
Never guess at brake-hose fitting torque.
9. Bleed the Brake
Because the hydraulic circuit was opened, air must be removed.
Follow the vehicle’s specified bleeding procedure.
During bleeding, keep the reservoir above its minimum level.
A service bulletin covering brake-hose replacement specifically warns that allowing the reservoir to fall below MIN can introduce air into the master cylinder or ABS hydraulic unit and make the bleeding process more involved.
10. Check for Leaks
After bleeding:
- Fill the reservoir to the correct level.
- Install the cap.
- Pump the brake pedal until firm.
- Hold steady pedal pressure.
- Inspect the hose-to-caliper connection.
- Inspect the bleeder screw.
- Check nearby brake lines.
There should be no visible brake-fluid seepage.
Key Takeaway: When a caliper replacement requires opening the hose, cap the hose immediately, install the new caliper with the correct seals, bleed the circuit, and pressure-check every connection before driving.
Can You Clamp the Brake Hose to Stop Fluid?
Sometimes a service procedure permits a special brake-hose pinch tool, but this should not be treated as a universal technique.
Purpose-Built Hose Pinchers
Some brake-service procedures call for a suitable hose pincher before opening a bleeder or hydraulic connection. These tools are designed to spread force more evenly across the flexible hose.
Use one only when:
- The vehicle procedure permits it
- The hose is designed to tolerate it
- The tool is specifically intended for brake hoses
- The hose is in good condition
Do Not Use Vise-Grips
Avoid:
- Locking pliers
- Vise-grips
- Side cutters
- Sharp clamps
- Improvised metal clamps
These can damage the internal reinforcement or liner even if the outside rubber still looks normal.
Internal hose damage can later cause:
- Restricted fluid return
- Brake drag
- Pulling
- Overheated brake
- Hose failure
Some Procedures Specifically Say Not to Pinch
Vehicle manufacturers use different hose designs and service methods.
Some OEM instructions explicitly tell technicians not to pinch or kink the hose while it is disconnected.
For a general DIY repair, a clean brake-line cap or plug is usually the safer fluid-control method unless the service manual specifically approves hose clamping.
Key Takeaway: Do not automatically clamp a flexible brake hose. Use a dedicated hose pincher only when the vehicle procedure approves it, and never substitute locking pliers.
Can You Press the Brake Pedal to Stop Fluid From Draining?
Some manufacturer procedures use a brake-pedal holding tool to keep the pedal partially depressed while a hydraulic line is open.
On certain master-cylinder designs, this moves the piston past the compensation port and isolates the reservoir from the hydraulic circuit.
One OEM recall procedure, for example, specifies holding the pedal beyond the first inch of travel during hose replacement to prevent the master-cylinder reservoir from draining.
That does not make pedal holding a universal technique.
Brake systems differ, especially on vehicles with:
- ABS
- Brake-by-wire systems
- Electronic boosters
- Integrated brake control units
- Hybrid regenerative braking
- Special bleeding procedures
Use the brake-pedal isolation method only when the service information for the exact vehicle calls for it.
Do not have someone repeatedly pump the pedal while the caliper or line is disconnected.
Why Does Brake Fluid Keep Dripping From the Hose?
A slow drip after disconnection is usually caused by gravity and the open hydraulic path back toward the reservoir.
The Hose Is Still Open
Without a plug, fluid may continue dripping until the reservoir becomes very low or the hydraulic system reaches a state that slows the flow.
Do not wait for it to stop by itself.
Cap the fitting.
Reservoir Is Above the Caliper
The master-cylinder reservoir normally sits higher than the wheel brakes.
Gravity can continue feeding fluid toward an open lower connection.
The Cap Does Not Reliably Stop Flow
Leaving the reservoir cap installed may slow fluid movement in some circumstances, but brake reservoirs need venting as fluid level changes.
Do not use the reservoir cap as your primary leak-control method.
More Fluid Loss Means More Air Entry
Every amount of fluid leaving the line creates room for air to enter.
Limiting the open time makes bleeding easier and reduces the chance of air migrating farther upstream.
What Should You Use to Plug a Brake Hose?
Use a product intended for hydraulic brake service.
Suitable options can include:
- Brake-line stopper
- Brake-hose plug
- Correct rubber service cap
- Purpose-built hydraulic line cap
- Manufacturer-specified service plug
The plug needs to tolerate the brake fluid used in the vehicle.
Do not use random rubber materials because brake fluid can attack incompatible compounds.
Keep the plug completely clean before installation.
Hydraulic brake systems contain small passages and valves that do not tolerate dirt well.
What About a Banjo-Bolt Brake Hose?
Banjo fittings are common at brake calipers.
The hose end has a round fitting through which a hollow banjo bolt passes.
Remove the Bolt Carefully
Position a drain container under the connection.
Loosen and remove the bolt while controlling the hose end.
Account for Both Sealing Washers
Many designs use one sealing washer on each side of the banjo fitting.
A typical arrangement is:
Caliper → washer → hose banjo fitting → washer → banjo bolt head
The exact arrangement must match the service information.
Replace Required Washers
Crush washers deform during tightening to form a seal.
If the manufacturer calls for replacement, use new washers.
Do not reuse a washer simply because it looks flat and undamaged.
Check Hose Orientation
Before final tightening, make sure the hose follows its original routing.
It must not:
- Twist
- Rub the tire
- Contact the wheel
- Stretch at full steering lock
- Rub suspension components
After installation on a steering axle, turn the steering from lock to lock and verify safe hose movement if the service procedure calls for that check.
How Much Brake Fluid Is Normal to Lose?
There is no fixed amount.
With the replacement caliper ready and the hose capped immediately, fluid loss may be quite small.
Leaving the line open for several minutes can allow substantially more fluid to escape.
The goal is not necessarily zero drops.
The goals are to:
- Keep the reservoir from emptying
- Prevent unnecessary air entry
- Keep the system clean
- Protect painted surfaces
- Complete the repair promptly
If a large amount of fluid escapes or the reservoir becomes empty, stop and follow the full vehicle-specific bleeding procedure.
Do You Have to Bleed Brakes After Removing a Caliper?
If you disconnected the hydraulic brake hose, yes, plan to bleed the brake system.
If you only unbolted the caliper and left the hose connected, hydraulic bleeding is normally unnecessary.
Bleeding removes compressible air from the system.
Air in a brake line can create:
- Soft pedal
- Long pedal travel
- Reduced braking response
- Inconsistent pedal feel
Some ABS systems require a scan tool if air reaches the hydraulic control unit.
Use the bleeding sequence specified for your vehicle rather than assuming every car follows the same wheel order.
Keep the Reservoir From Running Dry
Monitor the reservoir throughout bleeding.
Never keep pumping fluid out without checking the level.
If the level falls too far:
- Stop bleeding.
- Add the specified fresh brake fluid.
- Determine if air entered the master cylinder.
- Follow the appropriate bleeding procedure.
Do not automatically use DOT 3, DOT 4, or DOT 5.1 based on what is available in the garage.
Use the specification printed on the reservoir cap or listed by the vehicle manufacturer.
Common Mistakes That Cause Excessive Fluid Loss
Disconnecting the Hose for a Pad Change
This is unnecessary on a normal pad or rotor replacement.
Leave the hydraulic connection intact.
Opening the Hose Before the New Caliper Is Ready
Prepare replacement parts, tools, plugs, and washers first.
Then disconnect the line.
Forgetting to Cap the Hose
An open line can continue dripping and drawing air into the system.
Install the cap immediately.
Using Vise-Grips on the Hose
This can damage the hose internally.
Use the approved service method instead.
Letting the Reservoir Empty
This can introduce air into the master cylinder and possibly the ABS hydraulic unit.
Monitor the fluid level.
Reusing Old Banjo Washers
A previously crushed washer may leak after reassembly.
Use new seals when the procedure requires them.
Pumping the Pedal With an Open Line
Repeated pedal operation can push much more fluid out of the open brake connection.
Do not operate the pedal unless the service procedure specifically instructs you to.
Forgetting to Bleed
Capping the hose reduces air entry but does not guarantee that no air entered.
Once the hydraulic circuit is opened, bleed it correctly.
Key Takeaway: Most excessive fluid loss comes from unnecessary hose disconnection, leaving the line uncapped, draining the reservoir, or using an incorrect hose-control method.
How to Check the Repair Before Driving
Do not reinstall the wheel and immediately drive away.
Check Fluid Level
Set the reservoir to the specified level using fresh approved brake fluid.
Install the reservoir cap securely.
Pump the Pedal
With the vehicle safely stationary, press the brake pedal repeatedly.
It should become firm.
A pedal that stays soft or sinks under steady pressure needs further diagnosis.
Inspect Every Opened Connection
Look closely around:
- Banjo bolt
- Hose fitting
- Bleeder screw
- Caliper body
- Nearby hard-line connections
The surfaces should remain dry.
Hold Brake Pressure
Apply firm pedal pressure and hold it.
Have the connection inspected for seepage if possible.
A fitting that remains dry at rest may reveal a leak under hydraulic pressure.
Perform a Low-Speed Test
Only after a firm pedal and leak-free inspection should the vehicle be moved.
Begin with low-speed brake applications in a safe area.
Stop immediately if you notice:
- Soft pedal
- Pulling
- Warning light
- Fluid leak
- Poor braking
- Abnormal brake noise
Conclusion
For how to stop brake fluid leaking when removing caliper, first decide if the hydraulic hose needs to come off at all. During pad or rotor replacement, leave the hose connected and hang the caliper securely.
When replacing the caliper itself, prepare the new component before disconnecting the hose. Once the line is opened, use a clean brake-fluid-compatible cap or plug immediately to minimize fluid loss and air entry.
Do not crush flexible brake hoses with vise-grips. Some vehicles permit specific hose-pinching tools, while others warn against pinching entirely, so follow the exact service procedure for your brake system.
After reconnecting the hose, install the proper sealing washers, torque the connection correctly, bleed the hydraulic system, maintain the reservoir level, and check carefully for leaks. Do not drive until the pedal is firm and every opened brake connection stays completely dry under pressure.
FAQs About Stopping Brake Fluid Leaks During Caliper Removal
How Do I Keep Brake Fluid From Draining When I Remove a Caliper?
If the hose does not need removal, leave it connected.
For caliper replacement, disconnect the hose and immediately install a clean brake-line plug or cap that is compatible with brake fluid.
Can I Clamp the Brake Hose Before Removing the Caliper?
Only if the vehicle service procedure permits it and you use the specified brake-hose pinching tool.
Do not use vise-grips or sharp clamps because they can damage the hose internally.
Can I Leave the Brake Hose Connected When Removing the Caliper?
Yes, and this is the normal approach during many brake-pad and rotor jobs.
Support the caliper with a hanger so its weight does not pull on the hose.
Will Brake Fluid Keep Coming Out if I Disconnect the Caliper?
It may continue dripping because the open hose is connected hydraulically to the rest of the brake system.
Cap or plug the connection promptly rather than allowing it to drain.
What Can I Use to Plug a Brake Line?
Use a clean brake-line stopper, hydraulic service plug, appropriate rubber service cap, or another product specified for brake systems.
Do not insert improvised objects that may contaminate or damage the line.
Do I Need to Bleed Brakes After Disconnecting the Caliper?
Yes.
Opening the hose can introduce air into the hydraulic circuit. Bleed the system using the procedure specified for your vehicle.
What Happens if the Brake Fluid Reservoir Goes Empty?
Air can enter the master cylinder and possibly travel into the ABS hydraulic unit.
That may require a more involved bleeding procedure and, on some vehicles, diagnostic equipment.
Should I Put the Brake Reservoir Cap On to Stop Fluid Loss?
Keep the reservoir protected from contamination, but do not rely on its cap to stop fluid from an open caliper hose.
Use a proper plug or the vehicle’s specified hydraulic-isolation procedure.
Do I Need New Copper Washers When Reinstalling a Caliper?
Many banjo-bolt connections require new crush washers whenever the fitting is opened.
Check the service procedure for your vehicle and never accidentally stack new washers over old ones.
Why Is My Caliper Hose Still Leaking After Installation?
Possible causes include incorrect sealing washers, an old washer left underneath a new one, damaged threads, wrong fitting torque, a cracked hose fitting, or poor hose alignment.
Do not drive until the leak has been identified and repaired.