How to Check Power Brake Booster: Steps, Tests, and Warning Signs
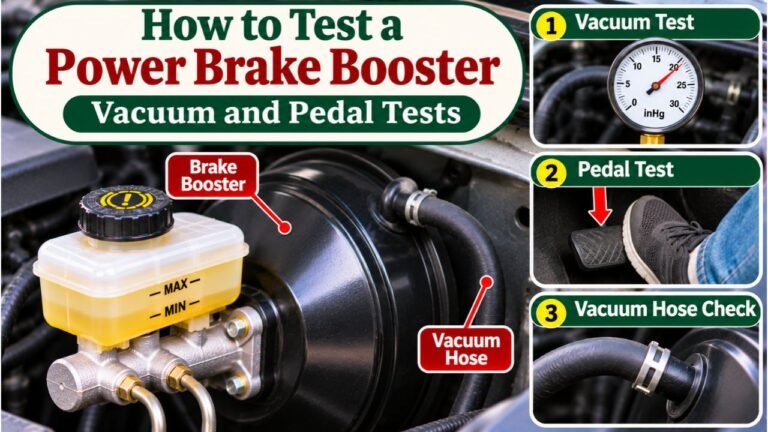
To check a power brake booster, turn off the engine, press the brake pedal several times until it becomes firm, then hold moderate pressure on the pedal while starting the engine. A properly functioning vacuum brake booster should make the pedal move slightly downward as vacuum assistance becomes available. If the pedal doesn’t move, the booster, vacuum hose, check valve, or vacuum source may have a problem.
A failing brake booster often causes a hard brake pedal, reduced power assistance, or a hissing sound when braking. However, these symptoms don’t automatically mean the booster itself needs replacement. A damaged vacuum hose or faulty one-way check valve can produce similar problems.
Most conventional vacuum boosters can be checked without removing the master cylinder or opening hydraulic brake lines. This guide explains how to perform the pedal test, inspect vacuum connections, measure vacuum supply, test the check valve, and determine whether the booster is working correctly. It also covers the differences between vacuum, hydraulic, and electric brake-assist systems.
How Does a Power Brake Booster Work?
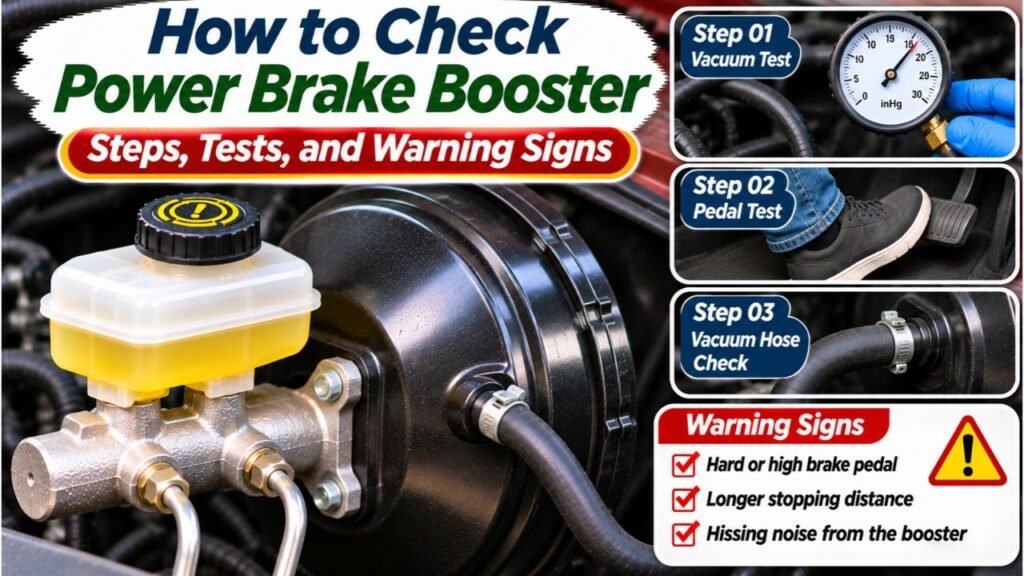
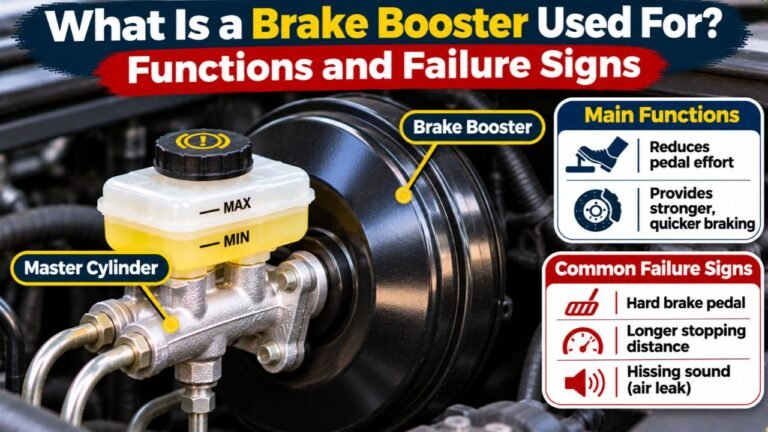
A power brake booster increases the force applied to the brake master cylinder, reducing the physical effort required to stop a vehicle.
Most traditional gasoline-powered vehicles use a vacuum brake booster mounted between the brake pedal linkage and master cylinder. The unit contains a flexible diaphragm, control valves, and a pushrod.
With the engine running, vacuum is supplied through a hose connected to the engine’s intake manifold or a dedicated vacuum pump. When the driver presses the brake pedal, the booster creates a pressure difference across its diaphragm. This pressure difference helps move the pushrod and apply the master cylinder.
When vacuum assistance disappears, the hydraulic brakes may still function, but considerably more pedal force is required.
Not every power brake system operates this way. Some trucks use hydraulic assistance supplied by the power steering system, while certain hybrid and electric vehicles use electrically powered brake assistance. The following procedure primarily applies to conventional vacuum-operated boosters.
Tools Needed to Check a Power Brake Booster
Basic brake booster testing requires very little equipment. More detailed inspections benefit from specialized diagnostic tools.
- Flashlight for inspecting hoses and connections
- Vacuum gauge for checking vacuum supply
- Hand-operated vacuum pump for advanced testing
- Compatible vacuum hose adapters
- Protective gloves and safety glasses
- Vehicle service manual for specifications
- Basic hand tools for accessing connections
The initial brake pedal test requires no specialized tools.
Safety Note: Perform these inspections while the vehicle is stationary. If braking performance is already questionable, do not drive the vehicle to test it. Arrange professional diagnosis or appropriate transportation instead.
How to Check Power Brake Booster Step by Step
Follow these steps in order to identify whether the vacuum booster receives sufficient vacuum, provides braking assistance, and retains its stored vacuum.
Step 01: Park the Vehicle and Identify the Brake Booster Type
Park the vehicle on a level surface away from moving traffic. Shift an automatic transmission into Park or a manual transmission into Neutral, apply the parking brake, and secure the vehicle against movement.
Open the hood and locate the brake master cylinder. On most conventional vehicles, the power brake booster is a large, round metal housing mounted against the firewall, directly behind the master cylinder.
Look for a relatively large vacuum hose connected to the booster through a plastic fitting or check valve.
If the booster has hydraulic pressure and return hoses instead of a vacuum supply hose, the vehicle may use a Hydro-Boost system. Do not apply the vacuum-specific diagnostic steps to that system.
Some newer vehicles have electric vacuum pumps or electronically controlled brake assistance. Consult the service manual before attempting a conventional engine-start test on those designs.
Step 02: Inspect the Booster, Vacuum Hose, and Connections
With the engine turned off, inspect the booster housing and its vacuum supply components.
Start at the vacuum hose connected to the brake booster. Trace the hose toward the intake manifold or vacuum pump.
Look for the following problems:
- Cracks or splits in the rubber vacuum hose
- Loose hose clamps or fittings
- Collapsed or flattened hose sections
- Disconnected vacuum lines
- Damaged plastic check valves
- Deteriorated rubber grommets
- Rust, physical damage, or unusual fluid around the booster
Gently inspect accessible hoses without pulling on brittle fittings.
A loose connection may allow outside air to enter the vacuum system and reduce the booster’s ability to assist braking.
Also inspect the area where the master cylinder attaches to the booster. Brake fluid leaking from the rear of the master cylinder may enter the booster and damage its internal components.
Do not remove the master cylinder simply to inspect for leaks unless the vehicle-specific service procedure requires it.
Step 03: Check the Brake Pedal With the Engine Off
Sit in the driver’s seat and make sure the engine is completely off.
Press the brake pedal slowly several times using normal foot pressure.
During the first few applications, the pedal may move relatively easily because the booster still contains stored vacuum.
As you continue pressing, the available vacuum assistance decreases.
Eventually, the pedal should become noticeably firmer and travel less under similar pressure.
This behavior is normal for a vacuum-assisted brake system. It shows that the stored assistance is being depleted.
If the pedal remains unusually soft or sinks toward the floor, the vehicle may have a hydraulic braking problem rather than a booster problem.
Important: A hard brake pedal after several applications with the engine off does not automatically indicate a failed booster.
Step 04: Perform the Engine-Start Brake Booster Test
After removing the stored vacuum, keep your foot on the brake pedal and apply steady, moderate pressure.
Without releasing the pedal, start the engine normally.
Watch and feel for movement beneath your foot.
If vacuum assistance is working, the brake pedal should move slightly downward shortly after the engine starts.
The movement occurs because the vacuum supply allows the booster to increase the force applied to the master cylinder.
The Mitsubishi brake booster operation check describes this engine-start test and identifies slight downward pedal movement as a normal result.
Expected result: The pedal moves slightly downward while the engine develops vacuum assistance.
Possible failure: The pedal stays unusually hard and does not move downward.
A failed result means the power-assist system needs further diagnosis. It does not establish that the booster itself is defective because insufficient vacuum supply can produce the same result.
Step 05: Test Whether the Booster Retains Vacuum After Shutdown
This test checks whether the booster and its connected vacuum system retain enough vacuum for reserve braking assistance.
Start the engine and allow it to run for a minute or two, or follow the vehicle’s specified preparation procedure.
Release the brake pedal and switch off the engine.
Wait for the period specified in the service manual, then press the pedal using normal force.
On a functioning vacuum-assisted system, the first application should generally feel easier than applications made after the stored vacuum has been depleted.
Press the pedal again.
The pedal should progressively become firmer as the remaining assistance is consumed.
If the first application is immediately very hard, the booster may not be retaining vacuum.
Possible causes include a leaking check valve, damaged vacuum hose, deteriorated grommet, or internal booster leakage.
The exact reserve capacity and retention time depend on the vehicle. Use its service specifications rather than assuming every booster must hold vacuum for the same period.
Step 06: Listen for Vacuum Leaks Around the Booster
With the vehicle safely secured, start the engine and let it idle.
Press and release the brake pedal several times while listening near the driver’s footwell and the booster area.
A brief air movement sound during pedal operation may be normal.
However, a persistent hissing sound, especially when the brake pedal is held down, can indicate a vacuum leak.
Pay attention to these symptoms:
- Continuous hissing near the brake pedal
- Air noise around the booster housing
- Rough engine idle when applying the brakes
- Changes in engine speed during pedal operation
- Reduced brake assistance after repeated applications
A ruptured diaphragm or defective internal control valve may allow unwanted airflow through the booster.
A leaking vacuum connection can produce similar noises.
Use a listening hose or suitable mechanic’s stethoscope to help locate the sound without placing your hands near moving engine parts.
Do not spray flammable chemicals around the booster or vacuum hoses to search for leaks.
Step 07: Measure Vacuum Supply With a Vacuum Gauge
If the booster fails the pedal test, checking the vacuum supply helps determine whether the problem is outside or inside the booster.
Turn off the engine before connecting diagnostic equipment.
Locate the vacuum supply hose and identify the manufacturer’s recommended vacuum test point.
Connect a suitable vacuum gauge using the correct adapter. Ensure the connection is secure and that unused ports are properly sealed.
Start the engine and measure vacuum at the specified operating condition.
CARDONE’s Diagnosing a Vacuum Brake Booster technical bulletin describes a typical vacuum supply of approximately 18–21 inches of mercury (in-Hg) for the applications discussed.
That range is useful background, but it is not a universal specification. Actual vacuum depends on the engine, altitude, operating conditions, and whether a dedicated vacuum pump is used.
Compare your reading with the vehicle manufacturer’s requirement.
If vacuum is below specification, investigate the supply system before replacing the booster.
Potential problems include vacuum leaks, restricted hoses, a malfunctioning vacuum pump, or engine conditions that reduce manifold vacuum.
Step 08: Check the Brake Booster One-Way Check Valve
The brake booster check valve helps retain vacuum when the engine is turned off or the vacuum supply temporarily decreases.
A damaged valve may allow stored vacuum to escape, leaving the brake pedal unusually hard after shutdown.
Turn off the engine and allow stored vacuum to dissipate before removing the check valve.
Locate the valve at the booster vacuum connection. On some vehicles, it is fitted directly into a rubber grommet. Others have it integrated into the hose or a sensor assembly.
If the manufacturer permits removal, carefully disconnect the valve without damaging the plastic housing or surrounding seals.
Use a hand-operated vacuum pump or approved valve tester to check its operation.
A conventional check valve should allow airflow in the direction needed to evacuate air from the booster toward the vacuum source while preventing reverse airflow that would destroy stored vacuum.
Check the actual valve markings and service instructions because valve designs and test connections vary.
If the valve leaks in the prohibited direction, is physically damaged, or fails the specified test, replacement may be necessary.
Never test vacuum components by sucking on a hose with your mouth.
Step 09: Inspect the Vacuum Hose for Restrictions and Internal Damage
A vacuum hose can appear normal externally while having internal damage that restricts airflow.
With the engine off, inspect accessible hose sections for softness, collapse, swelling, and deteriorated fittings.
If necessary, remove the hose using the manufacturer’s approved procedure.
Look for damage around sharp bends and locations where the hose passes close to hot engine components.
A restricted hose may provide enough vacuum for limited assistance but fail to replenish vacuum quickly during repeated braking.
If the hose is damaged, replace it with the correct brake-booster vacuum hose specified for the vehicle.
Do not substitute ordinary coolant hose or an unsuitable general-purpose rubber hose. The replacement must resist vacuum collapse, heat, and the operating conditions of the brake-assist system.
After installing the hose, reconnect all fittings securely and repeat the brake booster operation test.
Step 10: Check the Booster for Internal Vacuum Leakage
If vacuum supply and the check valve are working correctly but the booster still fails its operation test, investigate internal leakage.
A damaged diaphragm, internal air valve, or housing seal can prevent the booster from maintaining the pressure difference required for assistance.
Some service manuals specify a dedicated vacuum leak-down test using a gauge, adapter, and controlled vacuum source.
The procedure typically involves establishing the specified vacuum, isolating the booster as directed, and observing whether it maintains vacuum within the permitted loss limit.
Do not apply an arbitrary vacuum level or use compressed air to pressure-test the booster. Incorrect testing can damage internal components.
An isolated booster that cannot retain vacuum within its manufacturer’s limits may have an internal defect.
If the vehicle requires special adapters or the test cannot be performed safely, a professional brake-system inspection is appropriate.
Step 11: Compare Brake Pedal Behavior With the Engine Running and Off
After restoring all vacuum connections, compare the brake pedal under two operating conditions.
First, with the engine off and stored vacuum depleted, apply moderate pedal pressure. The pedal should feel firm because no power assistance is available.
Next, start the engine while maintaining pressure, using the approved operation test.
With a functioning vacuum booster, pedal effort should decrease as assistance becomes available.
The distinction is important:
- Hard pedal with engine off: Usually normal after stored vacuum is depleted.
- Pedal becomes easier with engine running: Indicates that power assistance is operating.
- Hard pedal under both conditions: May indicate missing or insufficient assistance.
- Spongy pedal under both conditions: Suggests a hydraulic problem requiring separate diagnosis.
- Pedal slowly sinks under steady pressure: May indicate a hydraulic leak or internal master-cylinder bypass.
Do not confuse an increase in assisted pedal travel with a pedal that continuously sinks toward the floor.
Step 12: Record the Results and Confirm All Connections Are Secure
Before finishing, inspect every vacuum hose and fitting disturbed during testing.
Confirm that the check valve is correctly installed, connections are secure, and no diagnostic adapter remains attached.
Check the brake-fluid reservoir level and inspect for visible hydraulic leaks.
If the vehicle has a brake warning light, ABS warning, or brake-assist warning message, diagnose the indicated fault according to the service manual.
Repeat the stationary pedal test to confirm consistent operation.
A booster that passes the basic test may still have an intermittent problem. If the original hard-pedal complaint continues, further diagnosis is necessary.
Do not operate the vehicle on public roads until the entire brake system is confirmed to function correctly.
How to Interpret Power Brake Booster Test Results
The combination of pedal behavior, vacuum measurements, and leak inspections helps narrow down the likely cause.
| Test Result | Possible Explanation |
| Pedal drops slightly when engine starts | Vacuum assistance is operating |
| Pedal remains hard after engine starts | Insufficient vacuum or booster malfunction |
| Initial pedal feels hard after shutdown | Stored vacuum may be leaking |
| Continuous hissing during pedal application | Possible booster or connection vacuum leak |
| Low vacuum reading at the supply hose | Vacuum source, hose, or restriction problem |
| Check valve fails one-way operation test | Defective check valve |
| Pedal is soft or spongy | Possible air or hydraulic brake fault |
| Pedal continuously sinks under pressure | Possible hydraulic leakage or master-cylinder fault |
A single abnormal result rarely identifies the exact failed part.
For example, replacing a booster because the brake pedal remains hard will not fix a collapsed vacuum hose supplying that booster.
The most reliable diagnosis checks the vacuum supply and external components before condemning the booster assembly.
Common Symptoms of a Bad Power Brake Booster
Hard Brake Pedal While Driving
A hard pedal is among the most recognizable symptoms of lost power brake assistance.
The driver may need substantially more foot pressure to slow the vehicle.
However, this symptom can also occur when the engine stops producing sufficient vacuum, the vacuum pump fails, or the check valve cannot maintain the required pressure difference.
Hissing Sound When Applying the Brakes
Persistent hissing near the brake pedal or booster housing may indicate an internal vacuum leak.
A brief sound during normal booster operation isn’t necessarily a defect.
A sustained hiss combined with a hard pedal or changing engine idle deserves immediate inspection.
Rough Engine Idle During Braking
Some vacuum booster failures create an unwanted air leak into the engine intake system.
On vehicles using manifold vacuum, this can affect engine idle when the brakes are applied.
Rough idle alone is not proof of a defective booster because engine intake leaks and other mechanical problems can cause similar symptoms.
Brake Pedal Changes After the Engine Is Shut Off
A healthy vacuum booster commonly retains some assistance after engine shutdown.
If the pedal becomes hard immediately, even after the booster has been supplied with adequate vacuum, the check valve or booster may be leaking.
This symptom is particularly useful when combined with a failed vacuum retention test.
How to Distinguish a Bad Brake Booster From a Bad Master Cylinder
The brake booster and master cylinder work together, but they perform different jobs.
The booster supplies additional mechanical force. The master cylinder converts that force into hydraulic pressure.
A defective booster commonly causes excessive pedal effort, while hydraulic problems are more likely to cause a soft, low, or sinking pedal.
A master cylinder with worn internal seals may allow pressure to bypass the piston. Under steady foot pressure, the pedal may continue moving downward.
Air inside the hydraulic system can also produce a soft or spongy pedal.
A booster failure generally does not introduce air into the brake-fluid lines because the vacuum chamber and hydraulic system are separate.
However, a leaking rear master-cylinder seal can allow brake fluid to enter the booster housing, potentially damaging its internal diaphragm or seals.
If brake fluid is found inside the booster, both the master cylinder and booster require inspection.
How to Check Hydraulic and Electric Power Brake Boosters
Not every power brake booster uses engine vacuum.
Hydraulic Power Brake Booster Testing
A Hydro-Boost brake system uses hydraulic pressure, commonly supplied by the power steering pump, to assist braking.
These systems appear on various trucks, vans, and other applications.
The NAPA guide to power brake boosters explains the distinction between vacuum-assisted boosters and hydraulic systems powered by the power steering pump.
For a hydraulic system, check the specified hydraulic-fluid level, visible leaks, pump operation, hoses, and assist-system warnings.
Some hydraulic boosters have an accumulator that stores pressure for limited reserve assistance.
Do not disconnect hydraulic pressure lines or attempt vacuum-hose testing on a Hydro-Boost unit. Pressurized fluid can cause injury, and the system may retain pressure after shutdown.
Follow the vehicle-specific depressurization and testing procedure.
Electric Brake Booster Testing
Electric brake-assist systems may use a dedicated motor, electronic controls, pressure sensors, and other components instead of a traditional engine-vacuum source.
Some vehicles use an electric vacuum pump with a conventional booster. Others use a more integrated electric brake-assist unit.
The proper diagnosis may require a compatible scan tool, electrical tests, stored fault-code inspection, and manufacturer-specified pressure checks.
Do not assume that the conventional engine-start pedal-drop test applies to every electric system.
Hybrid and electric vehicles can operate brake-assist equipment while the gasoline engine is stopped. Follow the manufacturer’s shutdown and diagnostic instructions before working near these components.
When Should a Power Brake Booster Be Replaced?
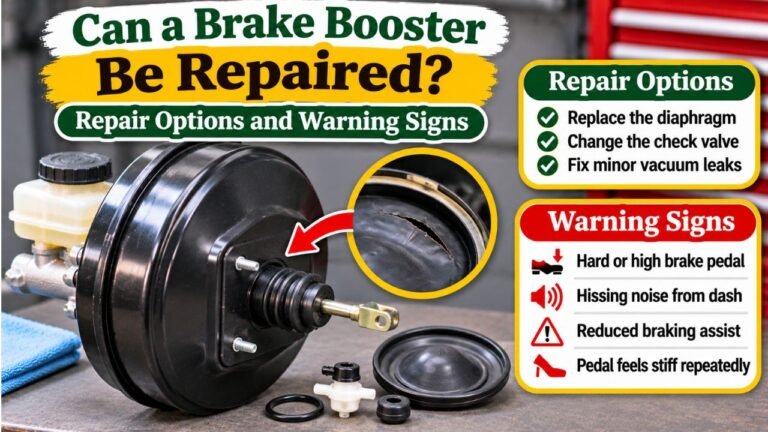
Replacement becomes appropriate when testing establishes that the booster itself is defective.
Examples include internal vacuum leakage, a damaged diaphragm, a malfunctioning internal control valve, or physical damage affecting safe operation.
However, replacement should not be based only on a hard brake pedal.
Check the vacuum supply, check valve, hoses, and related components before deciding.
A defective check valve or damaged vacuum hose may be replaceable independently if the manufacturer supplies those components separately.
If the booster requires replacement, use a compatible unit and follow the specified installation procedure, including correct pushrod adjustment and pedal linkage attachment.
Incorrect pushrod clearance or installation can cause brake drag, poor pedal travel, or incomplete brake release.
Brake booster diagnosis and replacement are safety-critical tasks. If the test results are unclear or braking is unreliable, have the vehicle inspected by a qualified technician.
FAQs About How to Check Power Brake Booster
Can You Check a Brake Booster Without Removing It?
Yes. Most conventional vacuum boosters can be checked while installed using a pedal operation test, vacuum supply measurement, and reserve-vacuum test. Removal is generally unnecessary for initial diagnosis.
Should the Brake Pedal Move Down When Starting the Engine?
Yes, on a conventional vacuum-assisted system, the pedal should generally move slightly downward when the engine starts while you maintain steady pressure. No movement suggests the power-assist system needs further testing.
Can a Bad Brake Booster Cause a Soft Brake Pedal?
A failing vacuum booster more commonly causes a hard pedal. A soft or spongy pedal generally points toward air, hydraulic leakage, or another brake-system problem. Multiple faults can exist together.
Can You Drive With a Bad Power Brake Booster?
Driving with a failed booster is unsafe because stopping may require much greater pedal force. Even if the hydraulic brakes still operate, braking performance may be unpredictable. Have the problem repaired before driving.
How Do You Know if the Brake Booster Check Valve Is Bad?
A faulty check valve may cause the booster to lose its stored vacuum after engine shutdown. Testing with an approved hand vacuum pump can determine whether the valve permits airflow in the required direction while blocking reverse flow.
Does a Brake Booster Need Brake Fluid?
A conventional vacuum brake booster does not use brake fluid internally for its assistance function. Brake fluid belongs in the master cylinder and hydraulic circuits. Fluid inside a vacuum booster may indicate a leaking master-cylinder rear seal.
Confirming Power Brake Booster Condition Before Replacing Parts
Understanding how to check power brake booster operation starts with a simple pedal test. A slight downward pedal movement when the engine starts is a useful sign of vacuum assistance, while a hard pedal with no change indicates that further inspection is needed. Vacuum retention, hose condition, and check-valve operation provide additional evidence.
The most important distinction is between a booster that cannot function and one that is not receiving the vacuum it needs. Test the supply system before replacing expensive components, and investigate soft or sinking pedals as possible hydraulic problems rather than assuming the booster is responsible.
If the booster fails the required checks, the brake pedal remains abnormally hard, or any part of the braking system behaves unpredictably, keep the vehicle off public roads until a qualified technician confirms the cause and completes the necessary repair.