Car Brake Pad Inspection: Signs, Thickness, and Service Checks
A proper brake-pad check looks at more than remaining lining thickness. You should compare inner and outer pads, inspect both sides of the axle, look for cracks, glazing, contamination, and uneven wear, and check the rotor and caliper for problems that could cause the new pads to wear badly.
A quick glance through the wheel can reveal a very thin outer pad, but it can also miss the pad on the inside of the rotor. That hidden pad may wear faster if a caliper piston or slide pin is sticking, which is why a single visible pad should not be used to judge the whole axle.
A careful inspection gives you time to plan pad replacement before the backing plate starts grinding into the rotor. It can also reveal a dragging caliper, scored rotor, fluid leak, or damaged pad surface before another set of pads is installed over the same fault.
AAA’s U.S. automotive guidance says pads around 3 mm thick are at the point where replacement should be planned, while also stressing that inner and outer pads can wear differently. That 3 mm figure is a useful screening point, but the vehicle manufacturer’s service limit should control the final decision.
In my research, the strongest reason for a car brake pad inspection is not simply finding out how much material remains. The wear pattern often tells you why the pad is wearing. One pad that is much thinner than its mate can point toward a sticking caliper piston, slide problem, or restricted pad movement.
The steps below cover a wheel-on check, a more accurate wheel-off measurement, pad condition, uneven wear patterns, rotor and caliper checks, warning signs, and the situations where a professional brake inspection makes more sense.
Car Brake Pad Inspection: What to Check
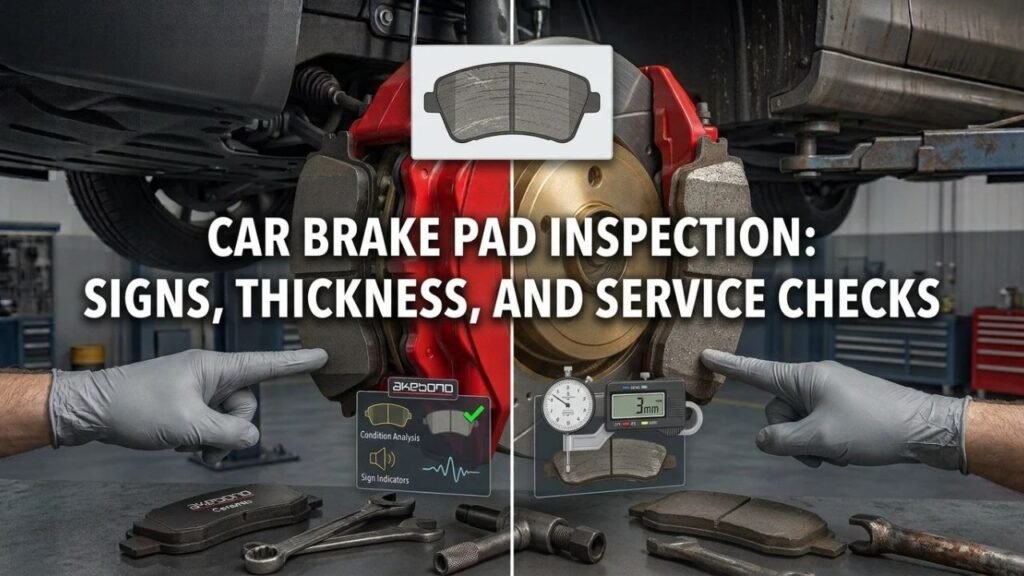
A proper check should answer three questions: how much friction material remains, is the pad wearing evenly, and is anything else in the brake assembly causing abnormal wear?
Pad Thickness
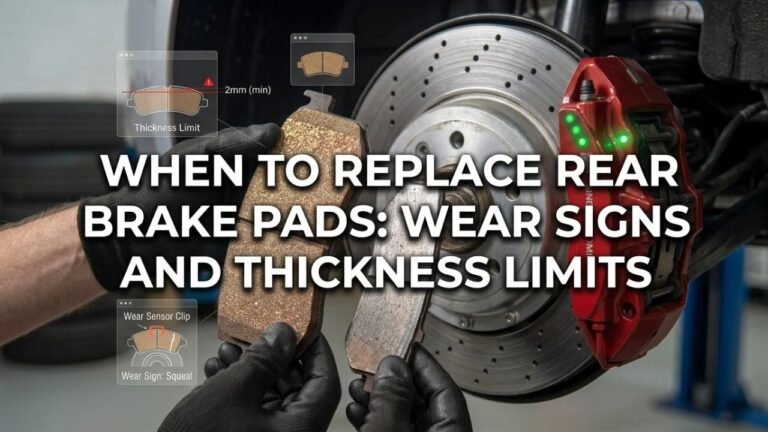
Measure the friction material only. Do not include the steel backing plate in the thickness reading.
A brake pad has a metal plate with friction material bonded or molded to it. The friction material is the section pressed against the rotor during braking. As it wears thinner, the caliper piston moves farther outward to maintain contact.
A flashlight and visual estimate may be enough to identify a pad that is clearly near the end of its life. A brake-pad gauge or suitable measuring tool gives a better reading when access allows.
Inner and Outer Pad Wear
Each disc-brake caliper normally has an inner and an outer pad. Both need attention.
The outer pad may be easy to see through an open wheel, while the inner pad is partly hidden behind the caliper. A floating caliper that does not slide freely may wear the pads at different rates. A piston that fails to release properly can also leave one pad dragging against the rotor.
Compare the two pads on the same wheel, then compare that wheel with the matching wheel on the other side of the axle.
Pad Surface Condition
Thickness alone does not make a pad serviceable.
Look for cracking, chunks missing from the friction material, heavy glazing, oil or brake-fluid contamination, separation from the backing plate, and abnormal taper. Ferodo’s brake troubleshooting guidance identifies contamination, heavy glazing, uneven wear, cracking, edge damage, and complete friction-material loss as conditions that may require pad replacement or further brake-system repair.
A shiny, glass-like friction surface may indicate glazing. A wet or greasy pad should raise concern for contamination from lubricant or brake fluid.
Key Takeaway: Measure the friction material, compare every pad on the axle, and inspect the surface for damage or contamination rather than judging pad condition from thickness alone.
How to Inspect Brake Pads at Home
A basic inspection can be done at home on many vehicles, but wheel design and caliper shape may limit what you can see. A wheel-off check gives a clearer view.
Before You Start
Park on a firm, level surface and let the brakes cool. Rotors and calipers can remain hot after driving.
If the wheel must come off, follow the vehicle’s approved lifting points and wheel-removal procedure. Use properly rated jack stands if the vehicle is raised. Never place any part of your body under a vehicle supported only by a jack.
Have a flashlight ready. A brake-pad thickness gauge is useful, though a precise wheel-off measurement may require more access than a quick driveway check provides.
Safety Tip: Do not blow brake dust around with compressed air. OSHA brake-service rules use dust-control methods because older and unknown friction materials may create hazardous airborne particles.
Quick Wheel-On Check
Start by looking through the wheel spokes toward the brake rotor and caliper.
Find the outer pad next to the rotor. The friction material sits between the rotor and the pad’s metal backing plate. If the lining looks very thin, schedule a closer inspection rather than trying to estimate remaining mileage from sight.
Look at the rotor face while you are there. Light polishing marks are normal, but deep grooves, heavy scoring, cracks, or strong blue heat marks call for closer evaluation.
A wheel-on check is mainly a screening method. AAA advises that removing the wheels gives a better view and makes it possible to compare inner and outer pad wear more closely.
Wheel-Off Inspection
If you have the equipment and experience to remove a wheel safely, a wheel-off inspection gives much better access.
Once the wheel is removed, locate both pads in the caliper. Inspect the outer pad and then find the inner pad near the caliper piston. Compare their remaining friction material.
Check the entire visible pad edge. A pad can wear at an angle, so one end may be thinner than the other.
Move to the matching wheel on the other side of the axle and repeat the check. Recording the measurements makes uneven wear easier to spot.
Measure the Friction Material
Place the measuring tool across the remaining friction material, not across the full pad assembly.
Measure at the thinnest accessible point if the pad shows tapered wear. A pad that reads 5 mm at one end and 3 mm at the other should not be recorded simply as a 5 mm pad.
If the caliper design prevents a reliable reading, do not force a tool between moving brake parts. A shop can remove the pads and measure them directly.
Key Takeaway: A wheel-on check is useful for screening, but a wheel-off inspection gives a better view of inner pads, taper, surface damage, and side-to-side differences.
Brake Pad Thickness: What the Measurements Mean
There is no single replacement thickness that applies to every passenger vehicle and every pad design. The owner’s manual, factory service information, or brake manufacturer’s specification should be used when available.
As a general inspection reference, many technicians begin planning replacement once friction material reaches roughly 3 to 4 mm. AAA guidance places pads around 3 mm at replacement time.
Brembo’s current passenger-car fitting instructions give another example of why the exact product specification matters: those instructions call for replacement when remaining friction material is below 2 mm or when the wear indicator activates. That is a product instruction, not a universal limit for every car.
A practical way to read pad thickness is:
| Remaining friction material | General inspection meaning |
| 8 mm or more | Substantial material remains on many passenger-car pads |
| 5–7 mm | Normal used condition; continue routine checks |
| 3–4 mm | Plan replacement and compare with factory specification |
| Around 2–3 mm | Near or at replacement range for many applications |
| Backing plate exposed | Pad is worn through; rotor damage is likely |
These ranges are screening guidance, not factory specifications. Some pads start thicker or thinner, and some vehicles use wear sensors that activate before the friction material reaches the lowest possible physical thickness.
Do not try to estimate a fixed number of miles from one thickness measurement. Two cars with 4 mm remaining may use that material at very different rates because of traffic, terrain, towing, driver habits, caliper condition, and regenerative braking on hybrids or EVs.
Uneven Brake Pad Wear Patterns and What They Mean
Even pad wear is as meaningful as total thickness. A large difference between pads usually deserves diagnosis before replacement.
Inner Pad Worn More Than the Outer Pad
On many floating-caliper systems, the inner pad sits against the piston.
If the inner pad is far thinner than the outer pad, the piston may not be releasing fully, or the caliper may not be sliding correctly. Corrosion, damaged boots, or restricted movement can contribute.
Do not install a new pad set without checking why the inner pad wore faster. The same fault can quickly damage the replacement pads and rotor.
Outer Pad Worn More Than the Inner Pad
An outer pad that is much thinner may point toward a caliper that is not sliding back freely or pad hardware that is binding.
The caliper body must move across its guide system so clamping force is shared across the rotor. Restricted movement can leave one pad doing more work.
Check slide pins, boots, pad contact points, corrosion, and hardware according to the vehicle service procedure.
Tapered Pad Wear
Tapered wear means one edge of a pad is thicker than the other.
Ferodo lists sticking caliper slides, caliper distortion, and excessive clearance among causes associated with tapered wear. Some vehicles use pads with intentional taper, so compare the shape with the correct service information before calling it a fault.
Severe taper paired with noise, pulling, or rapid wear deserves a full caliper and rotor check.
One Side of the Car Wears Faster
Compare left and right sides of the same axle.
A large side-to-side difference may come from a sticking piston, seized guide pins, pad binding, rotor problems, or a hydraulic issue. Ferodo links excessive wear within an axle set with sticking caliper guide pins or pistons.
A temperature difference after normal driving can also suggest a dragging brake, though touching a hot rotor or caliper is unsafe. A technician can compare brake temperatures with the proper equipment.
Key Takeaway: Uneven wear is a diagnostic clue. Find the cause of inner-to-outer, tapered, or side-to-side wear before installing another pad set.
What Else to Inspect With the Brake Pads
Pads do not operate alone. A good inspection looks at the parts that apply, release, and support the pads.
Brake Rotors
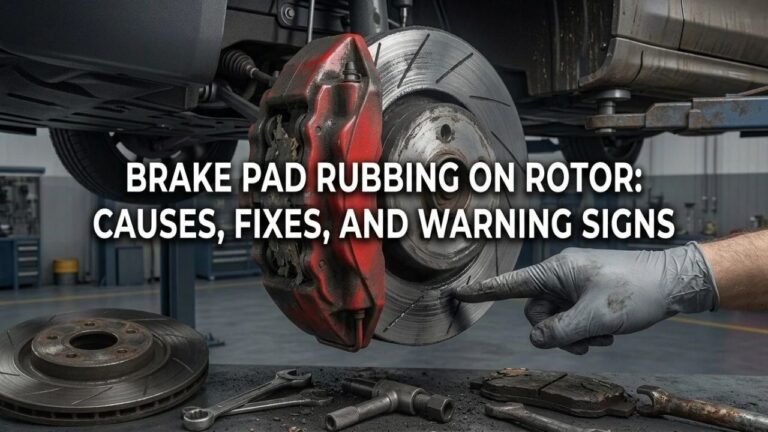
Check the rotor surfaces for deep grooves, heavy rust, heat spots, cracks, and a pronounced wear lip.
Rotor thickness needs to stay above the manufacturer’s minimum specification. That number is often marked on the rotor or listed in service information, but the correct measuring location and tool matter.
If a pad has worn down to the backing plate, inspect the rotor carefully for scoring and thickness loss before fitting new pads.
Caliper Slides and Piston
A floating caliper needs free slide movement. The piston must apply pressure and release correctly.
Sticking slides can create uneven inner-to-outer wear. A dragging piston can keep a pad against the rotor and create heat, rapid wear, and pulling.
Inspect rubber boots for tears and corrosion around exposed components. Do not force a piston or electronic parking-brake mechanism without the service procedure for that vehicle.
Brake Hoses and Fluid Leaks
Look around the caliper, hose connection, and bleeder for wetness.
Brake fluid on a pad contaminates the friction material. Ferodo’s troubleshooting information says contaminated pads may reduce braking performance and pull the vehicle to one side; the source of the contamination should be repaired and the affected pad set replaced.
A cracked, swollen, or leaking brake hose needs service. A low reservoir may have several causes, including pad wear or a leak, so do not assume topping it off solves the problem.
Pad Hardware
Inspect abutment clips, springs, shims, and pad contact areas.
Heavy corrosion under clips can tighten the pad’s fit in the bracket. A pad that cannot move freely may drag or wear unevenly.
Use only the lubricant type and locations called for by the brake or vehicle manufacturer. Friction surfaces must stay free of grease and oil.
Key Takeaway: Check rotors, calipers, hoses, fluid leakage, and pad hardware during the same inspection. Abnormal pad wear often starts with another component.
Warning Signs That Need a Brake Pad Inspection Now
Do not wait for routine service if the brakes begin behaving differently.
Arrange a brake inspection if you notice:
- Persistent high-pitched squealing during braking
- Grinding or metal scraping
- A brake-pad wear message or warning light
- The vehicle pulling during braking
- Brake pedal pulsation or strong steering-wheel shake
- One wheel producing unusual heat or a burning smell
- A soft, sinking, or suddenly changed brake pedal
- Longer stopping distance
- Visible pad material that appears extremely thin
- Deep grooves or fresh damage on the rotor
A wear-indicator squeal can mean a pad has reached its warning point. Grinding may mean friction material is already gone and the backing plate is contacting the rotor.
A soft or sinking pedal is not a normal pad-wear symptom to ignore. It may point toward a hydraulic fault, air in the system, fluid leakage, or another brake problem that needs prompt diagnosis.
If braking force drops sharply, the pedal falls toward the floor, or a major fluid leak is visible, do not treat the issue as a routine pad check.
How Often Should Brake Pads Be Inspected?
There is no universal mileage interval for every car.
A practical time to check pad condition is during tire rotation, wheel service, or scheduled maintenance because access is already available. Check sooner if the car sees heavy city traffic, towing, mountain descents, frequent hard stops, or a known history of uneven brake wear.
Pads should also be inspected after a new brake noise, warning message, pulling condition, or change in pedal response.
Do not assume low annual mileage means the brakes need no attention. Corrosion, sticking hardware, moisture, and long parking periods can create problems even when pad thickness remains high.
Hybrids and EVs may use friction brakes less often because regenerative braking handles part of the deceleration. That may slow pad wear while allowing rotor corrosion or pad binding to become more noticeable in some operating conditions.
DIY Brake Pad Inspection vs. Professional Inspection
A visual home check is useful when you understand what you are looking at and can work safely. A shop inspection adds access, measurement tools, and the ability to diagnose the cause of unusual wear.
What a DIY Check Can Tell You
A careful owner can often identify:
- Obviously thin outer pads
- A wear-indicator warning
- Heavy rotor scoring
- Visible cracks or pad damage
- A major inner-to-outer difference when both pads are visible
- Brake-fluid leakage around the caliper
- Loose or damaged visible hardware
For a routine screening check, that may be enough to decide that service should be scheduled.
When a Professional Inspection Makes More Sense
Professional inspection is the safer choice when pad visibility is poor, the vehicle has an electronic parking brake that affects service procedures, the wear pattern is abnormal, or braking behavior has changed.
A technician can measure all pads, rotor thickness, rotor runout when needed, caliper movement, hose condition, and hydraulic operation. The shop can also compare findings with factory specifications for the exact vehicle.
I would choose a full inspection instead of a driveway estimate if one pad appears far thinner than the others. That pattern often matters more than the absolute millimeter reading.
Key Takeaway: DIY inspection works well for basic screening. Use a professional inspection for hidden pads, abnormal wear, hydraulic symptoms, electronic brake-service requirements, or measurements that need factory specifications.
Conclusion
A car brake pad inspection should measure remaining friction material, compare inner and outer pads, and look for uneven wear, cracks, glazing, contamination, or separation. A thin pad is only part of the story; the wear pattern may reveal a caliper or rotor problem that needs attention before new pads go on.
Around 3 mm is a common point for planning replacement, but the correct service limit comes from the vehicle or brake manufacturer. Inspect the rotor, caliper, slide hardware, hoses, and nearby components whenever pad wear looks unusual.
My recommendation is to record the thickness at each wheel rather than judging the entire car from the easiest pad to see. If grinding, pulling, fluid leakage, a sinking pedal, or major uneven wear appears, move from a quick visual check to a full brake-system inspection.
FAQs About Car Brake Pad Inspection
Can I Inspect Brake Pads Without Removing the Wheel?
Yes, many open-spoke wheels let you see the outer pad and rotor with a flashlight. This works as a quick screening check.
It may not give a clear view of the inner pad, and inner-to-outer wear can differ. Remove the wheel safely or have a shop inspect the brakes if the inner pad cannot be seen.
How Thick Should Brake Pads Be During an Inspection?
There is no single correct thickness for every vehicle. Many passenger-car pads start with several millimeters of friction material and are commonly planned for replacement around the 3 to 4 mm range.
Use the factory or pad manufacturer’s service limit for the final decision. Measure friction material only, not the backing plate.
Is 3 mm of Brake Pad Material Bad?
Three millimeters usually means the pad is near replacement time rather than automatically unsafe at that exact moment.
AAA automotive guidance treats roughly 3 mm as a replacement point. The factory specification and wear indicator for the vehicle should take priority, especially if the pads are wearing unevenly.
Do I Need to Inspect the Inner Brake Pad?
Yes. Checking only the outer pad can miss severe inner-pad wear.
A sticking piston or slide problem may make the inner pad wear faster. Compare inner and outer thickness on each wheel and then compare both sides of the axle.
What Does Uneven Brake Pad Wear Mean?
Uneven wear often points toward restricted caliper movement, a sticking piston, pad binding, damaged hardware, or rotor problems.
The direction of the wear matters. Inner-to-outer differences, taper, and left-to-right differences each give clues about where the problem may be.
Should I Replace Brake Pads If They Are Cracked or Contaminated?
Pads with major cracks, missing material, severe separation, or oil or brake-fluid contamination should be evaluated for replacement even if plenty of thickness remains.
The source of contamination or damage must also be corrected. Installing new pads without fixing the cause can ruin the replacement set.
How Do I Know If the Rotor Also Needs Attention?
Check for deep scoring, cracks, severe rust, heat damage, or thickness below the manufacturer’s minimum specification.
If the old pad has worn into its metal backing plate, rotor damage is much more likely. Rotor thickness and condition should be measured before deciding to reuse it.