How to Grease Brake Pads Without Removing Tire: The Safe Way
You generally cannot lubricate disc-brake pad contact points correctly with the wheel still installed. The parts that may need brake grease sit behind the wheel and inside the caliper assembly. Spraying lubricant through wheel spokes can put grease on the rotor or pad friction material, which can reduce braking force and create a serious repair problem.
The biggest issue is access. Brake lubricant belongs on selected metal contact or sliding points, not on the surfaces that produce stopping friction. Those points are usually hidden by the caliper, pad hardware, and wheel.
Doing the job correctly gives you a chance to inspect the pad ears, abutment clips, slide pins, rubber boots, pad thickness, and rotor condition before applying any product. It also lowers the chance of turning a squeak into contaminated pads or a slippery rotor.
U.S. crash data gives brake work a clear safety context. Federal Motor Carrier Safety Administration crash facts based on NHTSA FARS data recorded a brake-system vehicle-related factor for 58 passenger vehicles involved in fatal crashes in 2022. That figure does not mean grease mistakes caused those crashes, but it is a useful reminder that brake-system work deserves careful service practices.
For anyone searching how to grease brake pads without removing tire, my main finding is that the wording can be misleading. You do not need to remove the rubber tire from the rim. You normally do need to remove the complete wheel-and-tire assembly from the hub so the caliper and pad contact points are accessible.
What matters most is where the lubricant goes, what type the vehicle or brake manufacturer calls for, and how to keep every trace of grease away from the pad friction surface and rotor face. The steps below explain the safe approach, the shortcuts to avoid, and what to check if brake squeal is the reason you wanted to add grease.
How to Grease Brake Pads Without Removing Tire: What Works
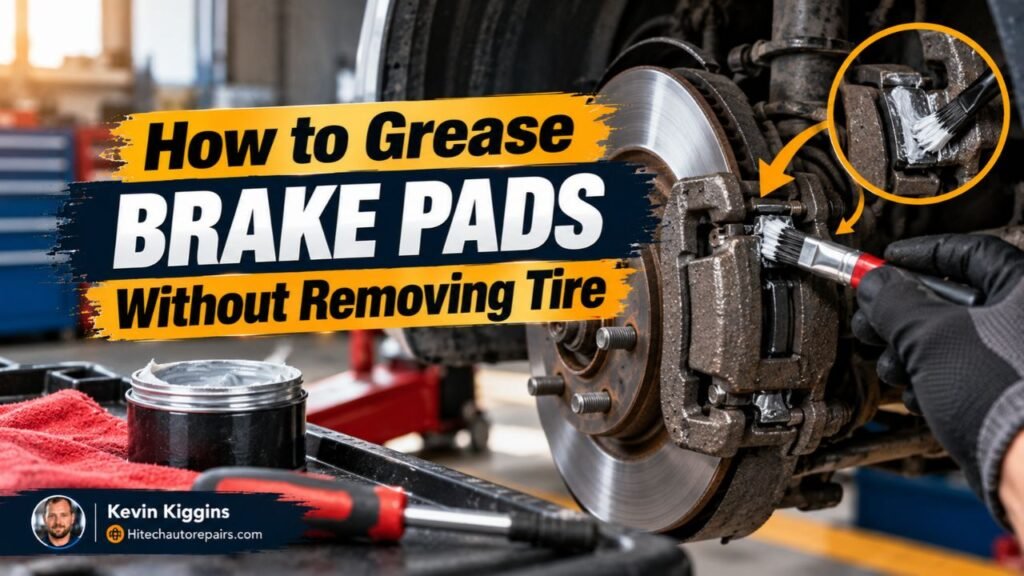
There is no proper wheel-on method for greasing the normal contact points on most disc-brake systems. The safe repair method is to remove the wheel, inspect the brake assembly, and lubricate only the locations approved for that brake design.
Why the Wheel Usually Has to Come Off
A typical disc-brake setup places the pads inside a caliper that straddles the rotor. The pad ears sit in bracket hardware, the inner pad contacts the caliper piston, and floating calipers may move on guide or slide pins.
These parts are blocked or partly blocked by the wheel. Even if you can see the caliper through large spokes, seeing a part is not the same as having controlled access to clean, inspect, and apply a thin film of lubricant.
Brembo’s current passenger-vehicle pad instructions call for cleaning pad resting areas and guides, checking moving parts, and applying supplied grease only at approved metal areas or the pad back as directed by the vehicle maker. That type of work requires direct access to the assembly.
Why Spraying Grease Through the Wheel Is Unsafe
Aerosol grease, penetrating oil, or a straw nozzle cannot reliably target hidden pad contact points. Overspray can land on the rotor face or soak into the pad friction material.
The rotor and pad face need dry friction to slow the vehicle. PowerStop specifically warns against lubricant on the friction side of the pad and says only a small amount is needed at approved sliding or contact areas.
Do not spray WD-40, general-purpose oil, silicone spray, chassis grease, or anti-seize into the caliper through the wheel. A product that quiets a squeak for a moment by coating a friction surface has not repaired the cause; it has contaminated the braking surface.
What You Can Check With the Wheel Still Installed
Open wheel designs may let you make a rough visual check of the outer pad, rotor surface, obvious fluid leakage, or heavy scoring. That inspection is limited. Inner pad wear can differ from outer pad wear, and seized slide hardware may not be visible from outside.
A wheel-on inspection is useful for deciding that the brake needs service. It is not a substitute for removing the wheel when lubrication or pad hardware work is required.
Key Takeaway: Do not try to inject or spray brake grease through the wheel. Remove the wheel-and-tire assembly so the actual contact points can be cleaned, inspected, and lubricated without contaminating the rotor or pad face.
Where Brake Grease Actually Belongs
Brake grease does not go on the friction material. It is used only at selected interfaces where metal parts slide, contact, or vibrate, and the exact locations can change with caliper and pad design.
Pad Ears and Abutment Areas
The metal tabs at the ends of many brake pads slide against abutment hardware in the caliper bracket. Corrosion or debris in this area can restrict pad movement and contribute to uneven wear, drag, or noise.
Wagner recommends cleaning caliper brackets and lubricating metal-to-metal contact points between brackets, guides, and pads with the specified brake lubricant for its service procedure. Akebono also calls for a thin layer at caliper and pad abutment contact points.
Use only a thin film where the service information calls for it. Thick grease collects dirt and raises the chance that excess product will migrate toward the rotor.
Caliper Slide or Guide Pins
Floating calipers use pins or guides so the caliper can move as braking force is applied and released. Some designs call for a rubber-compatible brake lubricant on these pins.
Do not assume every guide pin gets the same grease. Wagner separates metal-to-rubber lubrication from metal-to-metal lubrication and specifies silicone-type brake lubricant for guide-pin-to-boot contact in its procedure. A Hyundai brake-service bulletin also shows that some fixed-caliper procedures should not have pin grease added unless the shop manual or a service bulletin calls for it.
The vehicle service manual takes priority over a general rule.
Pad Backing Plate or Shim Contact Points
Some brake designs use a small amount of approved compound where the pad backing plate contacts the caliper piston or caliper fingers. Other pads use coated backs, bonded insulators, or multi-layer shims that need no added grease.
PowerStop states that grease is not required on the back of its shimmed pads, though a thin film may be used at the piston contact point if desired. Wagner says some of its pads with integrally molded insulators should receive no chemical compound on the insulator area.
This is a good example of why “grease the back of every brake pad” is too broad as a rule.
Places That Must Stay Dry
Never put brake grease on:
- The brake pad friction material
- The rotor friction faces
- Drum-shoe friction material
- The inside braking surface of a drum
- Any area the vehicle or brake maker marks as dry
- Rubber parts unless the product is approved for those materials
Brembo warns that friction surfaces must not become greasy and states that contaminated friction components may need replacement.
Key Takeaway: Brake grease belongs at approved sliding or contact points, not on the surfaces that stop the vehicle. Product type and grease location should match the vehicle, caliper, and pad instructions.
Proper Way to Lubricate Brake Pads and Caliper Hardware
If the goal is to service squeaky or sticking disc brakes, use a controlled wheel-off procedure. The exact fasteners, pin design, parking-brake setup, and torque specifications differ by vehicle, so keep the service manual for your model nearby.
Prepare the Vehicle Safely
Park on a firm, level surface. Secure the vehicle against movement, follow the owner’s or service manual for lifting points, and support it with properly rated jack stands before working near the brake assembly. Never rely on a hydraulic jack alone while your hands are near the wheel hub or caliper.
Some rear brakes use an electronic parking brake that needs a service mode before pad or caliper work. Do not force a rear piston back until you have checked the vehicle procedure.
Remove the Wheel-and-Tire Assembly
Loosen and remove the wheel fasteners using the procedure specified for the vehicle, then remove the entire wheel-and-tire assembly. The tire stays mounted on the wheel; no tire machine is involved.
With the wheel off, inspect the rotor, visible pad thickness, hoses, boots, and caliper for leakage, torn rubber, abnormal wear, or heat damage before taking more parts apart.
Open the Caliper as the Vehicle Procedure Requires
Many floating-caliper systems require removing one or both guide-pin bolts and lifting or removing the caliper. Fixed-caliper systems can use pins, springs, or other pad retainers.
Support a removed caliper with a hook or suitable support. Do not let it hang by the flexible brake hose. Brembo’s service instructions also warn against stretching, kinking, or twisting the hose.
Clean Before Adding New Lubricant
Remove old grease, brake dust, loose rust, and debris from the approved contact surfaces using methods and products suitable for the brake components. Inspect abutment clips, pad ears, slide pins, and rubber boots for damage.
Grease will not repair a seized, badly pitted, bent, swollen, or broken component. Replace damaged hardware or parts as specified for the vehicle.
Apply the Correct Brake Lubricant Sparingly
Use a product labeled for brake service and suitable for the materials it will touch. Apply only a thin coating at the points identified in the service information.
A common pattern on floating calipers is:
- Lubricate approved pad-ear or abutment contact points with the specified brake lubricant.
- Lubricate slide pins only if the vehicle procedure calls for it, using a product compatible with the boots and bushings.
- Add compound at piston-to-pad or caliper-to-pad backing contact points only if the pad or vehicle instructions call for it.
- Wipe off excess grease before reassembly.
Do not substitute ordinary bearing grease or petroleum grease near rubber brake components unless the product maker and vehicle procedure specifically approve it. PowerStop and Wagner both warn about lubricant compatibility with brake-system rubber and plastic parts.
Reassemble and Check the Brake Pedal
Reinstall pads, clips, pins, caliper fasteners, and the wheel in the correct positions. Tighten all fasteners to the vehicle manufacturer’s specified values and sequence. Do not guess at caliper-bolt or wheel-lug torque.
Before moving the vehicle, pump the brake pedal until it becomes firm so the pads are seated against the rotors. Check the brake-fluid level according to the vehicle procedure and confirm that nothing leaks or binds.
If the pedal stays soft, sinks abnormally, or brake operation does not feel normal, do not drive the vehicle. Recheck the work or have the brake system inspected by a qualified technician.
Key Takeaway: The proper method is wheel-off service: inspect, clean, use the specified brake lubricant only at approved points, reassemble to the correct specifications, and confirm a firm pedal before driving.
Why Brake Pads May Squeak Even After Greasing
Brake squeal does not automatically mean the pads need more grease. Noise can come from worn friction material, glazed pads, rotor condition, loose or corroded hardware, pad vibration, debris, incorrect installation, or a caliper that is not moving freely.
Worn Pads or Wear Indicators
Many pads use a mechanical wear indicator that contacts the rotor when the friction material becomes thin. Lubricating hardware will not fix that noise. The pad thickness and rotor condition need inspection.
A grinding sound is more serious than a light squeak. Grinding may mean the friction material is worn away or another component is contacting the rotor. Avoid driving farther than needed for safety and arrange inspection.
Rusted Abutments or Sticking Hardware
Rust under abutment clips can squeeze the pad ears and keep the pads from moving freely. Smearing grease onto visible surfaces without removing the hardware leaves the rust underneath untouched.
This is one reason I prefer cleaning first and lubricating second. Grease is not a rust-removal tool, and it cannot restore clearance where corrosion has built up under the pad hardware.
Seized Slide Pins
A floating caliper with a seized slide pin may cause uneven inner-to-outer pad wear, pulling, heat, drag, or recurring noise. A quick spray from outside cannot clean or inspect a pin inside its boot.
The pin needs to be removed according to the service procedure, checked for corrosion or damage, and serviced with the specified lubricant if lubrication is called for.
Key Takeaway: Brake noise has several possible mechanical causes. Lubricant is useful only when the noise or movement problem involves an approved contact point that actually needs lubrication.
What Brake Grease Should You Use?
The label “high-temperature grease” is not enough. Brake parts include steel, coatings, rubber boots, bushings, shims, and friction material, so compatibility matters.
Brake-Specific Lubricant for Metal Contact Points
Use the product specified by the vehicle, caliper, or pad maker. Some service procedures call for molybdenum-based material at metal-to-metal interfaces; others specify ceramic, silicone, or a supplied proprietary compound.
Do not mix products simply because each package says “brake grease.” If a pad kit includes a packet and placement diagram, follow those instructions.
Rubber-Compatible Lubricant for Guide Components
Guide pins that run through rubber boots or bushings need a product that will not swell, soften, or attack those materials. Silicone-based brake lubricant is common for this purpose, but the service information for the exact brake design should decide the product.
Some guide systems are designed differently and may have dry or specially treated parts. That is another reason not to apply grease blindly.
Use Less, Not More
A thin film is normally all that is required. Excess grease can squeeze out during assembly, collect grit, or migrate toward a braking surface.
My rule from the manufacturer guidance I reviewed is simple: if you cannot identify the exact contact point and confirm that it is supposed to be lubricated, leave it dry until you check the service information.
Key Takeaway: Use brake-specific lubricant that matches the exact contact point and material, and apply only a thin film where the manufacturer calls for it.
Can You Stop Brake Squeal Without Removing the Wheel?
Sometimes a harmless temporary squeak disappears after moisture or light surface rust is cleared by normal braking, but a recurring squeal should not be treated by spraying anything through the wheel.
You may be able to look through the wheel for a deeply scored rotor, very thin outer pad, loose visible shield, or obvious foreign object. That is only a preliminary check. Proper diagnosis often requires removing the wheel because the inner pad, caliper slides, clips, and hidden contact points need inspection.
If the noise started immediately after recent brake work, recheck the installation rather than adding grease from outside. Wrong hardware placement, a bent clip, contaminated friction material, uneven pad seating, or a loose fastener needs a direct inspection.
When a Brake Shop Is the Better Choice
Brake service is a poor place to experiment with a shortcut. Have the system inspected by a qualified technician if you find fluid leakage, a soft or sinking pedal, severe pulling, a burning smell, a wheel that becomes unusually hot, grinding, damaged hoses, seized hardware, or pads worn to their service limit.
Professional help also makes sense if you do not have safe lifting equipment, the required torque information, the correct electronic parking-brake procedure, or a clear service manual for the vehicle.
Grease should never be used to hide a fault that needs repair. A sticking caliper, damaged rotor, leaking hydraulic component, or badly worn pad needs diagnosis and repair before the vehicle returns to normal use.
Conclusion
The safe answer to how to grease brake pads without removing tire is that you normally cannot grease the correct brake-pad contact points with the wheel installed. You do not need to separate the tire from the rim, but the complete wheel-and-tire assembly generally needs to come off the vehicle.
Once the wheel is removed, clean and inspect the pad ears, abutment hardware, caliper guides, boots, and related parts. Apply only the brake lubricant specified for the exact contact point, and keep grease completely off the rotor face and pad friction material.
I would not use spray lubricant, WD-40, or a long nozzle through the wheel as a shortcut for brake squeal. If the real cause is rust, worn pads, a seized slide, damaged hardware, or rotor trouble, adding lubricant from outside will not correct it and may create a braking problem.
FAQs About Greasing Brake Pads Without Removing the Wheel
Can I spray brake grease through the wheel spokes?
No. Spraying grease through the spokes gives poor control over where the product lands. The spray may hit the rotor face or pad friction material instead of the hidden pad ears, abutments, or slide hardware. Remove the wheel for proper access and use a small, controlled amount only at approved contact points.
Can I use WD-40 to stop squeaky brakes?
No. Do not spray WD-40 or a general-purpose penetrating oil on a brake rotor, pad, or caliper in an attempt to stop squeal. Brake pads and rotors rely on dry friction. Oil contamination can reduce braking force and may require contaminated friction parts to be replaced.
Do I need to remove the tire to grease brake pads?
You do not need to dismount the rubber tire from the wheel. In normal disc-brake service, you remove the complete wheel-and-tire assembly from the hub. That exposes the caliper, pads, bracket, and hardware so they can be inspected and serviced safely.
Where do I put grease on brake pads?
Grease goes only on approved non-friction contact points. Common examples include pad ears where they contact abutment hardware, selected caliper guide points, and in some designs the metal back of the pad where it contacts the piston or caliper. Follow the vehicle and brake-pad instructions because some coated or shimmed pads require no grease on the back.
Should caliper slide pins always be greased?
No universal rule covers every caliper. Many floating-caliper pins use a rubber-compatible brake lubricant, but some brake designs have different instructions. Clean and inspect the pin, then follow the service manual or brake manufacturer’s procedure for the exact vehicle instead of assuming every pin needs grease.
What happens if brake grease gets on the rotor?
Grease on the rotor can contaminate the braking surface and reduce friction. Stop the service work and deal with the contamination before driving. Follow the brake or vehicle maker’s cleaning and replacement instructions. If pad friction material has absorbed lubricant, replacement may be required rather than simply wiping the surface.
Can brake grease fix a sticking caliper?
Grease can service a dry sliding point if that part is still in usable condition and the vehicle procedure calls for lubrication. It cannot repair a corroded piston, torn boot, badly pitted guide pin, collapsed hose, damaged bracket, or other failed component. A sticking caliper needs inspection to find the cause before more lubricant is added.
Why are my brakes still squeaking after I lubricated them?
The noise may come from worn pads, a wear indicator, glazed friction material, rotor condition, rust under pad clips, loose hardware, a seized slide, contamination, or an installation problem. Reinspect the brake assembly rather than adding more grease. Too much lubricant creates its own contamination risk and does not correct a mechanical fault.