How to Clean Motorcycle Brake Master Cylinder Safely at Home
To clean a motorcycle brake master cylinder, remove contaminated brake fluid, clean the reservoir with brake-system-compatible materials, inspect the hydraulic passages, and refill and bleed the system with fresh, manufacturer-specified brake fluid. Internal cleaning requires disassembly only when the master cylinder is designed to be serviced.
Over time, brake fluid can absorb moisture, collect contamination, and leave deposits inside the reservoir. These deposits may affect fluid movement, damage internal components, or contribute to poor brake performance. However, dirty fluid is not the only cause of a soft brake lever or inconsistent hydraulic pressure.
Cleaning the master cylinder correctly requires more care than wiping out the reservoir. Using an unsuitable solvent, scratching a small hydraulic passage, or introducing air into the brake lines can create serious braking problems.
This guide covers the tools and cleaning materials needed, a detailed step-by-step cleaning procedure, internal piston and seal inspection, brake bleeding, and common problems that may require replacement instead of cleaning. It also explains how to recognize contamination early and keep the motorcycle’s braking system in good condition.
Why Does a Motorcycle Brake Master Cylinder Need Cleaning?
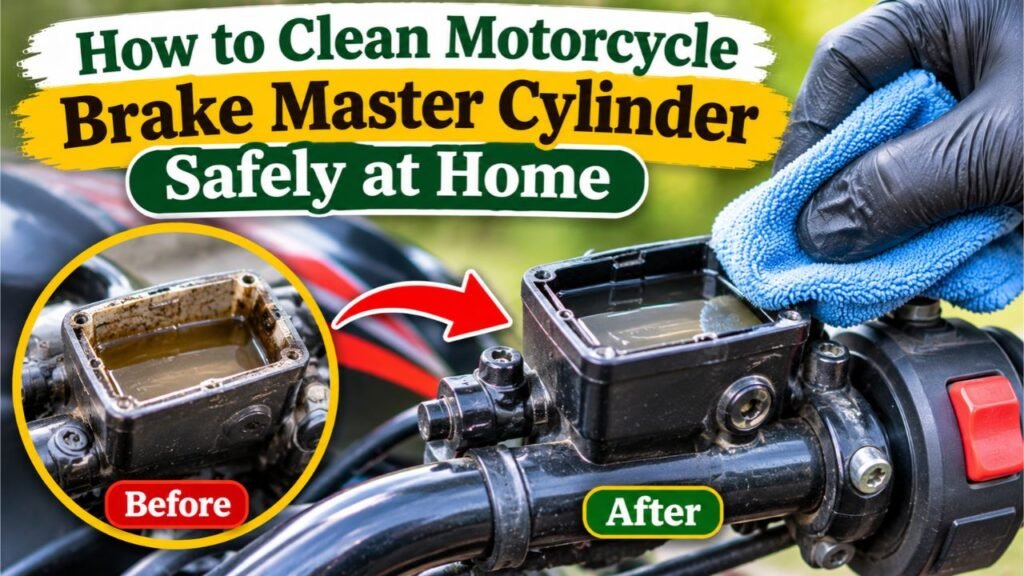
A motorcycle brake master cylinder converts force from the brake lever or pedal into hydraulic pressure. It contains a piston, seals, a spring, and small passages that connect the pressure chamber to the brake fluid reservoir.
When the rider applies the brake, the piston moves and pressurizes the fluid, transferring force through the brake lines to the caliper.
Contamination can interfere with this process in several ways.
- Old brake fluid: Moisture and contamination can contribute to corrosion and deposits.
- Reservoir sludge: Fine particles may collect around the bottom of the reservoir.
- Blocked compensation ports: Restricted passages can prevent proper pressure release.
- Corrosion: Moisture exposure may damage the metal bore, piston, or internal components.
- Damaged rubber seals: Deteriorated seals can allow internal pressure loss or external leakage.
A dirty master cylinder does not always need to be disassembled. Routine fluid replacement and careful reservoir cleaning are often sufficient when the cylinder operates normally.
However, internal corrosion, leaking seals, or a sticking piston require further diagnosis. Cleaning alone cannot restore damaged metal surfaces or worn hydraulic seals.
Tools and Materials Needed to Clean a Motorcycle Brake Master Cylinder
Prepare the necessary equipment before opening the hydraulic system.
| Tools and Materials | Purpose |
| Manufacturer-specified brake fluid | Cleaning approved components and refilling |
| Correct screwdrivers or hex keys | Removing the reservoir cover and mounting hardware |
| Clean, lint-free cloths | Removing accessible residue |
| Fluid-compatible syringe or suction tool | Extracting old reservoir fluid |
| Transparent bleeding hose | Directing old fluid into a container |
| Brake fluid collection container | Collecting used hydraulic fluid |
| Flare-nut wrench or correct socket | Removing applicable hydraulic fittings |
| Snap-ring pliers | Disassembling serviceable master cylinders |
| Approved replacement seals or rebuild kit | Replacing specified internal components |
| Protective gloves and safety glasses | Protecting skin and eyes |
For internal disassembly, use the exact service manual for the motorcycle and master cylinder.
Keep a separate supply of clean cloths and tools for brake work. Tools contaminated with petroleum grease or engine oil should not contact internal hydraulic components.
What Should You Use to Clean a Motorcycle Brake Master Cylinder?
The safest cleaning material depends on the component, brake fluid type, and manufacturer’s service instructions.
For normal reservoir cleaning, use fresh, specified brake fluid and clean, lint-free materials. Some manufacturers authorize particular alcohol-based cleaners for completely disassembled metal components, but those instructions are not universal.
Do not use gasoline, kerosene, engine oil, petroleum-based solvents, or ordinary household cleaners inside a conventional brake-fluid hydraulic system.
Aerosol brake cleaner should not automatically be treated as safe for internal pistons, seals, or assembled hydraulic passages. Some formulations can harm rubber or leave unwanted contamination. Use it internally only if the specific service instructions explicitly permit that product and application.
Brake fluid compatibility also matters. DOT 3, DOT 4, DOT 5, and DOT 5.1 are not interchangeable in every application. Silicone-based DOT 5 must not be substituted into a system designed for conventional glycol-based fluid.
For example, Honda’s official CBR600RR owner’s manual specifies Honda DOT 4 brake fluid or an equivalent and warns that brake fluid can damage painted and plastic surfaces.
Always verify the requirement for the actual motorcycle rather than assuming another model uses the same fluid.
How to Clean Motorcycle Brake Master Cylinder Step by Step
The procedure below distinguishes ordinary reservoir cleaning and fluid replacement from deeper internal cleaning.
Steps 01–07 cover routine reservoir cleaning and fluid flushing. Steps 08–10 are conditional and apply only when an internal repair is necessary and the manufacturer permits disassembly. Steps 11–12 cover final bleeding and testing.
If internal disassembly is already required, follow the applicable removal procedure instead of performing an unnecessary preliminary flush.
Step 01: Inspect the Master Cylinder and Identify the Problem
Before cleaning, inspect the motorcycle’s braking system to understand why servicing is necessary.
Check the brake lever or pedal for unusual resistance, excessive travel, inconsistent pressure, or a tendency to sink while steady force is applied.
Examine the master cylinder reservoir for dark fluid, visible particles, sediment, or unusual deposits.
Also inspect the area around the brake line connection, reservoir seals, and piston dust boot for signs of leakage.
Pay attention to the following conditions:
- Brake lever feels soft or spongy.
- Brake fluid appears contaminated.
- Piston movement feels rough or inconsistent.
- Fluid leaks around the master cylinder.
- Brakes remain partially applied after releasing the lever.
- Reservoir fluid level drops unexpectedly.
These symptoms do not automatically confirm a dirty master cylinder. Air in the lines, caliper problems, damaged hoses, and other hydraulic faults can produce similar results.
Do not ride a motorcycle with suspected brake pressure loss or a dragging brake. Diagnose the problem before returning it to service.
Step 02: Secure the Motorcycle and Protect Surrounding Components
Park the motorcycle on a firm, level surface and support it securely using an appropriate stand.
Turn off the engine and allow hot components to cool.
For a handlebar-mounted front master cylinder, position the handlebars so the reservoir is level. Some rear master cylinders have a separate reservoir mounted near the frame.
Cover the fuel tank, painted panels, instrument areas, and nearby plastic components with suitable protective materials.
Brake fluid can damage finishes quickly, so keep clean water available to rinse accidental spills from compatible exterior surfaces.
Wear gloves and safety glasses before opening the reservoir.
Arrange the tools on a clean work surface where removed screws, seals, and other components cannot become contaminated.
Step 03: Clean the Exterior of the Master Cylinder
Before removing the reservoir cover, carefully clean the outside of the master cylinder.
Use a clean cloth to remove accumulated dust, road grime, and loose debris around the reservoir cap and mounting area.
Pay particular attention to the cap edges, retaining screws, and the area surrounding the brake hose connection.
Dirt around these locations can fall into the hydraulic system when components are opened.
For exterior dirt, use a cleaning method approved for the surrounding finishes, keeping cleaning chemicals away from exposed hydraulic openings.
Dry the exterior thoroughly before proceeding.
Inspect the reservoir cap screws for damage or corrosion. Use the correct driver to prevent stripping their heads.
Step 04: Open the Reservoir and Inspect the Brake Fluid
Carefully loosen the reservoir cap screws or remove the cap according to the motorcycle’s design.
Lift the cap slowly and remove the rubber diaphragm or sealing membrane.
Avoid dripping old brake fluid onto painted surfaces.
Inspect the fluid and reservoir interior under good lighting.
Look for:
- Dark or cloudy fluid
- Sediment at the bottom
- Sticky residue on reservoir walls
- White or dark deposits around internal openings
- Damage to the rubber diaphragm
- Cracks or leaks around reservoir fittings
Brake fluid color alone cannot establish its condition. Some fluids darken during normal use, and contamination may be present even when the fluid looks relatively clear.
A swollen or damaged diaphragm should be replaced with the correct part.
Do not place the removed diaphragm on a dirty bench or allow it to contact incompatible solvents.
Step 05: Remove Old Brake Fluid From the Reservoir
Use a clean, brake-fluid-compatible syringe or suction tool to extract most of the old fluid from the reservoir.
Transfer it directly into a suitable collection container.
Avoid touching or damaging the small passages at the bottom of the reservoir.
Do not repeatedly operate the brake lever while the reservoir is nearly empty. This can introduce air into the hydraulic circuit.
For a routine fluid exchange, leave the hydraulic system connected and prepare to replenish the reservoir with fresh fluid before flushing the lines.
If the fluid contains unusual particles, rubber fragments, or signs of significant corrosion, stop and investigate the source rather than simply removing the visible contamination.
Never pour used brake fluid back into the reservoir.
Step 06: Clean the Reservoir Walls and Bottom
After extracting the old fluid, inspect the accessible surfaces inside the reservoir.
Use a clean, lint-free material lightly wetted with the specified fresh brake fluid to remove loose sediment and residue.
Clean the reservoir walls and accessible corners without forcing material into small openings.
Do not use a metal scraper, hard wire brush, or abrasive paper.
If contamination is firmly attached, determine whether the reservoir or cylinder can be removed and cleaned using its approved service procedure.
For a removable plastic reservoir, inspect the connection grommets and plastic fittings. Hardened grommets or cracked fittings may require replacement.
Important: Never leave fibers, cleaning chemicals, or loose debris inside the reservoir. Even small particles can interfere with hydraulic components.
Step 07: Inspect the Compensation Port and Flush the Brake Fluid
The master cylinder contains small fluid passages that allow pressure compensation and reservoir replenishment.
These openings are important because brake pressure must release correctly when the rider lets go of the lever.
Inspect the visible openings for debris without inserting needles, drill bits, or metal wire.
A restricted compensation port can contribute to brake drag or lockup as the system heats up. If an opening appears blocked, follow the manufacturer’s approved cleaning procedure or have the cylinder serviced professionally.
Next, refill the reservoir with fresh, specified brake fluid.
To perform a conventional manual fluid exchange, where the motorcycle’s service manual permits it:
- Attach a clear hose to the appropriate caliper bleed screw and place its free end in a collection container.
- Operate the brake lever or pedal as instructed for the vehicle.
- Open the bleeder while pressure is applied, then close it before releasing the control.
- Refill the reservoir regularly to prevent air from entering.
- Continue until the discharged fluid is clean and the required fluid exchange is complete.
Follow the model-specific sequence, especially on combined braking or ABS systems. Do not assume that ordinary manual bleeding is sufficient for every motorcycle.
Step 08: Remove the Master Cylinder if Internal Cleaning Is Necessary
Internal cleaning is a separate repair procedure. It is appropriate only when the manufacturer permits disassembly and the unit has a serviceable design.
If routine cleaning and proper bleeding do not correct a confirmed internal problem, consult the service manual before removing the cylinder.
For an approved rebuild, the procedure generally involves disconnecting the brake hose, removing the applicable mounting hardware, and separating the master cylinder from the motorcycle.
Use the correct tools and protect all open hydraulic connections from contamination.
Some designs use banjo bolts with sealing washers that must be replaced after removal.
For rear master cylinders, document the brake pedal linkage, clevis position, and pushrod adjustment before disconnecting them.
Secure the removed master cylinder on a clean workbench. Avoid clamping or deforming its hydraulic body.
Do not proceed with disassembly if the manufacturer specifies complete assembly replacement.
Step 09: Disassemble and Clean the Internal Master Cylinder Components
A serviceable master cylinder generally contains a piston assembly, return spring, rubber seals, retaining ring, and protective dust boot.
The exact arrangement depends on the model.
Follow the specified removal sequence, using proper snap-ring pliers when necessary. Control spring tension and keep the components arranged in their original order.
Inspect each component carefully.
Look for scratches, pitting, corrosion, swollen seals, broken springs, or damaged sealing surfaces.
For example, Harley-Davidson’s official single master cylinder rebuild instructions direct technicians to clean metal parts with denatured alcohol and rubber components with the specified DOT 4 fluid. Those instructions also prohibit using wire to clean the reservoir passages.
These cleaning materials and procedures apply to the identified Harley-Davidson master cylinders, not automatically to every motorcycle.
Where the manufacturer permits internal cleaning, remove deposits using approved materials and avoid scratching the bore.
If approved low-pressure compressed air is required, follow the specified precautions and wear eye protection. Never direct compressed air toward yourself or use uncontrolled pressure to eject a piston.
Replace the cylinder if the bore is pitted, scored, corroded, or outside its service limits. Cleaning cannot restore a damaged hydraulic sealing surface.
Step 10: Reassemble the Master Cylinder and Reinstall It
Once approved cleaning and inspection are complete, reassemble the master cylinder using the manufacturer’s instructions.
Replace seals, piston assemblies, retaining rings, or other components whenever the rebuild procedure requires new parts.
Lubricate the specified components with fresh brake fluid or the exact approved assembly lubricant.
Install the piston seals in the correct positions and orientations.
An incorrectly installed pressure seal may prevent the system from generating or releasing hydraulic pressure properly.
Verify that the piston and return spring operate freely and that the retaining ring is seated correctly.
Reinstall the dust boot and other protective components.
Mount the master cylinder securely, reconnect the brake hose with the required new sealing washers, and tighten all fasteners to the actual model’s specified torque.
Do not guess tightening values.
For a rear cylinder, restore the correct pushrod adjustment and brake pedal position. Incorrect adjustment can prevent the hydraulic pressure from releasing.
Step 11: Refill and Bleed the Motorcycle Brake System
After cleaning and any required reassembly, the braking system must be correctly filled and bled.
If the hydraulic line was disconnected or the piston assembly was removed, air may be trapped inside the master cylinder and brake lines.
Fill the reservoir with fresh brake fluid from a suitable sealed container.
Follow the service manual’s priming and bleeding procedure. Some configurations require additional steps to remove air from the master cylinder before bleeding the calipers.
Continue bleeding until air has been removed and the brake lever or pedal develops the expected resistance.
Do not allow the reservoir to run dry.
For motorcycles equipped with ABS, check whether the manufacturer requires a diagnostic tool or specialized procedure to bleed the ABS hydraulic unit.
When bleeding is complete, restore the specified fluid level and reinstall the diaphragm and reservoir cap.
Never attempt to correct a persistently soft brake lever by simply increasing the fluid level above the specified maximum.
Step 12: Check Brake Operation Before Riding
Before returning the motorcycle to service, inspect the entire area that was disturbed during cleaning.
Check the reservoir cover, hydraulic fittings, master cylinder body, and caliper bleed screws for leaks.
Operate the brake lever or pedal several times.
The control should move smoothly, return normally, and develop the expected firm hydraulic resistance.
Hold steady pressure and check for abnormal sinking.
Confirm that:
- No fluid leaks are visible.
- The brake lever or pedal returns fully.
- The brake releases without dragging.
- The reservoir fluid level is correct.
- All fittings and mounting hardware are secure.
- The brake light operates correctly.
- No relevant brake or ABS warning indicates a malfunction.
If any condition is abnormal, stop and correct it before riding.
Only after the system passes the manufacturer’s stationary checks should a controlled, low-speed brake test be performed in a safe area. Never use a public-road ride to investigate uncertain brake performance.
Problems That Cleaning a Motorcycle Brake Master Cylinder Cannot Fix
Cleaning can remove contamination, but it cannot repair every hydraulic fault.
Worn Piston Seals or an Internally Leaking Cylinder
A brake lever that slowly sinks under steady pressure may indicate internal hydraulic bypass.
However, external leaks, trapped air, and other braking system faults can create similar symptoms.
The Bennetts BikeSocial guide to rebuilding a motorcycle brake master cylinder explains the importance of checking other brake components and bleeding before identifying the master cylinder as faulty.
When the seals are confirmed defective, use an approved rebuild kit or replace the assembly.
Corrosion and Scratches Inside the Cylinder Bore
A smooth cylinder bore allows the piston seals to maintain hydraulic pressure.
Deep scratches, corrosion pits, and significant surface damage can prevent proper sealing even after cleaning.
These defects generally require replacing the master cylinder rather than attempting to polish away the damage.
Do not hone, sand, or refinish the bore unless the manufacturer explicitly approves that repair.
Air Trapped in the Brake Lines
A spongy brake lever after cleaning often indicates remaining air, although other mechanical or hydraulic problems are possible.
Check for leaks, verify the reservoir level, and repeat the correct bleeding process if required.
If the lever remains soft or inconsistent, have the system professionally diagnosed before riding.
How Often Should You Clean a Motorcycle Brake Master Cylinder?
There is no universal interval for completely disassembling and cleaning a motorcycle brake master cylinder.
Under normal conditions, internal disassembly is generally unnecessary unless inspection or troubleshooting identifies a problem.
Routine maintenance is more important.
Follow the motorcycle manufacturer’s brake fluid replacement schedule and inspect the reservoir during regular maintenance.
Many motorcycles specify brake fluid replacement around every two years, but the actual interval depends on the model and operating conditions.
Motorcycles stored for long periods or exposed to substantial moisture may need additional inspection.
Keeping the reservoir properly sealed, using fresh approved fluid, and addressing leaks promptly helps reduce contamination and internal corrosion.
FAQs About How to Clean Motorcycle Brake Master Cylinder
Can You Clean a Motorcycle Brake Master Cylinder Without Removing It?
Yes. Routine reservoir cleaning and brake fluid flushing can usually be performed while the master cylinder remains installed. Internal piston or bore cleaning generally requires removing and disassembling a serviceable cylinder.
Can I Use Brake Cleaner Inside a Motorcycle Master Cylinder?
Only if the manufacturer explicitly approves that cleaner for the internal parts being serviced. Many brake cleaners are not appropriate for contact with hydraulic rubber seals. Fresh specified brake fluid is the safer general choice for cleaning compatible hydraulic components.
Can Dirty Brake Fluid Cause Motorcycle Brakes to Stick?
Contamination can contribute to restricted passages or sticking components. However, brake drag can also result from incorrect pushrod adjustment, caliper faults, or damaged brake hoses. Proper diagnosis is necessary.
Should I Replace the Master Cylinder Seals After Cleaning?
Replace seals when the service procedure requires it or inspection confirms they are defective. Internal disassembly often requires new sealing components even when the removed seals appear acceptable.
Does Cleaning the Master Cylinder Require Brake Bleeding?
Yes, if hydraulic fluid has been exchanged or the system opened. Bleeding removes introduced air and helps restore proper hydraulic pressure. Follow the motorcycle’s exact bleeding procedure.
When Should I Replace the Entire Motorcycle Brake Master Cylinder?
Replace it when the bore is damaged, approved repair parts are unavailable, the unit is not designed for rebuilding, or a serviceable repair cannot restore proper hydraulic operation.
Keep Your Motorcycle Brake Master Cylinder Clean and Reliable
Understanding how to clean motorcycle brake master cylinder components means distinguishing routine reservoir cleaning from repairs that require complete disassembly. Removing contaminated fluid, protecting the small hydraulic passages, and using the correct cleaning materials are central to a safe procedure.
For most motorcycles with normally operating brakes, regular brake fluid replacement and careful reservoir inspection are more appropriate than unnecessary internal disassembly. A cylinder with damaged seals, corrosion, or an unsuitable bore needs an approved repair or replacement.
Always finish the job with proper bleeding, leak inspection, and brake operation checks. If the lever remains soft, pressure is inconsistent, or the brakes do not release correctly, have a qualified motorcycle technician diagnose the system before riding.