How to Change Rear Brake Pads Safely: Step-by-Step Instructions
Changing rear brake pads usually involves safely lifting the vehicle, removing the wheel, opening the rear brake caliper, retracting the piston, replacing the worn pads and hardware, reinstalling the caliper, and properly seating the new brakes. Rear systems vary considerably, especially on vehicles with electronic parking brakes, so model-specific service information should always be checked first.
Rear disc brakes may look similar to front brakes, but there are important differences. Some rear calipers contain the parking-brake mechanism, which means the piston may need to be rotated while being pushed inward instead of simply compressed.
Vehicles with an electronic parking brake can be even more particular. Many require the parking-brake motors to be placed into a service or maintenance mode before the caliper piston is retracted. Forcing the piston backward without following the correct procedure can damage the actuator or caliper.
If you are learning how to change rear brake pads, first identify the type of rear brake system on your vehicle. The procedure below covers the general process for a typical rear disc-brake setup, but torque specifications, piston-retraction methods, hardware arrangement, and electronic-parking-brake procedures vary by make and model.
Brake work directly affects vehicle safety. If you find damaged calipers, leaking brake fluid, badly corroded components, seized slide pins, questionable hoses, or anything you are not confident repairing, stop and have the system inspected by a qualified technician.
With the correct tools and service information, replacing rear pads can be a manageable DIY maintenance job.
What You Need to Change Rear Brake Pads
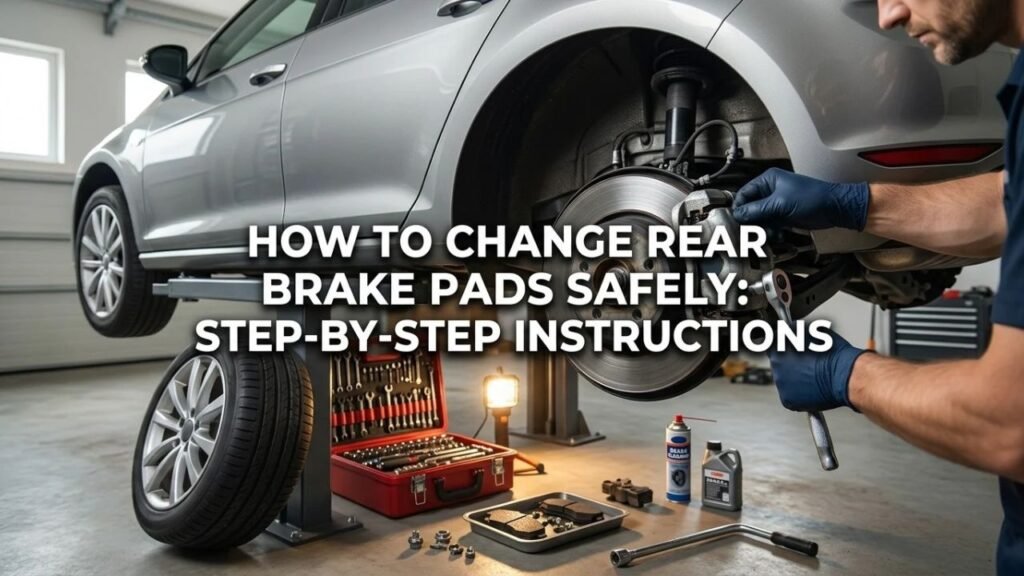
Having everything ready before lifting the vehicle makes the job safer and easier.
Basic Tools
Common tools include:
- Floor jack
- Jack stands
- Wheel chocks
- Lug wrench or impact wrench
- Ratchet
- Appropriate sockets
- Wrenches
- Torque wrench
- Flat screwdriver or small pry tool
- Brake-cleaning brush
Do not rely on the vehicle jack alone while working underneath or beside a raised vehicle.
Brake-Specific Tools
Depending on the rear caliper design, you may need:
- Caliper piston compressor
- Rear caliper wind-back tool
- Brake piston cube
- Electronic parking-brake scan tool or service-mode procedure
A normal C-clamp may work on some rear calipers, but it should never be assumed appropriate.
Replacement Parts and Supplies
Prepare:
- Correct rear brake pads
- New pad hardware if supplied
- Brake cleaner
- High-temperature brake lubricant approved for the intended locations
- Shop towels
- Gloves
- Eye protection
If the rotors are worn beyond specification, badly scored, cracked, or damaged by metal-to-metal contact, they may also need replacement.
Key Takeaway: Rear brake-pad replacement may require a piston wind-back tool or electronic parking-brake service procedure in addition to normal hand tools.
Check Which Type of Rear Brake System You Have
Do this before disassembling anything.
Conventional Rear Disc Brakes
Some rear calipers use a conventional hydraulic piston and a separate parking-brake system.
These may allow the piston to be pressed directly inward.
Mechanical Parking Brake Built Into the Caliper
Many vehicles use a parking-brake lever connected directly to the rear caliper.
The piston may have a threaded mechanism inside.
It often must be:
- Rotated
- Pressed inward
at the same time.
Trying to press one of these pistons straight back can damage the mechanism.
Electronic Parking Brake
An electronic parking brake, often called EPB, uses electric actuators rather than a traditional handbrake cable.
Depending on the vehicle, pad replacement may require:
- Service mode
- Maintenance mode
- Scan-tool command
- Specific ignition and switch sequence
Do not force an EPB caliper backward without knowing the correct procedure.
Drum-in-Hat Parking Brake
Some rear disc-brake vehicles use small parking-brake shoes inside the center section of the rotor.
In that design, the service-brake caliper piston may behave more like a normal disc-brake piston.
Key Takeaway: Identify whether the vehicle has a conventional piston, screw-in parking-brake piston, or electronic parking brake before trying to retract the rear caliper.
How to Change Rear Brake Pads Step by Step
The following process applies broadly to rear disc brakes.
Step 1: Park on a Flat, Solid Surface
Choose a level area with enough room to work safely.
Put the transmission in:
- Park for an automatic
- Gear for a manual transmission
Follow the vehicle manufacturer’s recommendations.
Chock the Wheels
Place wheel chocks at the wheels that will remain on the ground.
Do not depend entirely on the transmission to prevent movement.
Parking Brake Position Matters
For many rear-brake jobs, the parking brake must be released before removing the rear caliper.
Electronic systems may first need to be placed into service mode.
Check the service procedure before releasing or activating anything.
Step 2: Check the Brake Fluid Level
Open the hood and locate the brake-fluid reservoir.
Inspect the level before retracting the caliper pistons.
Why This Matters
When the pistons are pushed back into the calipers, brake fluid moves backward toward the master-cylinder reservoir.
If someone previously added fluid while the pads were worn, retracting the pistons may cause the reservoir to overflow.
Do Not Introduce Contamination
Keep:
- Dirt
- Oil
- Grease
- Water
away from the reservoir.
Use only the brake-fluid specification approved for your vehicle if fluid service becomes necessary.
Step 3: Loosen the Rear Wheel Lug Nuts
Before lifting the vehicle, loosen the lug nuts slightly.
Do not remove them completely.
Breaking them loose while the tire is still on the ground prevents the wheel from turning.
Step 4: Raise and Support the Vehicle
Use the manufacturer’s approved lifting point.
Raise the vehicle with a suitable floor jack.
Then place properly rated jack stands at the approved support points.
Lower the Vehicle Onto the Stands
Do not leave its weight supported only by the hydraulic jack.
After lowering it onto the stands, verify that the vehicle feels stable before continuing.
Never work under or beside an unstable vehicle.
Step 5: Remove the Wheel
Remove the loosened lug nuts.
Take the rear wheel off and move it away from the work area.
You should now be able to see:
- Brake caliper
- Caliper bracket
- Rotor
- Brake hose
- Parking-brake components
This is a good time to inspect for obvious damage or fluid leakage.
Step 6: Inspect the Brake Assembly Before Taking It Apart
Look at the condition of the existing parts.
Compare Inner and Outer Pad Wear
Both pads should normally wear reasonably evenly.
A large difference can point to:
- Seized slide pin
- Sticking caliper piston
- Binding pad hardware
- Corrosion
Replacing pads without correcting the cause may result in the new set wearing unevenly too.
Inspect the Rotor
Look for:
- Deep grooves
- Heavy rust
- Cracks
- Blue heat spots
- Severe lip at the edge
- Metal-to-metal damage
Rotor thickness should be checked against the manufacturer’s minimum specification when condition is questionable.
Inspect the Brake Hose
Look for:
- Cracking
- Bulges
- Leaks
- Twisting
Do not continue driving with a damaged brake hose.
Key Takeaway: Uneven pad wear, rotor damage, brake-fluid leakage, or seized components should be corrected rather than simply covered up with new pads.
Step 7: Remove the Caliper Bolts
Locate the caliper guide-pin bolts.
Depending on the design, you may need to hold the slide-pin flats with a wrench while loosening the bolt.
Remove the appropriate bolts.
Do Not Automatically Remove the Bracket
For a pad-only job, you may not need to remove the caliper bracket.
Rotor replacement often requires bracket removal.
Step 8: Lift the Caliper Off the Rotor
Carefully work the caliper away from the pads and rotor.
If the worn pads are tight, slight movement may be needed to create clearance.
Never Let the Caliper Hang From the Brake Hose
Support it with:
- Caliper hanger
- Strong wire
- Suitable hook
The flexible brake hose is not designed to hold the caliper’s weight.
Allowing the caliper to hang can damage the hose internally or externally.
Step 9: Remove the Old Brake Pads
Take the inner and outer pads from the bracket.
Pay attention to:
- Pad orientation
- Wear indicators
- Shims
- Anti-rattle springs
- Hardware clips
Taking a photo before removal can help during reassembly.
Compare the Old Pads
Check whether one is significantly thinner than the other.
Uneven wear may indicate a mechanical problem that deserves further inspection.
Step 10: Remove and Inspect the Pad Hardware
If the replacement pad kit includes new clips, remove the old hardware.
Clean the areas where the clips contact the bracket.
Corrosion Can Make Pads Stick
Rust buildup underneath stainless pad clips can squeeze the pad tabs and stop them from sliding properly.
Remove corrosion without grinding away excessive bracket material.
Install the new hardware in the same orientation as the originals.
Step 11: Inspect the Caliper Slide Pins
The caliper must be able to slide freely.
Remove or move each guide pin according to the caliper design.
Look for Problems
A healthy slide pin should:
- Move smoothly
- Have an intact boot
- Show no severe rust or pitting
A seized pin can cause one brake pad to wear much faster than the other.
Lubricate Correctly
Use lubricant specifically suitable for brake caliper slide pins and compatible with the rubber boots.
Do not use ordinary chassis grease unless the service information specifically permits it.
Do not coat the friction surfaces.
Key Takeaway: Free-moving slide pins are essential for even brake-pad wear; a seized guide pin should be serviced before installing new pads.
Step 12: Retract the Rear Caliper Piston
This is one of the most important steps.
The piston must move inward to create room for the thicker new pads.
Conventional Push-In Piston
If the service information confirms a standard hydraulic piston, use a proper piston compressor.
Press it inward slowly and evenly.
Screw-In Rear Piston
If the piston has notches or slots and incorporates the parking brake, it may need to be rotated while being pushed inward.
Use a rear-caliper wind-back tool.
Some vehicles require:
- Clockwise rotation
- Counterclockwise rotation
Do not guess.
Electronic Parking Brake
Follow the exact service procedure.
The vehicle may require the EPB motor to retract before the hydraulic piston can be serviced.
A scan tool may be necessary on some vehicles.
Watch the Brake-Fluid Reservoir
As the piston moves inward, check the reservoir.
Stop if fluid approaches the top.
Never Force a Stuck Piston
If unusually high force is required, stop.
Possible causes include:
- Wrong retraction method
- EPB not in service mode
- Seized piston
- Internal caliper problem
Forcing it can turn a normal pad replacement into an expensive caliper or actuator repair.
Key Takeaway: Rear caliper pistons may push straight in, rotate inward, or require electronic service mode; verify the correct method before applying force.
Step 13: Clean the Brake Assembly
Use brake cleaner and suitable tools to remove loose dust and debris.
Clean areas such as:
- Pad abutment surfaces
- Hardware mounting locations
- Accessible bracket areas
Avoid blowing brake dust into the air with compressed air.
Keep Friction Surfaces Clean
Do not contaminate:
- Rotor faces
- Pad friction material
with:
- Grease
- Oil
- Anti-seize
If contamination occurs, correct it before assembly.
Step 14: Apply Brake Lubricant Where Required
Use only small amounts of suitable high-temperature brake lubricant.
Possible lubrication points include:
- Pad ears where they contact hardware
- Specified backing-plate contact points
- Slide pins
Follow vehicle or brake-pad manufacturer instructions.
Never Lubricate the Friction Material
Keep lubricant off:
- Pad face
- Rotor braking surface
Do not cover everything with grease.
More is not better.
Step 15: Install the New Rear Brake Pads
Fit the new pads into the bracket.
Make sure they:
- Sit correctly
- Move properly in the hardware
- Match the original inner/outer arrangement
Check Wear Indicator Position
If one pad includes a mechanical wear indicator, install it in the specified location.
Do not simply copy the other side of the vehicle because some pad arrangements are side-specific.
Step 16: Reinstall the Caliper
Carefully lower the caliper over the new pads.
It should fit without excessive force if the piston has been retracted correctly.
Do Not Twist the Brake Hose
Check that the hose follows its natural path.
A twisted hose can create stress and potentially interfere with fluid flow.
Step 17: Install and Torque the Caliper Bolts
Thread the bolts in by hand first.
This helps prevent cross-threading.
Tighten them to the exact vehicle-specific torque specification.
Do Not Guess Torque
Rear caliper fasteners vary widely.
Overtightening can:
- Damage threads
- Break bolts
Undertightening can allow the caliper to loosen.
If the repair involved bracket bolts, torque those to their own specification as well.
Step 18: Repeat the Procedure on the Other Side
Brake pads should generally be replaced as an axle set.
Do not install new pads on one rear wheel while leaving heavily worn pads on the other.
Repeat the same inspection and installation process on the opposite side.
Step 19: Reinstall the Wheels
Put each wheel back onto the hub.
Thread the lug nuts by hand.
Tighten them lightly in a star or crisscross pattern.
Step 20: Lower the Vehicle and Torque the Lug Nuts
Raise the vehicle enough to remove the jack stands.
Lower it carefully.
Use a calibrated torque wrench to tighten the lug nuts to the vehicle manufacturer’s specification.
Do not rely on an impact wrench for final wheel torque.
Key Takeaway: Final assembly should use vehicle-specific torque values for caliper and wheel fasteners rather than estimates or maximum impact-gun force.
Step 21: Pump the Brake Pedal Before Driving
Do not skip this step.
After retracting the pistons, there may initially be a large gap between the pads and rotors.
Press the Pedal Repeatedly
With the vehicle stationary:
- Press the brake pedal.
- Release it.
- Repeat until it becomes firm.
The first few presses may travel farther than normal.
Do Not Drive Until the Pedal Is Firm
If the pedal remains unusually soft, sinks, or does not feel normal, investigate the problem before moving the vehicle.
Step 22: Check the Brake Fluid Again
Once the pads are seated against the rotors, inspect the fluid level.
It should remain within the reservoir markings.
If brake fluid needs to be added, use only the type specified by the vehicle manufacturer.
Step 23: Reactivate the Electronic Parking Brake
If the vehicle was placed into EPB service mode, exit the mode according to the manufacturer’s procedure.
Cycle the parking brake as directed.
Watch for:
- Warning lights
- Error messages
- Abnormal actuator noise
Do not ignore an EPB fault after the brake job.
Step 24: Bed In the New Brake Pads
New pads and rotors need proper surface contact.
Brake-pad manufacturers often specify a bedding procedure.
A common process may include several controlled stops from moderate speed followed by cooling, but procedures vary with pad material.
Follow the instructions supplied with the brake pads.
Avoid Immediately Holding Hot Brakes
After repeated bedding stops, keeping the vehicle stationary with heavy pedal pressure can leave uneven pad deposits on hot rotors.
Follow the pad manufacturer’s cooling instructions.
Key Takeaway: Pump the pedal before moving the vehicle, restore electronic parking-brake operation, verify fluid level, and follow the pad manufacturer’s bedding procedure.
How Long Does It Take to Change Rear Brake Pads?
For someone familiar with the vehicle, a straightforward rear pad replacement can sometimes be completed in roughly one to two hours for both sides.
Time increases when dealing with:
- Rusted hardware
- Seized slide pins
- Electronic parking brake
- Screw-in pistons
- Rotor replacement
- Damaged fasteners
- Corroded brackets
A first-time DIY repair should not be rushed.
Brake work is a poor place to trade careful inspection for speed.
How Do You Know Rear Brake Pads Need Replacing?
Several signs can point to worn pads.
Brake Warning or Pad-Wear Message
Some vehicles use electronic wear sensors.
A dashboard message may appear when the sensor contacts the rotor.
Squealing
Mechanical wear indicators can create a high-pitched sound when pad material becomes thin.
Not every squeal means worn-out pads, but it deserves inspection.
Grinding
Grinding can indicate that friction material has worn away and metal is contacting the rotor.
Driving should be minimized until the brakes are inspected.
Thin Friction Material
If visual inspection shows very little pad material remaining, replacement is due.
Use the vehicle or brake-pad manufacturer’s minimum thickness specification rather than guessing.
Uneven Wear
One thin pad and one thick pad may point to:
- Caliper problem
- Slide-pin problem
- Binding hardware
Replacing pads alone may not solve it.
Key Takeaway: Warning indicators, thin friction material, grinding, and uneven pad wear are strong reasons to inspect the rear brake system rather than simply waiting for mileage intervals.
Do Rear Brake Pistons Need to Be Screwed In?
Some do.
This is especially common on calipers where the mechanical parking brake acts through the piston.
Look at the Piston Face
A screw-in piston may have:
- Slots
- Notches
- Recesses
that engage a wind-back tool.
This is only a clue, not proof.
Check Service Information
The correct direction and method vary by vehicle.
One caliper may rotate clockwise while another design uses a different procedure.
Never Use Excessive Force
If it refuses to retract, confirm:
- Parking brake is released
- EPB is in service mode when required
- Tool is turning the correct direction
- Caliper is not seized
Can You Change Rear Brake Pads Without Removing the Caliper?
Usually, the caliper needs to be opened or removed from the bracket sufficiently to remove and install the pads.
Some caliper designs allow the body to pivot after removing one guide bolt.
Others require both slide bolts to be removed.
The caliper should still be supported rather than hanging from the brake hose.
Do You Need to Bleed Brakes After Changing Rear Pads?
Normally, no.
A straightforward pad replacement does not require opening the hydraulic system.
Bleeding Is Needed If
You:
- Open a brake line
- Replace a caliper
- Allow air into the hydraulic system
- Perform other hydraulic repairs
Simply retracting a piston does not normally introduce air.
Soft Pedal Is Not Normal
If the pedal remains soft after pumping it several times, investigate before driving.
Possible problems include:
- Air in system
- Leak
- Incorrect assembly
- Hydraulic issue
Should Rear Rotors Be Replaced With the Pads?
Not automatically, but they need inspection and measurement.
Replace Rotors If They Are
- Below minimum thickness
- Cracked
- Severely scored
- Structurally damaged
- Excessively corroded on the braking surface
Rotor Thickness Matters
Measure with a suitable micrometer.
Compare the result with the rotor’s minimum thickness specification.
Rotor Condition Affects New Pads
Installing new pads against a badly damaged rotor may produce:
- Poor contact
- Noise
- Vibration
- Reduced pad life
Can You Replace Rear Brake Pads on One Side Only?
Generally, pads should be replaced on both sides of the same axle.
The left and right rear brakes need similar friction characteristics.
Replacing only one side can contribute to:
- Uneven braking
- Uneven wear
- Different pad behavior
If only one side is worn, find out why.
A mechanical fault may be responsible.
What If the Rear Caliper Piston Will Not Compress?
Stop rather than applying more force.
Possible Screw-In Piston
It may need rotation.
Electronic Parking Brake Still Engaged
The actuator may need service mode.
Seized Caliper
Internal corrosion can prevent movement.
Parking-Brake Mechanism Problem
A mechanical parking-brake mechanism can bind inside the caliper.
Wrong Tool
A basic compressor may not work on a wind-back design.
Applying excessive force can damage the caliper or EPB actuator.
Key Takeaway: A rear piston that refuses to retract often indicates the wrong procedure or a caliper problem; forcing it is not a safe solution.
Common Rear Brake Pad Replacement Mistakes
Several mistakes can create serious brake problems.
Forgetting EPB Service Mode
Forcing an electronic caliper can damage the parking-brake mechanism.
Pressing a Screw-In Piston Straight Back
The internal parking-brake adjuster can be damaged.
Hanging the Caliper by the Hose
This places unnecessary stress on the flexible hydraulic hose.
Installing Pads Backward
The friction material must face the rotor.
Getting Grease on the Pads
Contamination can reduce friction and create noise.
Ignoring Seized Slide Pins
New pads may quickly wear unevenly.
Skipping Rotor Inspection
Thin or heavily damaged rotors can compromise the repair.
Forgetting to Pump the Pedal
The first brake application may have excessive pedal travel.
Guessing Bolt Torque
Brake and wheel fasteners require the correct specifications.
Forgetting to Tighten Lug Nuts Properly
Final tightening should be done with a torque wrench.
Key Takeaway: Most serious DIY brake mistakes involve incorrect piston retraction, contaminated friction surfaces, overlooked mechanical problems, or improper fastener torque.
Rear Brake Pad Replacement Safety Checklist
Before driving, confirm all of the following:
- Both rear pad sets installed correctly
- Caliper bolts torqued
- Brackets torqued if removed
- Slide pins moving correctly
- Brake hoses not twisted
- No brake-fluid leaks
- Parking brake functioning
- EPB service mode exited
- Brake-fluid level correct
- Wheels installed
- Lug nuts torqued
- Brake pedal firm
- No warning lights
- Tools removed from under vehicle
Then perform a cautious low-speed brake test in a safe area.
Conclusion
For how to change rear brake pads, the basic process is to safely raise the vehicle, remove the rear wheels and calipers, inspect the brake components, retract the pistons correctly, install the new pads and hardware, torque everything properly, and restore normal brake operation before driving.
The most important difference between rear and front pad replacement is the parking-brake mechanism. Some rear pistons push straight inward, others must be rotated while retracting, and vehicles with electronic parking brakes may require a service mode or scan-tool procedure.
Do not force a piston that will not move, hang a caliper from its brake hose, contaminate the pads or rotors, or guess critical fastener torque. Check the exact service information for your vehicle before beginning.
Once everything is assembled, pump the brake pedal until firm, confirm the brake-fluid level and parking-brake operation, torque the wheels, and follow the new pad manufacturer’s bedding procedure before returning to normal driving.
FAQs About Changing Rear Brake Pads
Is changing rear brake pads difficult?
It can be a manageable DIY job on a simple rear disc-brake system. Difficulty increases with electronic parking brakes, screw-in caliper pistons, rust, seized components, or rotor replacement.
Do I need a special tool to change rear brake pads?
Possibly. Many rear calipers need a piston wind-back tool, while some electronic parking-brake systems require a scan tool or specific service-mode procedure.
Do rear brake caliper pistons push or twist in?
Both designs exist. Some push directly inward, while others must be rotated and pushed simultaneously. Check the vehicle-specific procedure before attempting to retract the piston.
Do I need to bleed the brakes after changing rear pads?
Normally not if you do not open the hydraulic system. If a brake line is disconnected or air enters the system, bleeding will be required.
Should I replace rear brake pads on both sides?
Yes. Brake pads are generally replaced as a complete axle set so the left and right rear brakes have matching friction material and similar wear.
Can I drive immediately after changing rear brake pads?
Only after confirming the pedal is firm, the fluid level is correct, there are no leaks or warning lights, the wheels are properly torqued, and the parking brake works. New pads should then be bedded according to their manufacturer’s instructions.
Why won’t my rear brake piston go back in?
The piston may need to be rotated, the electronic parking brake may need service mode, or the caliper may be seized. Stop applying force until the correct procedure is confirmed.
How long does it take to replace rear brake pads?
A straightforward two-wheel rear pad replacement may take around one to two hours for someone familiar with the job. Corrosion, electronic parking brakes, rotor replacement, or seized parts can make it take much longer.